What's going on in your shop? Show us whats going on, and talk a bit about your work!

Oh boy. I think that should be on the table? ;)

You now might have a toolrest for a disc grinder. :)

It was emergency triage. This sander came with a bleh built in dust collection system, which actually would have been decent for hobby use with light occasional wood dust, which is what it was meant for.

There was an impeller run through a plastic housing behind the disc, with no filter and no way to clean it out. The entire sander has to be disassembled. Combine that with a bunch of ratty, cheesy plastic guards that are warping and rubbing against moving parts, and you have a recipie for disaster.

Once I saw flames licking out I figured it was about time all that junk came off. The platform itself is actually a pretty decent machine.

I had a sheath and blade roughing assembly line on my main bench, and a project set up on my other bench, so this just got done on the floor because I needed my machine running.

It looks like I was a bit haphazard with the parts, that was all of the unnecessary crap that will not be going back on.

This class of 6x48+9 machines usually run about $300, sears had this on clearance plus some reward points and an online coupon for in store pickup, I got it for just over $100 with tax. I've already gotten a few years good use out of it and this is the first major work I've done.

Much better without all the plastic junk:

FXj0Mqn.jpg
 
Last edited:
Ian- If it weren't for the tools around it, I almost thought you threw that sander across the shop and that's where it landed! ;) :D


This is part of what I did today... :)

[video=youtube;qAMWgEBTK6Q]https://www.youtube.com/watch?v=qAMWgEBTK6Q[/video]
 
Nice video. :)

I'm not gonna lie, the thought crossed my mind when it came to a dead stop mid-grinding and flames started licking out. :D

I've been meaning to do this for a while, I just got forced into it a little earlier than I'd hoped (and without a clear work surface planned). I also plan on rebuilding the tensioner, it works Ok but could be a lot better. The machine is actually surprisingly sturdy considering what it is, weighs about 90lbs. Plus, everything runs true and the machine bearings are actually quite decent, even if the "3/4hp" motor is a bit dodgy.

The cool thing is that the base is open access to the drive pulley. I have a nice brand new 1hp 1ph tefc Baldor that a member traded me for a knife. It's on the shelf waiting for the current motor to die. I almost considered doing the full changeover right now, but I figured I might as well get as much mileage as I can out of the original.
 
I'm loving these videos, Nick. So much great information, and all for FREE.

Here's some of what I've been up to:

Thermal cycling a Bowie.
055.JPG


067.JPG


069.JPG


My take on a box cutter.
003.JPG


005.JPG


019.JPG
 
Ian- Sometimes I wonder if being a "tinkerer" it's a blessing or a curse... ;) :D When you have something like that sander and just know some mods will make it better, it's sure hard to leave it alone! :)


Will- Man you've come along fast!!! Awesome work!!! :cool: Very excited to see that Bowie finished up. What is that you're doing the thermal cycling in? That box cutter is all kinds of wicked--- very cool! :thumbup: :)
 
[video=youtube;qAMWgEBTK6Q]https://www.youtube.com/watch?v=qAMWgEBTK6Q[/video]

Around 4:30 you are using a post anvil,

Then at about 5:19 you've got a smaller scarred up oldie anvil for straightening.

then around 5:30 back on the Nimba


why the different ones ?


Just finished up these 4 hunters all have distal tapers and tapered tangs. I am really now getting the hang of tapering tangs...I think.


Workin on a batch of AEB-L pocket khukris, small push knife was just leftover stock


I have decided to get back into hand forging my blades, this is the first blade I have forged in 5 years. Forged from 1/4" 80CRV2. Also third blade to wear my stamp. The pocket khuks will have my stamp, the hunters were from before I had my stamp sadly.
 
Around 4:30 you are using a post anvil,

Then at about 5:19 you've got a smaller scarred up oldie anvil for straightening.

then around 5:30 back on the Nimba


why the different ones ?


Just cuz I can! ;)

Actually, there's a method to the madness. The post anvil makes very little surface contact, so it doesn't suck the heat out of the steel as fast, and that also helps to pull the bevel down faster (even with it bouncing around). Also, it's much higher than the other anvils, so it's very easy to see what I'm doing and pin-point the light hammer blows.

Then I used the straightening wrench to center the edge, which meant the blade needed to be gently straightened again, and that old anvil is right next to that vise.

Then on the final heat I was just making sure everything was where it's supposed to be--- which included making sure there were no ripples in the bevel. The very rigid Nimba with its big, flat face, works very well for that.


It could all be done on any one of them, but I don't have to, so I don't. ;)

The post anvil works so well for so many things, I'm building a more serious one. I made it from a "4140, fork-lift tine" drop that Brian Ayres gave me when he came here. :cool:
 
Last edited:
Been doing modifications on the grinder. Had to to machine a rectangular section out of the tool rest you see bolted to the platen. Then fit a piece of 3/8ths CR in its place and tig weld it in. Wrote a program at work to fly cut it sat down and watched it make chips. Been too busy with school to do much serious work in the shop, could use a good cleaning. Been meaning to air it out, still stinks of buffalo horn.

 
Will- Man you've come along fast!!! Awesome work!!! :cool: Very excited to see that Bowie finished up. What is that you're doing the thermal cycling in? That box cutter is all kinds of wicked--- very cool! :thumbup: :)

Cheers Nick. The Bowie design is more than a little Wheeler inspired.
I'm doing the cycling in my gas fired heat treating box. Not the best design for gas, but it works well enough for now.

The burner is mounted low, and the blade sits up high on the shelf. The idea was to allow the gasses/heat to disperse a bit before hitting the blade.

I've got a PID controlling a solenoid valve in the gas line to regulate the temperature.

057.JPG


065.JPG
 
A small hunter for a charity auction, and a bowie ready to cut whatever gets in the way........both with my new mark and both of Aldo's 1084.:thumbup:


The new mark.


Darcy
 
Darcy - I'm really loving that finish on the Bowie. Care to share your methods?
Thanks Broomhead. It is hand sanded to 280 grit......cold blued and then etched in bleach until it looks like a big rusty turd:D Then sand off the accumulated gunk until it looks the way I want it to. Have to do a couple etching soaks in the bleach............sometimes sand the blade lightly between to get the bleach to "bite" properly. Also make sure the bleach is fresh....otherwise it will not work well. It's a real durable finish, great for a hard use blade. I like the textured fittings for the same reason........if I drop it in the rocks and ding up the guard a bit, it is easy to blend the dings back in and you'd never know it got dropped.:thumbup:
Darcy
 
Looks like a blue/bleach etch.... vera nace.
 

Attachments

  • IMG_2813.jpg
    IMG_2813.jpg
    99 KB · Views: 105
Last edited:
I've been finishing up a few pieces destined for my display at a local outdoor adventure gear retailer.

First, the loot acquired on my Easter road trip to the Big City(Halifax). The big piece is some tightly figured Rosewood. There's also chunks of Gabon Ebony, A. Blackwood and Thuya burl there as well. This shot was taken in my friend's woodworking shop as I was about to clean and cut these up for future use.


All of the following are stock removal, clay-backed 1095, heat treated and finished ground, in varying states of completion:
A little Acorn with figured Red Oak:


A small Warnie with end-cut Bacote.....:


....and one with striped Macasar Ebony....:


...and one with Tulip:


A Liam's Hunter in Thuya burl, almost done:


I love this wood!!


And, I haven't named this one yet, in Claro Walnut( I have two of these going):


Most of the pieces above have slab liners of various wood veneers like this:


-Peter
 
Will- That gas-fired kiln looks great. :thumbup: I'm excited to see that knife when it's done--- I love your stuff! :cool:


Darcy- Those look awesome, and thanks for explaining your process! That finish is really cool. :cool: :)
 
DellisI'd love to see how you do the finish to!man that's lovely! what are the handle materials on those two?

Nick Wheelernice video! what steel are those Bowies?

It's amazing how many knife makers are making nice knives(I think allot of that is from the free share of info like on here)
 
Daniel (chknifemaker) click on page 56 of this thread... ;) :p 
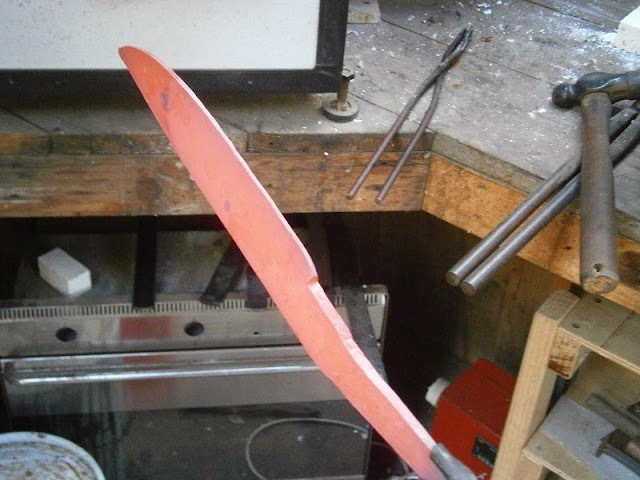
The blades are 52100. :)


Peter- you were posting while I was--- lots of cool stuff going on there! :)
 
All I have to say on this topic is that I'm really looking forward to grinding some thin AEB-L and 52100 next month... all this thick Elmax and 3V is wearing me out...
 
Back
Top