Richard338
Gold Member
- Joined
- May 3, 2005
- Messages
- 7,669
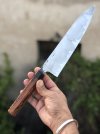
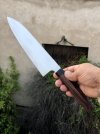
The Bowie is getting close to assembly time.
The guard, spacer and handle all fit as I could hope.
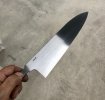
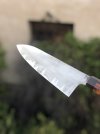
I'm approaching 1000 grit on the main bevel.
Took the operation inside with fresh clean cloths and workspace.
(cool and no mosquitos either)


The guard, spacer and handle all fit as I could hope.
I'm approaching 1000 grit on the main bevel.
Took the operation inside with fresh clean cloths and workspace.
(cool and no mosquitos either)