What's going on in your shop? Show us whats going on, and talk a bit about your work!

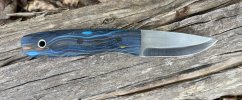
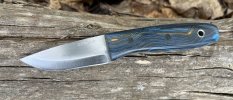
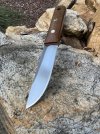
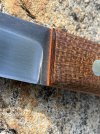
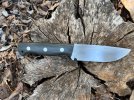
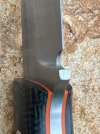
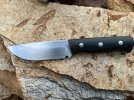
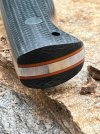
Just finished this skinner...
CPM154 blade with fine jimping on spine,
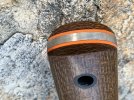
Stabilized Redwood Burl with red G10 liners, nickle silver pins and lanyard hole,
416 stainless bolsters,
sheath has frog skin inlay.

4IebIhZ.jpg

Yfuwrgr.jpg
 
Off to a slow start but here are a few that I am working on. Let me know what your thoughts are Good or Bad!View attachment 2582080

Good morning Hankins! Looks pretty good. Since you asked, I would have made the forward most cutout a good deal smaller since its location on the handle is going to be a high stress point. Maybe the second one a bit smaller as well. Probably won’t have a problem though.
 
Just finished this skinner...
CPM154 blade with fine jimping on spine,
Stabilized Redwood Burl with red G10 liners, nickle silver pins and lanyard hole,
416 stainless bolsters,
sheath has frog skin inlay.

4IebIhZ.jpg

Yfuwrgr.jpg
That's a great looking blade! Good work!

I'm new to knifemaking, just barely starting out. I'll be honest, work like yours is both intimidating and inspirational.

A lot of techniques in making a knife are still a mystery to me. How do you get the sanding "grain" to go parallel with the blade, especially the little plunge line nook?
 
Thanks Edbriver, check out the video navman just posted. Most of my blades are hollow ground so the process is a little different but it all comes down to staging your grits, patience, and detail. On my final grits I usually wear a pair of 1.5 power cheater glasses, they seem to help me in getting a nice parallel scratch pattern.
 
Yeah, all of the 32" billet is spoken for so far! These 2, one of my wife, one for my mom and another person it looks like!

Matt Parkinson from Dragons Breath Forge helped me a lot and one of the things he told me is that it isn't always layer count, but layer density. The first 2 blades really show that! The larger clip point, I forged to profile and down close to final thickness (just over 1/8") before going to the grinder. The raindrop one was a bit thicker to start, but I drilled the dimples and then forged it down again and it was around .100" at the spine when the grinding was done. The raindrop looks like a much higher layer count, but it's just been forged down thinner, so the layers are packed tighter. It has some chatoyance to it, too!

Next billet, I will probably do from 1" wide barstock. Most of my blades are narrower hunter/edc style, so I have to take the wider billet and forge it narrower first, then draw it out. This billet was was originally 1/8" 15N20 and 3/16" 1084, 8 layers of each. Next time, I will prob do 3/32" 15n20 and 1/8" 1084 (or another carbon steel: W2, 125CR1, 52100 or 80CRV2?), 16 layers (8') of each, so I can draw out, cut and restack once instead of doing it twice. I TIG weld (no filler rod) around the entire billet, so I should be OK with using the thinner layers of steel. Any thoughts on the 2nd carbon steel? Looking at 52100 or 125CR1 to get more edge holding?
 
Contrary to popular belief, the "G" in G-Carta stands for "Gonna-lectro-cute-ya"
 
Here's how the chef's knife turned out:
CqFVm0K.jpg

If I were the type to name things, I'd call this one Ansel Adams...
Specs:
Blade length: 8-1/2" (220mm)
Height @ heel: 2" (51mm)
Spine thickness @ heel: 0.095" (2.4mm)
Have a good rest of the week, all.
I forgot to mention (and this might be referring to a topic from another thread) that I did use the carbide straightening hammer on this.
So I have at least one example of this technique being suitable for pattern welded blades.
 
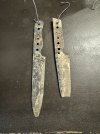
I recooked some 1095 & W2 that didn’t harden properly a while ago. These two decided they needed to be re-profiled. Oh well, at least the grain looks good.
IMG_0439.jpegIMG_0440.jpeg
 
Back
Top