What's going on in your shop? Show us whats going on, and talk a bit about your work!

First time posting in the knife makes forum. I've been making a few blades in my garage, I started this past winter.

Finished this one up today. 8670 and lager g10. I acid etched in ferric chloride but didn't tumble or rock wash it. I thought it looked kinda rustic with this finish.

Once enough scratches develop and I want a new finish has anyone ever tumbled a knife in ceramic media that has g10 on it? Will it give the g10 a nice finish or just chew it up?
IMG_5370.jpeg
 
Last edited:
First time posting in the knife makes forum. I've been making a few blades in my garage, I started this past winter.

Finished this one up today. 8670 and lager g10. I acid etched in ferric chloride but didn't tumble or rock wash it. I thought it looked kinda rustic with this finish.

Once enough scratches develop and I want a new finish has anyone ever tumbled a knife in ceramic media that has g10 on it? Will it give the g10 a nice finish or just chew it up?
View attachment 2941954
I would protect the handle with duct tape over painter tape.
 
Thank you, that would work. I remember seeing a YouTube video of a guy tumbling a finished knife with g10.....but I might be remembering it wrong. He could have bead blasted it to get some texture on the g10.
 
Thank you, that would work. I remember seeing a YouTube video of a guy tumbling a finished knife with g10.....but I might be remembering it wrong. He could have bead blasted it to get some texture on the g10.
Great knife! It won’t do anything significant to the G10 other than dull the finish a bit and give it a more mottled look. I tumble G10 handled knives all the time to get a nice stonewash on the spines once finished. With a low grit (240) finish you likely won’t notice much if anything after a coat of oil. Above that and you’ll lose some of the glassy sheen that high polished g10 can achieve. Either way, tumbling alone won’t demonstrably change your g10 handle.
 
Hi,

Here is a new DIY kiln I have made. Slow to heat up, but works pretty well so far. Total power is about 2.3kW, and 1000+ degrees celsius is eventually reached after several hours of heating. Heating elements are 0.8 mm Kanthal wire. Interior is constructed from regular schamotte bricks, which are typically used for fireplace building. Outer insulation is made from common aerated concrete blocks, but it's already showing cracks so might need an improvement in the future. Spent about 200 euros for materials and one week of extra time in evenings. No temperature control yet, but is it to arrive from China some day.


Regards,
Lukas
 
Last edited:
What style media do you use? I got some at harbor freight that is a pretty good sized triangle looking thing.
View attachment 2943638
I use that as well, among other things. If you’re using a vibratory tumbler you’ll be fine. Even with a rotary, it won’t damage or alter the g10, will just leave some heavier surface scuffing.
 
AND SO IT BEGINS....
Over the last week of great weather and a strong friend who was out of work, I did the demolition of my old smithy. It has served me well for almost 30 years. I am upgrading it to be enclosed and 12X32 feet. It will house an 8-foot wide welding area, a 12 foot forging area, and a 12 foot lawn and garden/storage area. I will put on Lexan greenhouse roofing. Plans call for solar powered lighting system and independent generator powered 240VAC. (I might as well get use from my home generator which has not been used for more than a test run in many years). I got a 24' POD to store everything from the forge as well as my construction tools and supplies while doing the work.
I am ripping out the old decking floors and filling in the slope with fill dirt topped with 3" of crusher run. Many of the tools and things I have accumulated will either find homes in the new forge or find new homes in other folks shops.
I'll finish the last of the tear-down and have the hauler come and load the debris and cart it away. From there is is the filling/grading, posts and walls, roof, and interior finishing ... then put everything back. I hope to have it done by mid-September.
A fortunate coincidence was a visit to a friend's dad and seeing a stack of four 4X8 sheets of 1" horse stall matting. He said I could have them!!! That will make a great floor in the forging/grinding area.

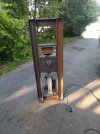
The big forge is Ron Frazier's old sword forge. I'll re-paint it and use it as yard art. The other things are some large aluminum quench plates, and two granite surface plates that are in serious need of cleaning. One is 36" long and the other massive one weights close to 100 pounds. There is also a shot of two 12X36" panels of Ghost Green Jade G-10.

After clearing the old decking and benches, I'll take down the smithy roof and the old privacy fencing..

I'll probably put up a thread on the build and update it as I go.forge.jpganvil.jpganvil 1.jpgforge1 Ron Frazier.jpgforge massive surface plate.jpgforge surface plates.jpgforge ghost gerrn G-10.jpgfirge quench plates.jpg
 
Last edited:
The anvil is in better shape that it looks. The magnets make grinding dust and scale stick to it and those things have rusted while exposed during the pre-teardown. It needs a wire brushing. I'll repaint the 154# Hay Budden on the 400# flat anvil after it is ready to re-install. Other things not in the photos that will get new paint and go in the forge are a 400# post anvil, two huge vises, a Greenlee caulking vise, and several leg vises.
 
Last edited:
Working on a Bowie, my first folder, and the following hunter in 3V. I still need to sharpen and apply a finish to the handle. Hand satin finished to 400 grit, good enough for a 3V user. It's at 61.9 HRC. Please forgive the low light and resolution (and the
mess on the floor. The wife lets the dog clean the plates and cups, and the cat thinks she's special and insists on drinking out of a cup).
IMG_0361.JPGIMG_0367.JPGIMG_0364.JPGIMG_0370.JPGIMG_0368.JPG
 
Last edited:
been hella busy with my day job, but i finally completed my first "damascus" knife

first damascus, first brass guard, first hidden tang. alot of screw-ups/er learning involved.
But my startegy is always keep moving forward. learn and move on. I wouldn't even think of selling this one, but more was an exercise in figure stuff out.
did this in my 1 burner mr. volcano. had 14 layers, that i drew/cut/re-stacked twice. 80crv2/15n20
 
getting close on getting forge up and running

i learned to only use straws that are smooth, i used the only ones they had at walmart and they had lengthwise ribbing. which made them (even soaked in wd40) grab on to the kast-o-lite.
so this was the ribbon burner test, and i just cooked out the remaining straw parts that wouldn't come out.
also one tip also is use a 2x for the bottom board of your mold for the ribbon burner, that way you can drill down further for the straws and have more to grab when pulling them out.
 
Back
Top