- Joined
- Sep 12, 2007
- Messages
- 348
I haven't posted anything in a while, I have other projects going on, but also some knives being finished and just waiting for sheaths. This one I wanted to get finished first because I was excited about it. I am very happy about the proportions - some time ago I asked for a feedback on a bowie knife I was making and was not happy with it, and then I took that feedback and got better. So THANK YOU to all of you providing feedback.
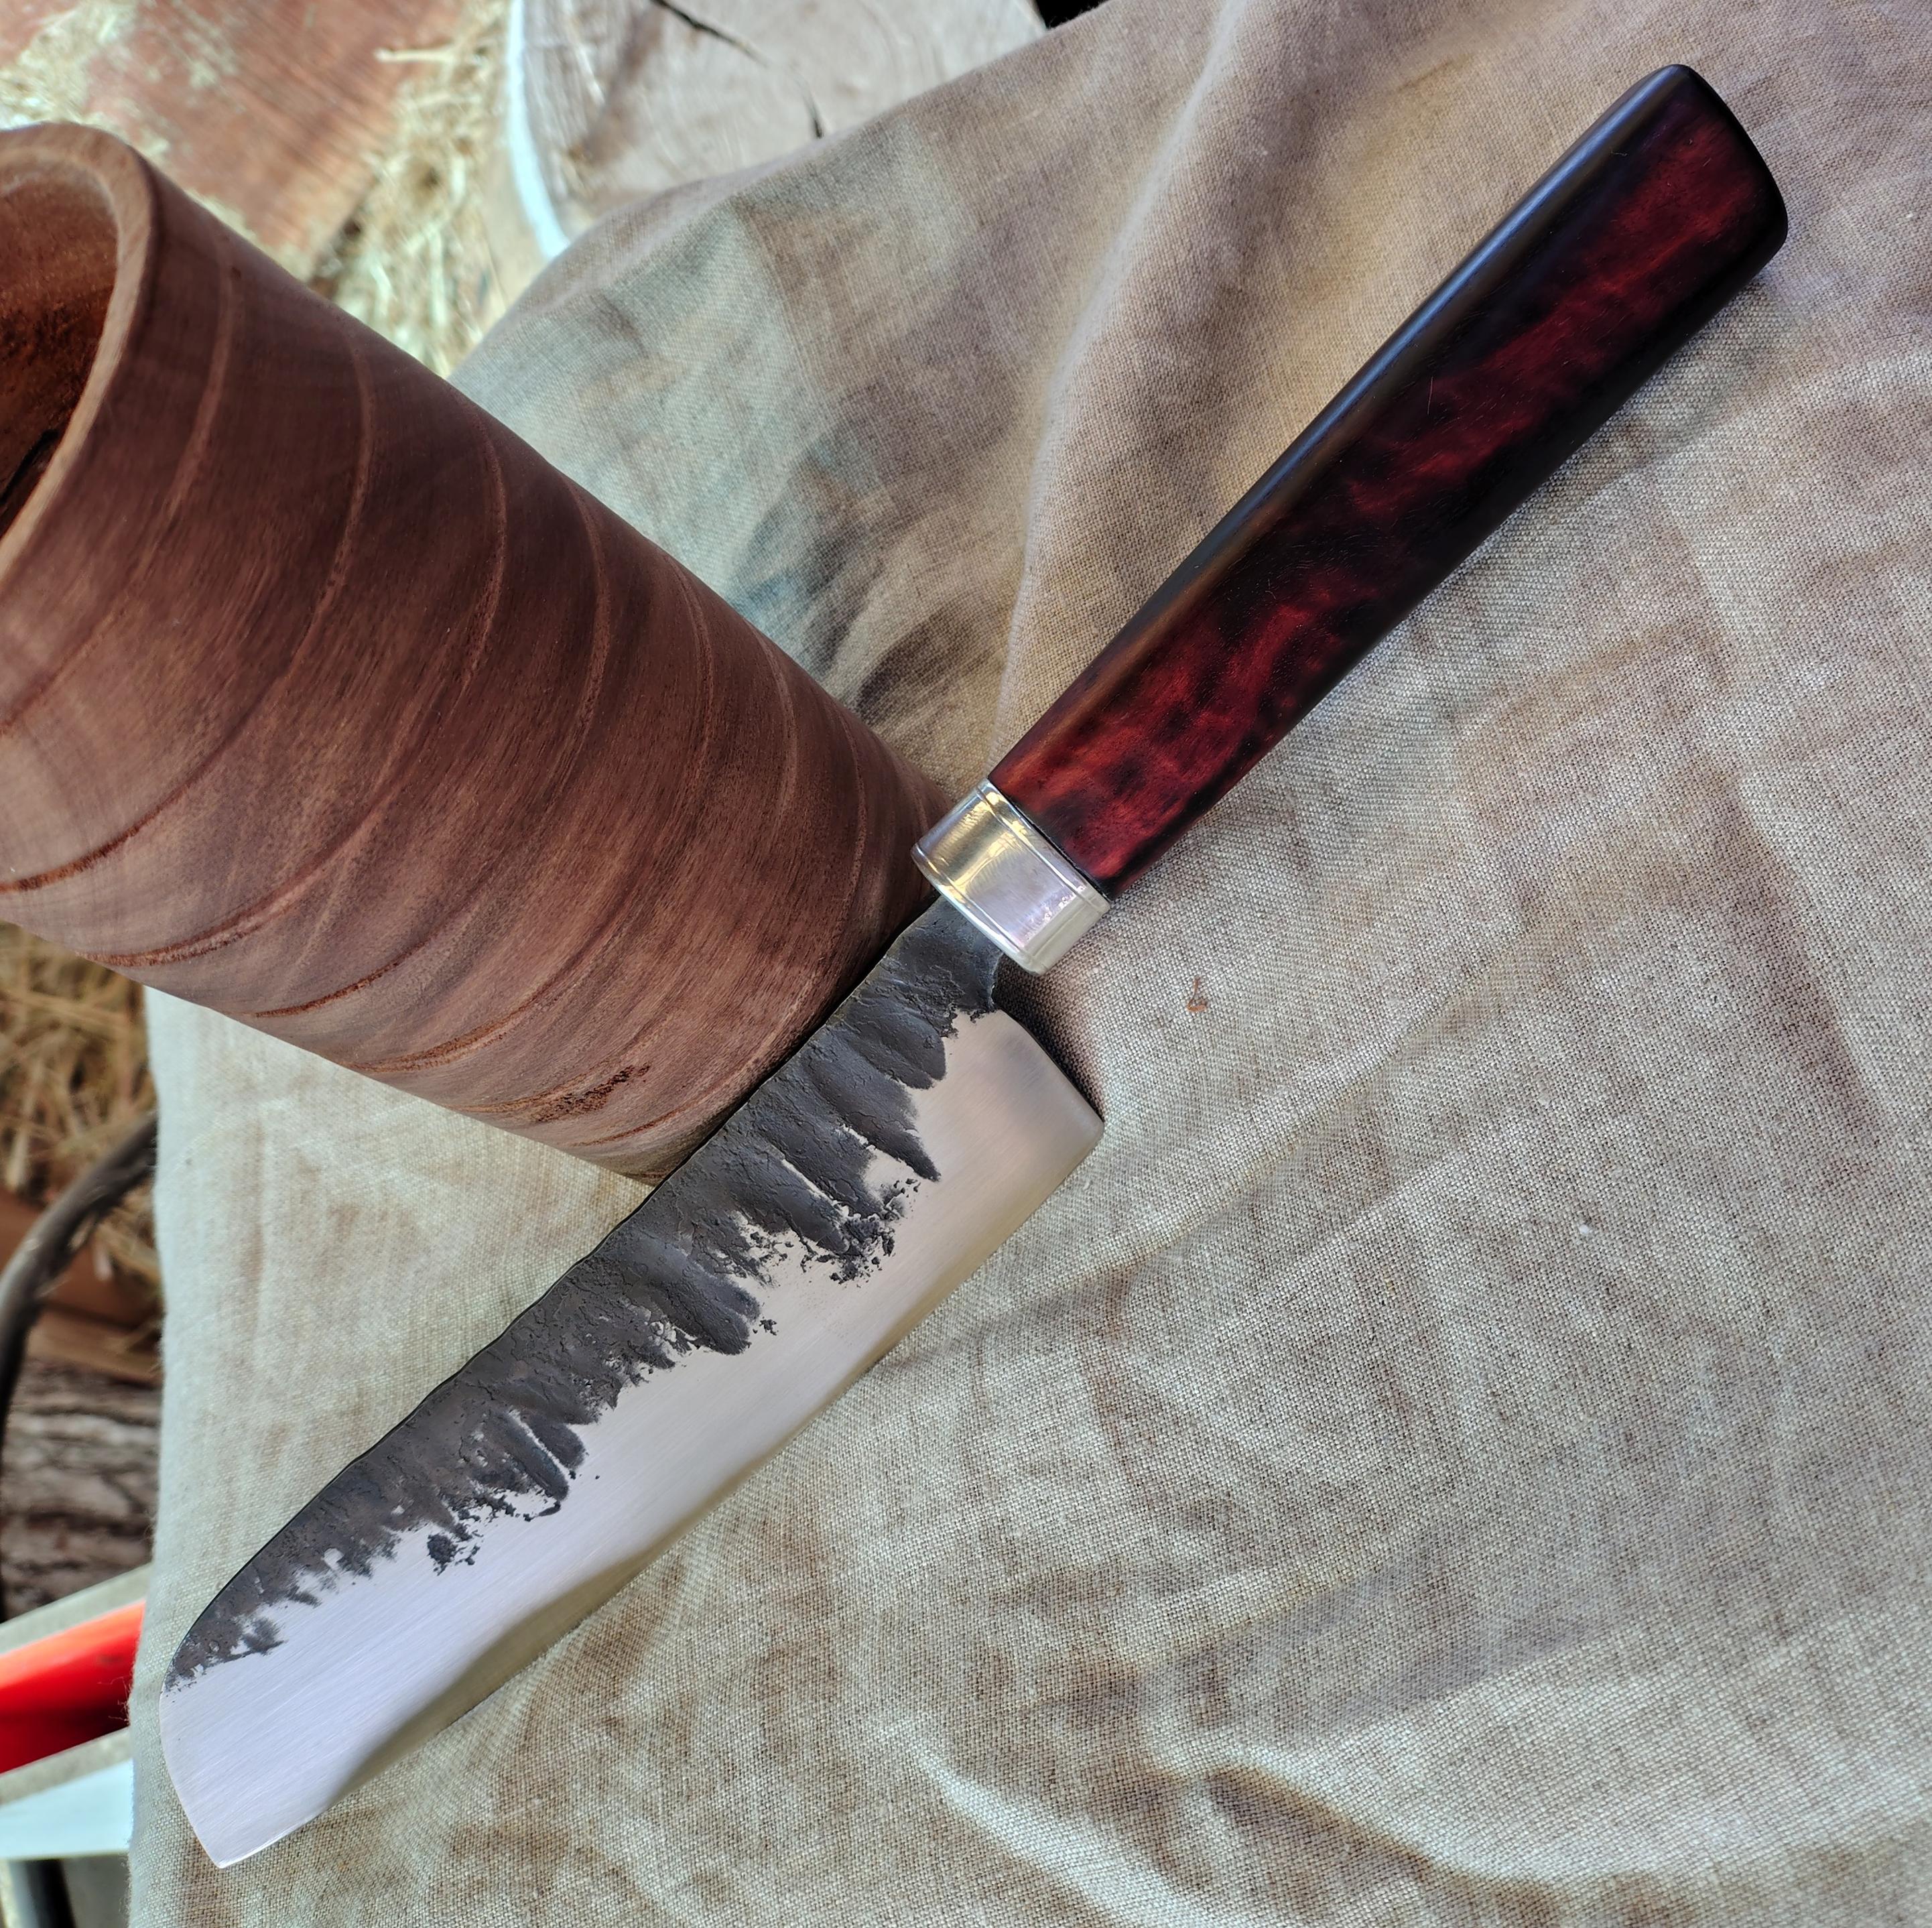
Steel is Sleipner at 6 mm thickness, handle is indian ebony, bronze and blued steel. Silver brazing marks where the balls at the tips of the guard are a bonus") Takedown construction.
Takedown construction.


Steel is Sleipner at 6 mm thickness, handle is indian ebony, bronze and blued steel. Silver brazing marks where the balls at the tips of the guard are a bonus
Takedown construction.
Last edited: