Make your tool almost as thin as your wire strips. It should be very sharp. Make a bunch of them from an old hacksaw blade. Make some wider for long straight lines, and some shorter for curves. They break, chip, and get dull, so switch out when they start to need more force.
Get 1/2Hard flat wire. When learning, use .010"X.055" (30 gauge) for most lines. For work the has lots of branches, make the "stem" in .013"X.055" (28 gauge), and the branches in .008"X.055". When you get some practice, use .008" (32 gauge) for the finer details.
Sketch your pattern actual size on paper. Use this as a visual reference while marking the wood.
Bevel the insert edge of the strips by running a sharp knife along them with the blade pressing on the lower edge. This slightly tapers the wire as well as hardens the insert edge a bit. A good trick is to run a black marker along the wire. Then run the knife blade along the insert edge. This leaves a dark line on the top and a shiny area on the tapered edge.
On dark woods, paint the handle area that will be use with a light coat of China White (art supply store or Amazon). It will come off later in the sanding. Draw it directly on light color woods.
Sketch your pattern as neatly as possible. Erase and re-do as needed until you are pleased.
Punch your lines at least as deep as the wire, deeper is fine, but avoid shallower cuts.
Start punching the cut at the "base" of the pattern and punch your line in a continuous line from base to tip. Go back and add the branches and berries. Punching "connect the dots" places like you did will always get uneven lines. Try to "walk" the cutter down the line in a rocking motion. Where branches will be added, wiggle the cutter side to side a bit to widen the cut at the junction. When punching the branch cuts, work from the tip of the branch back to the junction. This allows the insertion of the branch wires to look more natural.
Inlay the wire the same way, in continuous strips.
When adding branching curls, taper the first 1/4" of wire so it lays flush as it starts to diverge. Also, taper the last 1/4" at the ends so it has a more natural look.
Otherwise, you get those gaps and odd spots at the junction.
Tap the wire in gently with a 1oz. brass or nylon hammer or small hard wooden mallet. Strat with light taps and walk the strip down the line. Go back and repeat as is seats. If some sticks out, that is OK. It will be filed flush later. Pounding hard only bends and warps the wire.
File or sand the excess wire off as well as the remaining China white (if used). Use a very fine file (#4) or 220 grit sandpaper. Wash off any residue of China White with alcohol and let dry. Be gentle, take your time, and don't file any farther than just barely flush at first, and just get any proud wire down to the wood. Don't go for a finished look yet.
Rub the wire area with a 50% diluted wood glue like Tightbond and let dry overnight. Use light regular color glue for light woods, and the dark color glue for dark woods. This will lock the wire in place as well as fill gaps.
Finish filing, sanding and applying the finish, if you are using one. The last sanding of the finish should leave the wire surface exposed, not covered in finish. I find 800 grit sandpaper works well for the last sanding.
Adding "berries" of round wire is a great accent. Depending on the berry size desired, 16, 18, and 20 gauge round wire works well. Add the berries after all the wire inlay is tapped in place. Drill tiny holes a few thousandths smaller than the wire size used, and tap in short tapered pieces of wire. Cut off the excess snips and file flush.


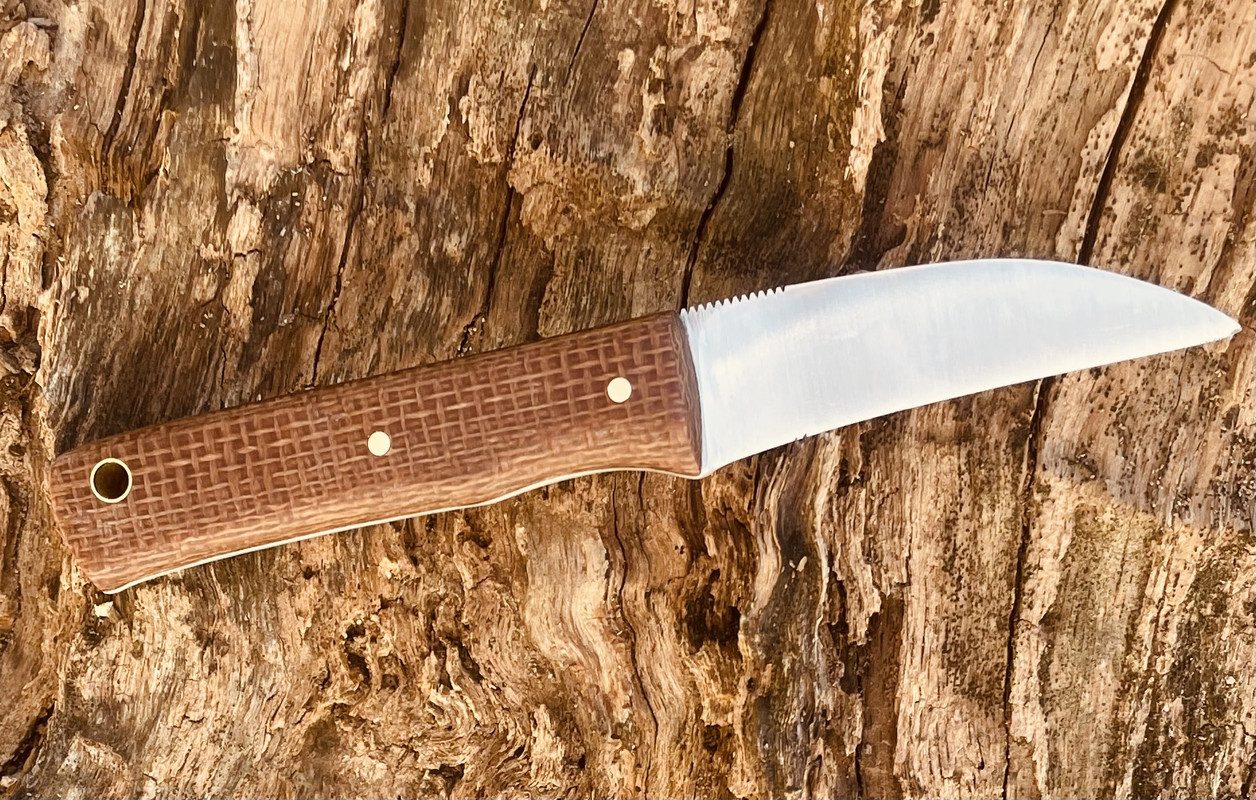
 Thanks again to Sharp By Coop Photography for making my work look it's best!


")