What's happening in the David Mary Custom shop?

So it's a yes, Crag the Brewer Crag the Brewer 
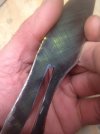
, I have been using Steve's glass platens since first ordering them June 9, 2020. They immediately improved my grinding. My tools still want to fight me a bit, especially when belts decide they want to change their tracking direction. But I have ways to make it work regardless, as long as function and performance are more important than perfect symmetry at plunge lines. I've achieved that a number of times, but there are other times that the interaction between my grinder, platen, and belts doesn't behave as nicely, which is why my grind symmetry is still not as consistent as I'd like yet. Every time I do a platen change I feel like I learn something new, and my goal is to keep that trending toward better and better grinds. So the reason for the post is my excitement at having fresh ones again. They are built like tanks and hold up really well. I remember the first time I got chips on the edge of a platen, I could no longer grind with 220 grit ceramic, and I kept leaving little grooves or channels in my blades. I stopped that in a hurry and bought more platens, but that issue seems to have vanished, and I feel much more comfortable grinding and making it look as close to my goal as possible even with beaten up platens. But there's something about a clean platen... maybe it's all mental. But it's like cleaning your desk or something, maybe. A feeling of renewal. Anyway, I tend to feel like the first few knives off a fresh platen take less effort than the last one on the old platen.
 
Last edited:
Anyway, the plan changed at the shop after all. I was given the blessing to cut one tree down and then I move some wood over to the garage. I'm looking to keep that tree there as a coffee break bench and balance trainer.

I did the job with a machete that I gave to Chris about a year ago, if I recall. He was kind enough to lend it to me. Some of you may remember this one as the mustard patina that made woodysone woodysone sad. ;)

IMG_8470.JPG
IMG_8471.JPG
IMG_8472.JPG


While I was there grabbing the machete, I snapped some pics of a couple other knives I had given him over the years. Before the machete was this one in AEB-L:

IMG_8469.JPG
IMG_8468.JPG
IMG_8467.JPG


And before that, this one in sawmill blade steel, which I think was even before I started re-heat treating that stuff. I had explained to him how to do a patina with vinegar, and he did a great job. But the sheath has rubbed it all off of one section.

IMG_8463.JPG
IMG_8464.JPG
IMG_8465.JPG
IMG_8466.JPG
 
The tools for the job were the machete, my folding saw given to me by bikerector bikerector out of the blue one day (thanks again!), and the Prevail Wharncliffe which Chris very graciously refused to allow me to give him this time around. So the Prevail that I miss so much... well now there is a Wharny version with a slim Suretouch handle at my hip. I really have nothing to complain about.

Had to start with glove repair, as this is an angle grinding glove that has the right hand knuckles burned away, and my middle and ring fingers kept wanting to pop out of the glove while swinging the machete.
IMG_8473.JPG
IMG_8474.JPG


Here's where I want my break station and wood pile. I might have to rethink the wood pile location though so it gets more sun? Basically I am standing at north facing south to take the next pic.
IMG_8477.JPG
IMG_8486.JPG
IMG_8485.JPG
IMG_8484.JPG


IMG_8480.JPG
IMG_8479.JPG
IMG_8478.JPG


The Prevail was great for batoning roots so as not to trip on 'em.

IMG_8492 - Copy.JPG
 
I had to work at that stump with the Prevail and saw then anchor the other end of the log to get it to sit securely there. I gave it a good few solid kicks and stomps to make sure up and down pressure wouldn't bounce it off there if I or anyone else wants to walk back and forth on it.

IMG_8493.JPG
IMG_8494.JPG
 
I have found that over time, my scotchbrite belts tend to give me the worst tracking problems, the coarse ones to a noticeable degree, and the medium ones are the worst. I have often relied on them to help me clean up my blade surfaces from where they have left off on either the 120 or 220 grit ceramic belts, by going either 36, 120, coarse, medium, fine, or 36, 120, 220, fine. The problem is that scotchbrite belts have tended to load up with material, and I was used to using rubber belt cleaners, and didn't know how to clean my scotchbrite belts (since rubber belt cleaners will only load them up even more).

But since moving into this shop, I have come to a few understandings about these things, and here's the plan going into the end of 2022, start of 2023: No more medium or coarse scotchbrite belts. They are too much of a liability, since though they usually work fine brand new, they don't take very long to start (presumably) stretching and thus wanting to track left or right, requiring me to constantly adjust belt tracking when changing sides of the blade I am grinding. The fine ones never seem to give me this problem, so I have loaded up on 220 grit ceramics, and have just placed an order for five three packs of the fine scotchbrite belts (fifteen belts total, which I think is more than I have even owed over the last two and a half years since I started using them). My best satin finishes have come from this progression of Red Label Abrasives product: 36 grit EdgeCore ceramic, 120 grit EdgeCore ceramic, 220 grit green ceramic, fine scotchbrite belt.

I believe this change in my process will help me to increase grinding efficiency and consistently produce grinds of the same or perhaps better quality than the best ones I have produced so far.

Also, I did what in hindsight is kind of obvious: I bathed some of my older scotchbrite belts in a bucket of soapy water. I found that helped them to regain some of their efficiency. Also, I found that dipping the blade in soapy water during passes on the scotchbrite seemed to improve the finish I get as well.
 
I got here and decided wait for the fresh fine belts before I finish anything else. But I have time for s project which Crag the Brewer Crag the Brewer geberously supplied materials for. Certainly enough for a new give away.
I was Just cleaning up my shop a little...haha.
Don't feel obligated to use what I sent, just use your imagination.


*And I didn't wanna pay all that shipping for only that one thing! 😜
 
This is interesting stuff. The edge I put on it doesn't want to push cut but into slices nonstop with no slowing down or any detectable edge degradation thus far. Impressive. And hard to grind. This this will be a cool necker with paracord wrapped handle. If I knew how much this would demolish cardboard, it have made it a straight wharny. But I but this type of edge does tomatoes well too. Toothy carbide edge I guess? It doesn't want to shave me but it slices paper well enough after some use and cardboard as though it were meant to all along.
IMG_8522.JPG
IMG_8523.JPG
 
Yours look Awesome!!!

I'm glad you made the most of the steel. As soon as found it, I knew it would be perfect for you, making quickly needed knives. It's nice having that flexibility., And the heat treating is Perfect, and won't get ruined while grinding like most steels.

I saw that too that it was very difficult to get to shaving sharp, but then it stays that way forever. They are extremely Hard, yet flexible and difficult to break.

Doesn't rust too bad either.

I Laugh at all the cardboard I cut now.
I hope you keep one too.
 
Seems like this has been an organizing and regrouping week for me. Here are the knives that have not sold yet, which I think was probably because I didn't go as thin as I could have. So now I have rectified that one these two, which necessitate a whole new maker's mark on the hawkbill. I also remove a bit more G10 in strategic places for what I believe turned out to be superior balance, grip, ergos, and looks than how it was before.

IMG_8560.JPG

But this one is giving me trouble. I tried to apex the microbevel at 20° per side, but it was slow going, so I dropped down to the 15° per side slot on the SharpMaker with the brown rods to thin it out a bit more behind the edge. But clearly I have to go back to the grinder with it and thin it out even more..... I'll probably go for broke on it as well, and have to re-mark it, too, but that's fine.

IMG_8566.JPG
 
Back
Top