- Joined
- Dec 6, 2006
- Messages
- 1,109
Thanks so much everyone. ") I'm glad you like the pics so far. Here are some more pictures of the knife in progress. Enjoy.
I'm glad you like the pics so far. Here are some more pictures of the knife in progress. Enjoy. 
The blade after tempering.
 001 by Kyle Royer, on Flickr
Time to order some stainless steel. The ended up not having a lot of the sizes I needed so I had to get some way bigger than what I need, it will still work fine. I'll just have more removal to do.
 005 by Kyle Royer, on Flickr
I also ordered some transfer film for the engraving. I'll use it to transfer the artwork from the computer to the steel.
 006 by Kyle Royer, on Flickr
Also need some 14k gold for the handle pins.
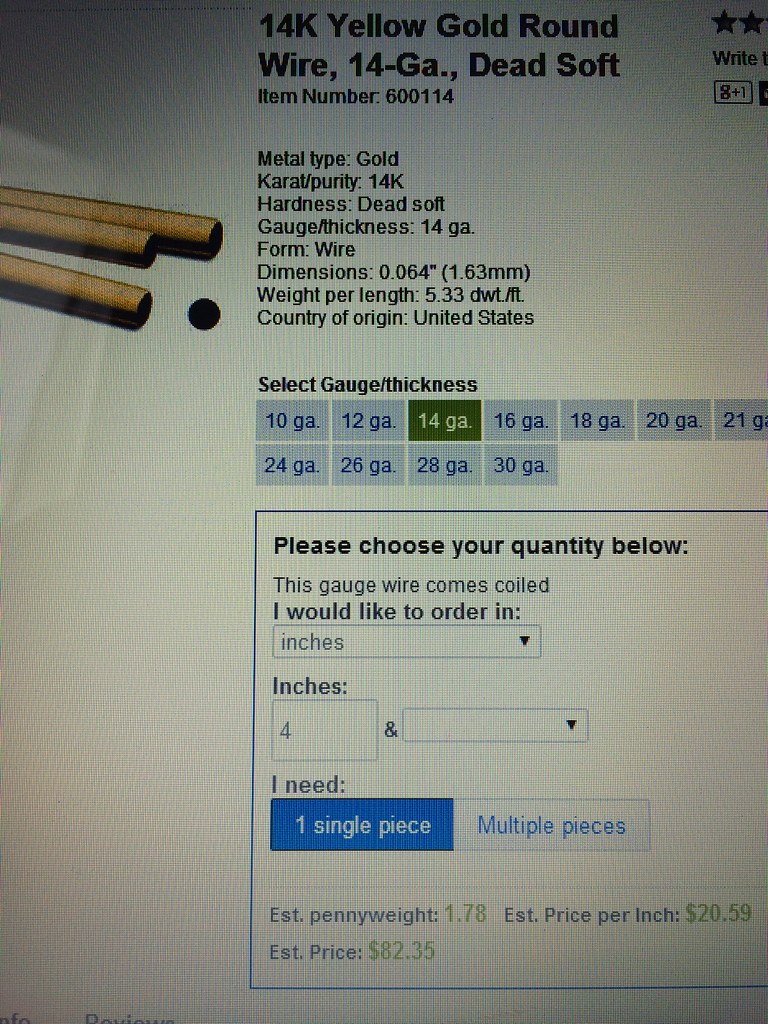 007 by Kyle Royer, on Flickr
Time to start surface grinding the tang of the blade.
 009 by Kyle Royer, on Flickr
Make a few passes and it's ready to flip over so I can do the other side.
 010 by Kyle Royer, on Flickr
 011 by Kyle Royer, on Flickr
Both sides completely surface ground. I've stepped the area around where the guard goes and the rest is uniform in thickness.
 012 by Kyle Royer, on Flickr
Time to dress the wheel on my surface grinder so it will leave a nice smooth finish on the ricasso area when I grind that in next.
 014 by Kyle Royer, on Flickr
The dresser is made from a 1/4 carat man made diamond.
 015 by Kyle Royer, on Flickr
Just run the wheel across it a few times lowering it into the dressing diamond and you have it.
 016 by Kyle Royer, on Flickr
Starting to surface grind the ricasso.
 017 by Kyle Royer, on Flickr
One side done. I can start out at 600 grit on the ricasso when I hand sand.
 018 by Kyle Royer, on Flickr
The thickness is at 0.247 after surface grinding the ricasso.
 019 by Kyle Royer, on Flickr
Scribe some lines to follow when I finish grinding in the primary blade bevels.
 020 by Kyle Royer, on Flickr
Some lines on the area where the clip will be too.
 021 by Kyle Royer, on Flickr
No music ever since I moved becuase I hadn't had time to hang my stereo up. Well, I stopped the other day and just did it. Love to listen to my music while working.
 022 by Kyle Royer, on Flickr
 023 by Kyle Royer, on Flickr
My family came over and helped get a bunch of stuff done like cleaning up the yard, helping me get my house more in order, getting the vent system set up for my KMG grinder and my surface grinder. Dad and I also got the wiring all done and cleaned up for my press, surface grinder and air compressor. And to top everything off my pressure tank for the well water quite working so we put a new one in. Lots of stuff....
 025 by Kyle Royer, on Flickr
The vent for my surface grinder.
 026 by Kyle Royer, on Flickr
And the vent for my KMG.
 027 by Kyle Royer, on Flickr
All the wiring finished up for the big equipment.
 028 by Kyle Royer, on Flickr
The new pressure tank.
 029 by Kyle Royer, on Flickr
Okay, back to knives. Finish ground to 50 grit.
 030 by Kyle Royer, on Flickr
I'm using a height gauge to measure the tip to see if it's in the very middle of the blade. I make a few minor adjustments with the grinder until it's right where I want it. Within 0.001 inch.
 031 by Kyle Royer, on Flickr
 032 by Kyle Royer, on Flickr
Right at 0.043 on this side and 0.044 on the other. Close enough for me. I measured a piece of my hair and it was 0.002 inches thick so the tip at this point is only off by half the thickness of a human hair.
 033 by Kyle Royer, on Flickr
Ground the crest onto the spine.
 035 by Kyle Royer, on Flickr
Heading out to the mail box I found the the flowering bushy thing out there had bloomed. I thought it was pretty so I took some pics of it. I have no idea what it is, do any of you know what it is? The flower is as big as my hand wide open.
 037 by Kyle Royer, on Flickr
 038 by Kyle Royer, on Flickr
 039 by Kyle Royer, on Flickr
Okay, I've got the blade ground to 120 grit.
 040 by Kyle Royer, on Flickr
 042 by Kyle Royer, on Flickr
Time to convex the edge. The tape is so the slack belt won't grind into the spine area.
 043 by Kyle Royer, on Flickr
Here is the edge convex ground ready for sharpening so I can performance test the blade.
 044 by Kyle Royer, on Flickr
Sharpened.
 045 by Kyle Royer, on Flickr
I put a flat pipe handle on so I'll have something to grip when chopping.
 046 by Kyle Royer, on Flickr
Went through the 2x6 with no problems. I went through a huge and very hard knot too. It still shaved hair after all the chopping was said and done with.
 047 by Kyle Royer, on Flickr
Now I put the file guide on the ricasso so I can scribe lines for where my plunge cuts will come to. When using the lines as a guide and also using my plunge cut jig it makes the plunge cuts perfect every time with no guess work in it.
 048 by Kyle Royer, on Flickr
Here is my plunge cut jig.
 049 by Kyle Royer, on Flickr
A close up shot of the place that makes the magic happen.
 050 by Kyle Royer, on Flickr
Ready to start grinding.
 051 by Kyle Royer, on Flickr
All ground in and looking really good.
 052 by Kyle Royer, on Flickr
I'm all ready for hand sanding next.
 053 by Kyle Royer, on Flickr
Thanks for looking. More to come in a few days.
I'm glad you like the pics so far. Here are some more pictures of the knife in progress. Enjoy. The blade after tempering.
001 by Kyle Royer, on FlickrTime to order some stainless steel. The ended up not having a lot of the sizes I needed so I had to get some way bigger than what I need, it will still work fine. I'll just have more removal to do.
005 by Kyle Royer, on FlickrI also ordered some transfer film for the engraving. I'll use it to transfer the artwork from the computer to the steel.
006 by Kyle Royer, on FlickrAlso need some 14k gold for the handle pins.
007 by Kyle Royer, on FlickrTime to start surface grinding the tang of the blade.
009 by Kyle Royer, on FlickrMake a few passes and it's ready to flip over so I can do the other side.
010 by Kyle Royer, on Flickr011 by Kyle Royer, on FlickrBoth sides completely surface ground. I've stepped the area around where the guard goes and the rest is uniform in thickness.
012 by Kyle Royer, on FlickrTime to dress the wheel on my surface grinder so it will leave a nice smooth finish on the ricasso area when I grind that in next.
014 by Kyle Royer, on FlickrThe dresser is made from a 1/4 carat man made diamond.
015 by Kyle Royer, on FlickrJust run the wheel across it a few times lowering it into the dressing diamond and you have it.
016 by Kyle Royer, on FlickrStarting to surface grind the ricasso.
017 by Kyle Royer, on FlickrOne side done. I can start out at 600 grit on the ricasso when I hand sand.
018 by Kyle Royer, on FlickrThe thickness is at 0.247 after surface grinding the ricasso.
019 by Kyle Royer, on FlickrScribe some lines to follow when I finish grinding in the primary blade bevels.
020 by Kyle Royer, on FlickrSome lines on the area where the clip will be too.
021 by Kyle Royer, on FlickrNo music ever since I moved becuase I hadn't had time to hang my stereo up. Well, I stopped the other day and just did it. Love to listen to my music while working.
022 by Kyle Royer, on Flickr023 by Kyle Royer, on FlickrMy family came over and helped get a bunch of stuff done like cleaning up the yard, helping me get my house more in order, getting the vent system set up for my KMG grinder and my surface grinder. Dad and I also got the wiring all done and cleaned up for my press, surface grinder and air compressor. And to top everything off my pressure tank for the well water quite working so we put a new one in. Lots of stuff....
025 by Kyle Royer, on FlickrThe vent for my surface grinder.
026 by Kyle Royer, on FlickrAnd the vent for my KMG.
027 by Kyle Royer, on FlickrAll the wiring finished up for the big equipment.
028 by Kyle Royer, on FlickrThe new pressure tank.
029 by Kyle Royer, on FlickrOkay, back to knives. Finish ground to 50 grit.
030 by Kyle Royer, on FlickrI'm using a height gauge to measure the tip to see if it's in the very middle of the blade. I make a few minor adjustments with the grinder until it's right where I want it. Within 0.001 inch.
031 by Kyle Royer, on Flickr032 by Kyle Royer, on FlickrRight at 0.043 on this side and 0.044 on the other. Close enough for me. I measured a piece of my hair and it was 0.002 inches thick so the tip at this point is only off by half the thickness of a human hair.
033 by Kyle Royer, on FlickrGround the crest onto the spine.
035 by Kyle Royer, on FlickrHeading out to the mail box I found the the flowering bushy thing out there had bloomed. I thought it was pretty so I took some pics of it. I have no idea what it is, do any of you know what it is? The flower is as big as my hand wide open.
037 by Kyle Royer, on Flickr038 by Kyle Royer, on Flickr039 by Kyle Royer, on FlickrOkay, I've got the blade ground to 120 grit.
040 by Kyle Royer, on Flickr042 by Kyle Royer, on FlickrTime to convex the edge. The tape is so the slack belt won't grind into the spine area.
043 by Kyle Royer, on FlickrHere is the edge convex ground ready for sharpening so I can performance test the blade.
044 by Kyle Royer, on FlickrSharpened.
045 by Kyle Royer, on FlickrI put a flat pipe handle on so I'll have something to grip when chopping.
046 by Kyle Royer, on FlickrWent through the 2x6 with no problems. I went through a huge and very hard knot too. It still shaved hair after all the chopping was said and done with.
047 by Kyle Royer, on FlickrNow I put the file guide on the ricasso so I can scribe lines for where my plunge cuts will come to. When using the lines as a guide and also using my plunge cut jig it makes the plunge cuts perfect every time with no guess work in it.
048 by Kyle Royer, on FlickrHere is my plunge cut jig.
049 by Kyle Royer, on FlickrA close up shot of the place that makes the magic happen.
050 by Kyle Royer, on FlickrReady to start grinding.
051 by Kyle Royer, on FlickrAll ground in and looking really good.
052 by Kyle Royer, on FlickrI'm all ready for hand sanding next.
053 by Kyle Royer, on FlickrThanks for looking. More to come in a few days.


