A very quick and close look at 'steeling'

Hi HeavyHanded,

I don't understand either. Maybe you could take microscope-images of the steel itself? (I mean images of the long round steeling steel.) That would give us some idea of what it's surface texture is like, and possibly give us ideas about what it is doing to the knife edge.

Sincerely,
--Lagrangian

I certainly can, unfortunately I totally reconditioned the steel on two finishing wheels and finished it with alumox compound on leather. We can get an idea what my steel is doing, but that's not the same as studying one of the industry samples.
 
Thus far the edge is getting in the way of learning about plastic-flow. Remove the edge, pressure will be less sensitive.
steelingplasticflow.png


configA - large perpendicular force (to very small area, 90deg edge), we can quickly observe the drastic result.
configB - having a bevel, the result is more refine, observe lead/trail edge and bevel result.

Worth a try using a knife spine? I don't have high mag optic.


I follow the logic, but getting a clean pic of something like the metal flow around a corner might be very difficult at mag higher than 100-200x due to the loss of depth. Hopefully the 100 pass test subject will tell us more, I'll try to pick up some Castor oil (hear you can sub it for cedar oil for immersion microscopy) and maybe get a real close look.
 
Hi HeavyHanded,

Okay, no prob. Whatever steeling rod you end up testing, maybe you could post a microscope picture of the rod itself along with pictures of the before/after steeled knife edge.

I have a small (I think the rods are only about 4 inches long) steel from http://www.razoredgesystems.com/ and if you want I could lend it out to you. It was used a fair amount a long time ago, but otherwise is unmodified.

Sincerely,
--Lagrangian
 
Last edited:
Whew, there's too much going on here.

First pic is of the reconditioned drill rod, I polished and finished it exactly as I did the Foster Bros, but have gotten very different results.
Steel_I_160.jpg~original


Second pic is of the Aus8 with 5 passes on this steel
E_640_1.jpg~original


Third is with 50 passes - starting to look pretty rough
E_640_2.jpg~original


Fourth is after 100 passes - now very rough and with what I would consider an unacceptable amount of burring - visible at this magnification as that sort of leafy effect - far more visible to the unaided eye, This edge needs repair. I may have to put it on the Foster Bros and see what happens...
E_640_3.jpg~original


Wanted to have something known to compare it to, sooo, put my freshly resharpened EKA to the steel once more

First is with no steeling prepared as before. I'm getting better at this, could just tree-top some leg hair off the fine Crystalon and stropped on a mix of swarf and oil on newspaper.
F_640_1.jpg~original


Now after 6 passes on the steel - I caught sight of some interesting metal formation. Dead center you can see where the metal has been swept up and is partially burying the original grind. Scratch pattern is smaller, but apex is less uniform.
9NtVH24l.jpg


Second pic with focus shifted to make the formation more easily recognized. This is looking more like the rod has enough abrasive quality to push the steel around and produce some deformation, but not enough to carve the affected metal free of the surface.
5zhstDNl.jpg


Tentative conclusion, different steels can work an edge differently not just based on surface prep (both steels were finished identically - pics of the first one to follow). The second series with the same knife from the original pics looks totally different. Based on this I cannot even say that the Aus8 is behaving any differently than the Sandvic on this steel. If one is going to improvise a steel, it might be best to do as Stitchawl did and go with unhardened steel from the local hardware store or go right to a very smooth laboratory glass. Just have to figure out why the other steel produced a desirable result and this one needs to go in the scrap bin...
 
Last edited:
Hi HeavyHanded,

Wow, thanks for your post. A lot of stuff indeed! :)

A couple of quick questions:
(1) Is your drill rod annealed or hardened? Any idea about its HRC hardness? I ask because I bought some drill rod too, a while back, but it is actually annealed so actually, not hard.
(2) Approximately what angle are your knives sharpened on on the Crystalon?
(3) Approximately what angle are your knives steeled at using the smooth rod?
(4) What grits were used to prepare your Foster Bros steel?
(5) Do you think the steel-rod shows any wear at all, either visibly by eye, or under the microscope?

Sorry if you already posted the details for (2)-(4) and I missed it. If so, just let me know and I'll go back to gather the details from your earlier posts. I'm having trouble keeping the details of everything everyone is saying in my head.

Thanks for your work! :) I'll be looking at your pictures and reading in more detail, when I have time.

Sincerely,
--Lagrangian
1)
I don't know for sure, but a hacksaw blade lightly dragged across it would not mark, and with some pressure would not bite except to leave a few light scratches, so pretty hard stuff (as are the other steels).

2)
My freehand edges are all right around 28-32 degrees inclusive - pretty reliable. I don't usually go lower than the high 20s and never go higher than 32.

3) I only raise the angle a degree or two (maybe three but no more) - I use a Sharpie on these steels just to make sure, because felt feedback is might limited.

4)
Both steels were done up with Norton Beartex nylon wheels. The first one is a high density medium grade alomox wheel, the second is a medium density SiC wheel. At this point a nice satin finish. Then they were polished with white compound from Sears on leather. All process were radial - I couldn't think of a time-effective way to polish them lengthwise.

5)
None of the three I've tested showed any but the faintest of chicken tracks, and that not until I'd hit them for 100 passes or more. I marked my spot on the rod so I could keep track of where I'm working - ten or 12 passes show no wear.
 
If one is going to improvise a steel, it might be best to do as Stitchawl did and go with unhardened steel from the local hardware store or go right to a very smooth laboratory glass. Just have to figure out why the other steel produced a desirable result and this one needs to go in the scrap bin...

One thing to keep in mind is that 'my' testing and results were strictly subjective... i.e. how the knives cut the particular things they were designed for, and NOT based on how the edge looked in a photomicrograph.

While it's certainly interesting to see and learn about it, (and I've been searching out a good, affordable digital microscope... damn you.. :) ) the question remains; do looks = ability to do the intended job? We can measure the specific chemicals that give an apple flavor, but does measuring the amount of those chemicals tell us if the apple will taste good? Or, are other co-factors involved?


Stitchawl
 
Hi stitchawl,

I was talking to Singularity35 recently, and he made the same point. He suggested we separate knife geometry from cutting performance. He thought we should use the following informal definitions:
(1) _Sharpness_ is a function of only geometry. It is the "quality" of knife apex.
Maybe includes how pointy the apex is, maybe includes how smooth it is.
(2) _Cutting Ability_ or _Cutting Performance_ is how well the performs in cutting tests.
You can perform cutting tests and know nothing about the knife's geometry.
Exactly what is a "good cutting test" isn't clear, so that's where the definition is informal, but still useful I think.

Thanks to singularity35 for this suggestion.

Returning to your question, Stitchawl, it is a very good one. I think ideally, we would like a test where we perform the following steps:
(1) The knife is first photographed at the naked-eye _and_ the microscope level.
(2) Tested for cutting performance.
(3) The knife edge is photographed again after cutting tests, at the microscopic level.

So far, I only know of one tester who has performed (2) and (3), and I know of zero tests which have done (1),(2), and (3). Of course that doesn't mean they aren't out there... I only frequent BladeForums.com, KnifeForums.com, Spyderco.com forums, WickedEdgeUSA.com forums, and the HypeFreeBlades.com forums. I know almost nothing about the shaving community, and virtually nothing about the wood-working community.

The single tester, that I'm aware of, who has done (2) and (3) is Brent's Sharpening Pages:
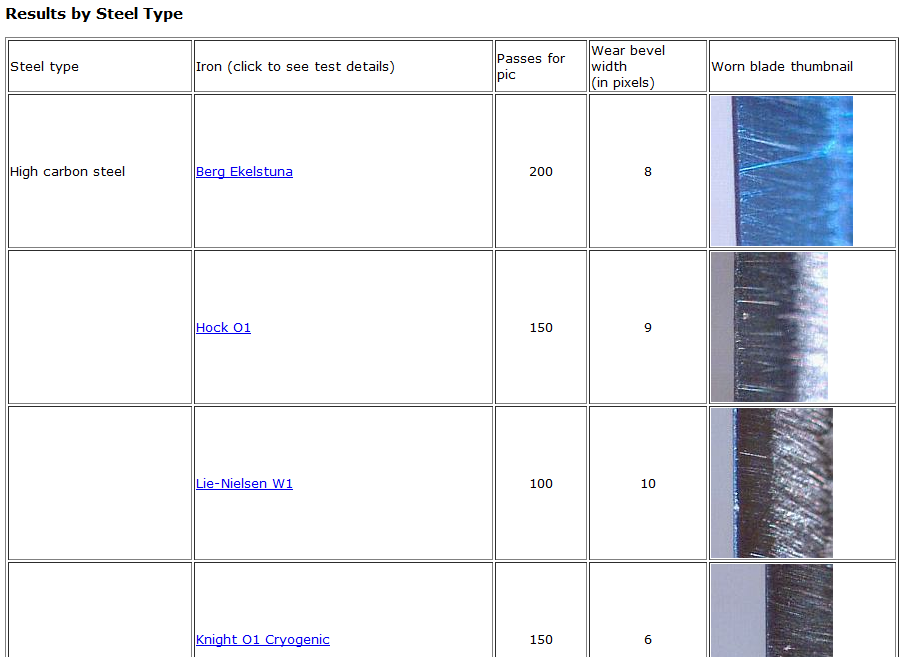
http://www3.telus.net/BrentBeach/Sharpen/bladetest.html
T7kf2.png


I haven't looked at Brent's results in detail, but it may be worth doing so. I do wish he had microscope photos of the edges before tests. Even Prof. Verhoeven only sharpened and photographed his knife edges; he did not do any cutting tests in his technical report,_Experiments on Knife Sharpening_.

I think the problem is that it is a huge amount of work just to do (2) not to mention (1) and (3). Sharpening, photographing, microscoping, testing, and then re-photographing and re-microscoping, well... even for just one knife, could easily take hours. And then to do variations to see effects of different sharpening techniques, along with experimental controls, etc. and very soon you are literally talking about so many man-hours that it would fill days and weeks.

Maybe what we need is an army of machines or robots who can precisely, consistently sharpen, microscope, and test knife performance. ^_^;

Because of issue of different setups and technique, etc., I'm not sure how we could parallelize testing among ourselves to combine results. In practice, that seems extremely difficult to do with good consistency (ie: reproducible results). If you have any thoughts about how to attack this problem, that would be great. Like you, I wish to know how much good microscopic geometry of the knife edge affects knife cutting performance.

Sincerely,
--Lagrangian
 
Because of issue of different setups and technique, etc., I'm not sure how we could parallelize testing among ourselves to combine results. In practice, that seems extremely difficult to do with good consistency (ie: reproducible results). If you have any thoughts about how to attack this problem, that would be great. Like you, I wish to know how much good microscopic geometry of the knife edge affects knife cutting performance.

There in lies the rub...
I've participated in a dozen different 'how to test "sharp" ' threads, and the only thing we could all agree on was that there was no way to standardize the tests short of building some sort of robotic device, and even then, there were some 'gray areas' that didn't seem to fit our needs. I theorize that the smoother, sharper finish will test 'sharper' for push cutting, while a 'slight' (and whose to say how slight?) tooth will slice better. And as it seems that it's mostly kitchen knives that get steeled, we get the needs of the individual chef and his cutting style that must be taken into account. Does the Chinese sushi chef cutting Sea Bream need a different edge than the Executive Chef slicing a steamship roast?

Me? I like the pictures. It's interesting to see what's going on, and I like learning how things work. But correlating that information into working guidelines is, to say the least, difficult!

Stitchawl
 
You guys probably know this, but just in case you don't:

Wood-workers use a burnishing tool on their cabinet scrapers. This is very similar to steeling, and is discussed in the book, _The Complete Guide to Sharpening_ Leonard Lee. This book is mostly targeted at woodworkers, so this makes sense.
http://www.amazon.com/The-Complete-...=sr_1_1?s=books&ie=UTF8&qid=1337831507&sr=1-1

You can also read about burnishing a cabinet scraper in many websites on woodworking. For example, here is a snippet from the website www.woodgears.ca:
http://woodgears.ca/scraper/index.html
ANFgz.png


It might be worth seeing what woodworkers have experienced and advise about burnishing scraping tools. And I wonder if a burnisher is significantly different from a smooth knife steel.

This could also be similar to bluntcut's request that we steel a corner edge of a knife, such as on the spine. Steeling the edge of a scraper is not the same, but it may be closely related.

Sincerely,
--Lagrangian
 
Last edited:
I believe that the goals the woodworker and his cabinet scraper are actual deformation of the edge. In the article you quoted;
www.woodgears.ca:
http://woodgears.ca/scraper/index.html

... it states; '...this is done by pushing the burnishing tool very firmly onto the scraper, and pushing it along the edge of the scraper.'

This is in direct opposition to the use of the steel with a knife edge. We don't want to press them together 'very firmly.' We want very light contact. Now, this could be because when sharpening a cabinet scraper, one first forms a square surface, then draws a burr from a corner of that square, rather than first starting with an acute apex edge. I can certainly imagine what would happen to said acute apex edge were I to 'push the burnishing tool very firmly into it!'

Man, I'm sure glad that I don't have to figure this stuff out for a living...


Stitchawl
 
I can add some very informal cut test results to this. The edge in the first series back on pg 1 had a good edge starting. I made a few comments about cutting some paper and a bit of dry shaving. The Aus8 and retest of the Sandvic on the drill rod steel resulted in degraded performance, tho still quite sharp. After 5 passes the Aus8 showed a slight improvement crosscutting newspaper - the pitch was higher and quieter. After 50 passes it was definitely on a downward slide, pitch became lower and louder, felt resistance increased. After 100 passes it was visibly burred, so cut testing is almost irrelevant.
The Sandvic blade began to decline in overall cut quality immediately, tho it did turn into a very good draw cutting edge (rather it kept it drawcutting qualities) it lost a lot of its pushcutting qualities after 6 passes. Could still shave some arm hair but also displayed a lower pitch and more resistance crosscutting newspaper.

From my perspective the difference I'm describing can be expected when you look at the pics. The initial testing resulted in a "better" edge, the second go around with a different 'steel' did not. Again, from looking at the pics I imagine the second steel might be better at refreshing an abused edge, but not as good at finishing one.

Also, Bluntcut's first observation that the steel might be acting as a microhone may very well be more correct than I thought.
 
Further consideration - I was wondering if the reason the two reconditioned steels don't perform the same might not be due to the Foster Bros needing less work = less radial scratching = radial scratches making a hash of the edge. In any event I put it to the medium density nylon SIC wheel and ran it lengthwise till I could no longer make out the radial scratches. Took the abused Aus8 blade and after 25 passes the burr that had formed on the drill rod steel was smaller. In fact after a handful of follow up swipes on some newspaper the burr was essentially gone. Hmmm - will take some pics when I get to work tonight...And it all started out so simple.
 
Further consideration - I was wondering if the reason the two reconditioned steels don't perform the same might not be due to the Foster Bros needing less work = less radial scratching = radial scratches making a hash of the edge. In any event I put it to the medium density nylon SIC wheel and ran it lengthwise till I could no longer make out the radial scratches. Took the abused Aus8 blade and after 25 passes the burr that had formed on the drill rod steel was smaller. In fact after a handful of follow up swipes on some newspaper the burr was essentially gone. Hmmm - will take some pics when I get to work tonight...And it all started out so simple.

Hi HeavyHanded,

Just to be sure... By "radial scratches" do you mean scratches that are circular on the steeling rod? Err... I mean, go around as a circle, in a plane perpendicular to the long axis of the cylindrical rod.

Looking forward to your new tests and results. :)

Sincerely,
--Lagrangian
 
Hi HeavyHanded,

Just to be sure... By "radial scratches" do you mean scratches that are circular on the steeling rod? Err... I mean, go around as a circle, in a plane perpendicular to the long axis of the cylindrical rod.

Looking forward to your new tests and results. :)

Sincerely,
--Lagrangian

That's what I mean, not sure if that's what I'm actually saying tho...


OK, here's the latest. I took the Aus8 blade that had been abused yesterday and gave it another go on the better steel, after I gave it a few lengthwise pases on a finishing wheel (Norton Bear tex 1-8SF). This eliminated all radial scracthing from my first "reconditioning". I later did the same thing to my drill rod 'steel'.
This allowed me to do some very nice recoveryy with the Aus8. This pic at 160x is the exact same from the last set of pics, the only thing I did was about 50 passes on the steel and few swipes on paper to clean it up. No burrs in evidence. looks a lot like the first series on pg 1

Aus8_160_1.jpg~original


And at 640, the edge seems to have recovered nicely and cuts very well. It may be weak as can be, but I don't think so. Any process that can remove the old burr can certainly expose fresh steel at the apex - time will tell.

Aus8_640_1.jpg~original


I had to try the Sandvic blade on the "re - reconditioned" drill rod, I reground it a fresh apex with the Crystalon after last night's rough treatment (didn't take any control pics this time). As a side note, considering the identical treatment both of these edges rec'd I have to think there's something inherent in the Sandvic that makes it a bit rougher edged. EKA claim RC of 59, Cold Steel probably isn't going that high with their Aus8.? This after about 25 passes off the stone.

Sandvic_160.jpg~original


And at 640 - this edge is ferocious. Tree-toping leg hair with some authority despite its fairly coarse profile. One thing I have to say about steeling, it is a very fast way to take an edge up a notch or two without the dangers of rounding or diminishing the aggressive nature of a coarser edge that often results from stropping with compound.

Sandvic_640.jpg~original


And here's the steel before

Steel_I_160-1.jpg~original


And after. These are of the drill rod, but the Foster Bros looked identical so didn't bother.


Steel_I_160_2.jpg~original


Tentative conclusion - the steel is acting a microhone, whether it be using plastic flow or not, the huge difference in results based on alignment of the grooves/ scratch patterns on the steel made a huge difference. I now wonder if any of hte commercial "smooth" steels really are - might be nice to take a close look at a high-end one out of the box.

Found a website for a man in Australia that reconditions quality steels. He says they're polished, but not mirror. And no, he isn't sharing his process, but I think we're close...

http://thesteeldoctor.com/

Next step is to try some borosilicate rod, that might take me few.
 
Last edited:
I'm curious to take a really hard rod of steel (or any material, such as borosilicate, or maybe other hard metals) and see if we could polish it all the way down to 0.1 micron grit, and then see what happens with it. I'm not sure what an appropriate material would be.... When you test the Borosilicate glass rod, that will be interesting indeed.

Maybe one could try a chromium carbide rod or wear plate? I know that high-end Starrett-Weber gauge blocks are made of chromium carbide because they are extremely hard and extremely stable (both over long duration due to corrosion resistance, and also in terms of thermal expansion although we don't care about that). Other companies sell chromium carbide wear plates for industrial applications.

I'll go play with the tungsten-carbide rod I bought, but probably it has WC particles that are too big.
 
Lot of ground to cover here. Chrome plating for exterior applications, such as car bumpers, is 10 millionths of an inch thick. It is applied over the Copper, semi bright Nickel, and bright Nickel to make the brown looking Nickel appear bluer. Hard Chrome plating is much thicker, but the deposit is rough and does not resemble the mirror finish of the Detroit products. Sal Glesser lives in Golden, CO, the headquarters of Coors beer. Coors was using ceramic filters for its beer, and Sal figured out a way to use the ceramic material for sharpening. Sal's business started as a sharpening products operation. When I talked to the guys who quarry and sell the various microcrystalline quartz products known as Washita and Arkansas stones, they told me that all the particles are the same size, but the apparent differences in "grit" are determined by the density of the stone. So higher specific gravity equals finer polish. Zirconium carbide is the compound that is supposed to be second in hardness only to diamonds, not Zirconium oxide. I think I read in Kyocera's literature that Aluminum oxide is mixed with Zirconium oxide in the production of the white ceramic blades. This might be an economy thing; it might be a better product thing. The Boker Cera Titan blades are made out of Titanium to which carbides (probably Titanium carbides) have been added along with some Silver for ductility. These blades are no longer in production. They are metal; not ceramic. They won't break if dropped, but they retain an edge about 10X as long as the average steel blade. Did I leave anything out?
 
Beryllium Copper is used to make non-sparking tools such as wrenches and hammers. Beryllium is quite a noxious substance, so I wouldn't be surprised if they are phasing this application out. Zirconia (Zirconium oxide) is used to make imitation diamonds for jewelry, and it has a higher refractive index than diamonds. I use my white ceramic blades as steels for my metal knives. The white ceramic is translucent. If you use a ceramic blade as a steel, it will turn the lettuce brown because of the residual metal on the blade.
 
Back
Top