Beckerhead Knife Making and Modification Thread

Thank you. I'm beat...hand sanding is sweaty work.

That's how I've done my Ferret and BK2. All hand sanding! It is sweaty work indeed. I guess that's why I've only done it in little bits. I can't seem to get all the scratches off my BK2. I have it almost mirrored, but you can still see some of the scratches, what the crap?! I guess I may have gone a little too squirrely on some of the lower grit papers.
 
15393584497_baf7140607_b.jpg


looking forward to the finish product!!
 
Finally finished up some polishing and stripping of the rest; ready for scales, hopefully this weekend.

14991810504_a788657047_b.jpg


In case it doesn't look like what it once was....

15613403472_53a98c37ea_b.jpg


15425917429_0cb99ff712_b.jpg
 
Wow Mike. That is freaking outstanding.

I ordered a burner for the forge a couple days ago. Hoping to get it tomorrow and build this weekend. I will try my best to document the process.
 
That turned out pretty good, ww.


Tomorrow, I'm going to head to a few hardware stores and see if I can find the stuff to make a forge. I've got the anvil, and I bought a couple hammers today to try out.

I need some steel for a container, a few firebricks, some refractory cement and assorted drill bits. Haven't decided how I'm going to make the burner. May opt to purchase one preassembled.

I made mine with an air pig from Princess Auto (what you yanks call Harbour Freight). Cheap, and thick steel, bit smaller than an old propane tank which also works well.
 
Getting ready to epoxy some scales. RTA knife kit:

15432897839_8d3fdbb8e8_b.jpg


Everything is fitted and scuffed and ready to go....gonna put kids to bed before I mix epoxy, tho. Used the drill to scuff up the pins. Stainless is a lot harder than brass....duh! Still, it seemed to work.

14999380433_9805af0f9e_b.jpg
 
go! go! go!
(I hoped you opened that stout with the sheath ON the birudashi! :D )

So that's why I can't find the end of my finger.....I thought it was the strong drink! (I think you would really like the Coffee Stout, BTW)

Just unclamped the bastid and gave it a little go on the grinder....those SS pins are going to suck.
 
15439836427_6036aaa75c_b.jpg


this BK14 is like a lab rat of mine. tried stripping the paint off then now its soaking in some expired apple cider vinegar while i will try out other mod on it in the future.
 
This looks like a knife forge, doesn't it?

DSC01718.JPG


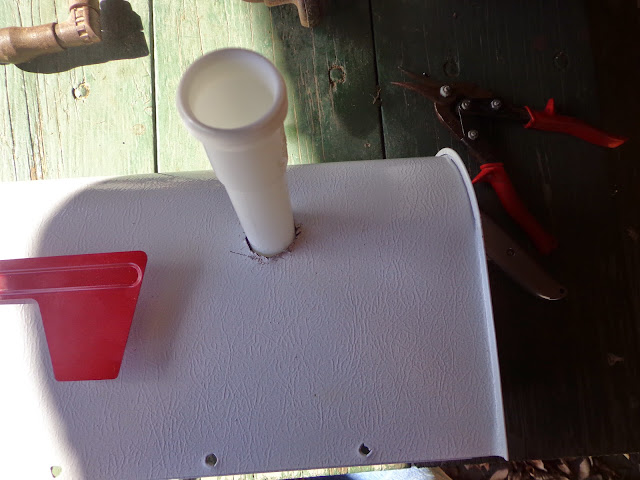
First things first, I needed to cut a hole in the side for my burner.

Right about there looks pretty good. I used a length of 3 inch pvc for my chamber. The mailbox is roughly 20" deep.

DSC01720.JPG


I couldn't find the chuck for the drill, so I used an old hand drill. Found a 1/4" bit and used tin snips to make a relatively round hole big enough for the burner tube to fit in.

DSC01721.JPG


Same thing on the back side. I cleaned it up a bit after this pic was taken, but neglected to get a photo of it.

DSC01722.JPG


This is the first tub of refractory cement I used. Mixed it up well and added enough water to make it a consistency close to pudding. This stuff is rated for temps up to 3000F.

DSC01724.JPG


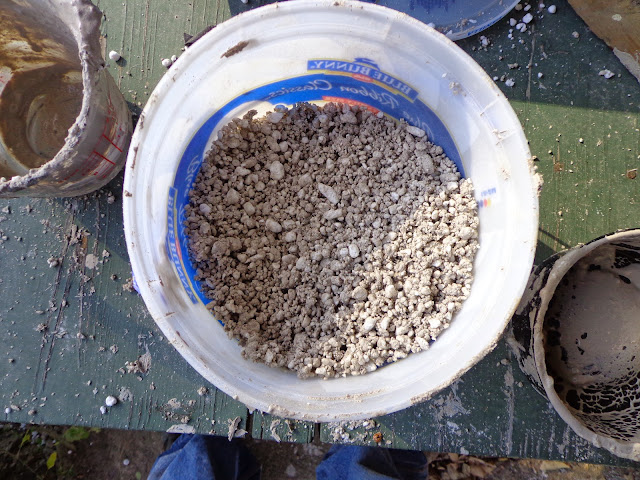
I read that the proper mixture is 4 parts perlite to 1 part cement. This is what it looked like mixed together.

DSC01725.JPG


I quickly ditched the tree branch in favor of an old broom handle to tamp the mixture. I did this between ever layer of refractory mix.

DSC01726.JPG


I quickly realized that I didn't have enough refractory cement, so I made a quick trip to the farm store to get a couple more tubs. When I opened it up I had lot more liquid separated from the medium and was much darker in color and softer in texture. Although they are the same brand and everything, they were bought from different stores, so we will see how it holds up.

This is it looks like now. Going to let it set up over night and yank the plastic out tomorrow.

DSC01728.JPG


After it sets up for a day or two I will mix up some more refractory cement and line the chamber and ends with it. I may have to put a couple inches of the perlite mix at the backside of the chamber so it doesn't melt it.:D

So far I have used about a gallon of refractory cement and roughly 4 gallons (2 bags) worth of perlite.
 
The mailman and delivery jokes are lining up in my brain already. ...that's pretty cool, CB. Really looking forward to seeing it in action. ...as are you, I'd imagine.
 
HAHA!! That is awesome CB!! The mailbox forge!

:D

The mailman and delivery jokes are lining up in my brain already. ...that's pretty cool, CB. Really looking forward to seeing it in action. ...as are you, I'd imagine.

Yeah man, I'm pretty stoked to beat some stuff into knife like objects.

A mailbox. That is simply brilliant. Hats off to you brother.

Thanks trade. It is the only thing I could think of that's deep enough without having to take a torch or welder to it.
 
Back
Top