-
The BladeForums.com 2024 Traditional Knife is available! Price is $250 ea (shipped within CONUS).
Order here: https://www.bladeforums.com/help/2024-traditional/ -
America has reached 250 years, and I am grateful to be here, in the best country in the world. Thank every one of you who helps make this country a better place, those who have gone before and risked it all, and those who've paid the ultimate price to make the United States what we are today.
Happy Birthday America! Let Freedom Ring for all time!
You are using an out of date browser. It may not display this or other websites correctly.
You should upgrade or use an alternative browser.
You should upgrade or use an alternative browser.
Beckerhead Knife Making and Modification Thread
- Thread starter granitestateofmind
- Start date
- Joined
- Oct 18, 2018
- Messages
- 9,125
Hurry up and get Your choppers out, or else I might commission you to print Me some handles.....Hahha.Thanks! Flexible filaments like you handled (TPU, TPE, etc) are 3d printing's best kept secret. A lot of the common materials are quite dissapointing for functional applications, but the flexibles are truly engineering grade. My handles are made from TPE and are like a hard rubber. Simliar to Busse's Res-C handles but slightly stiffer and less "tacky" feeling. I need to hurry up and get my line of choppers out because I feel like tons of people are going to copy my idea haha. Here's a durability test on the handles, no damage:
They look super cool!
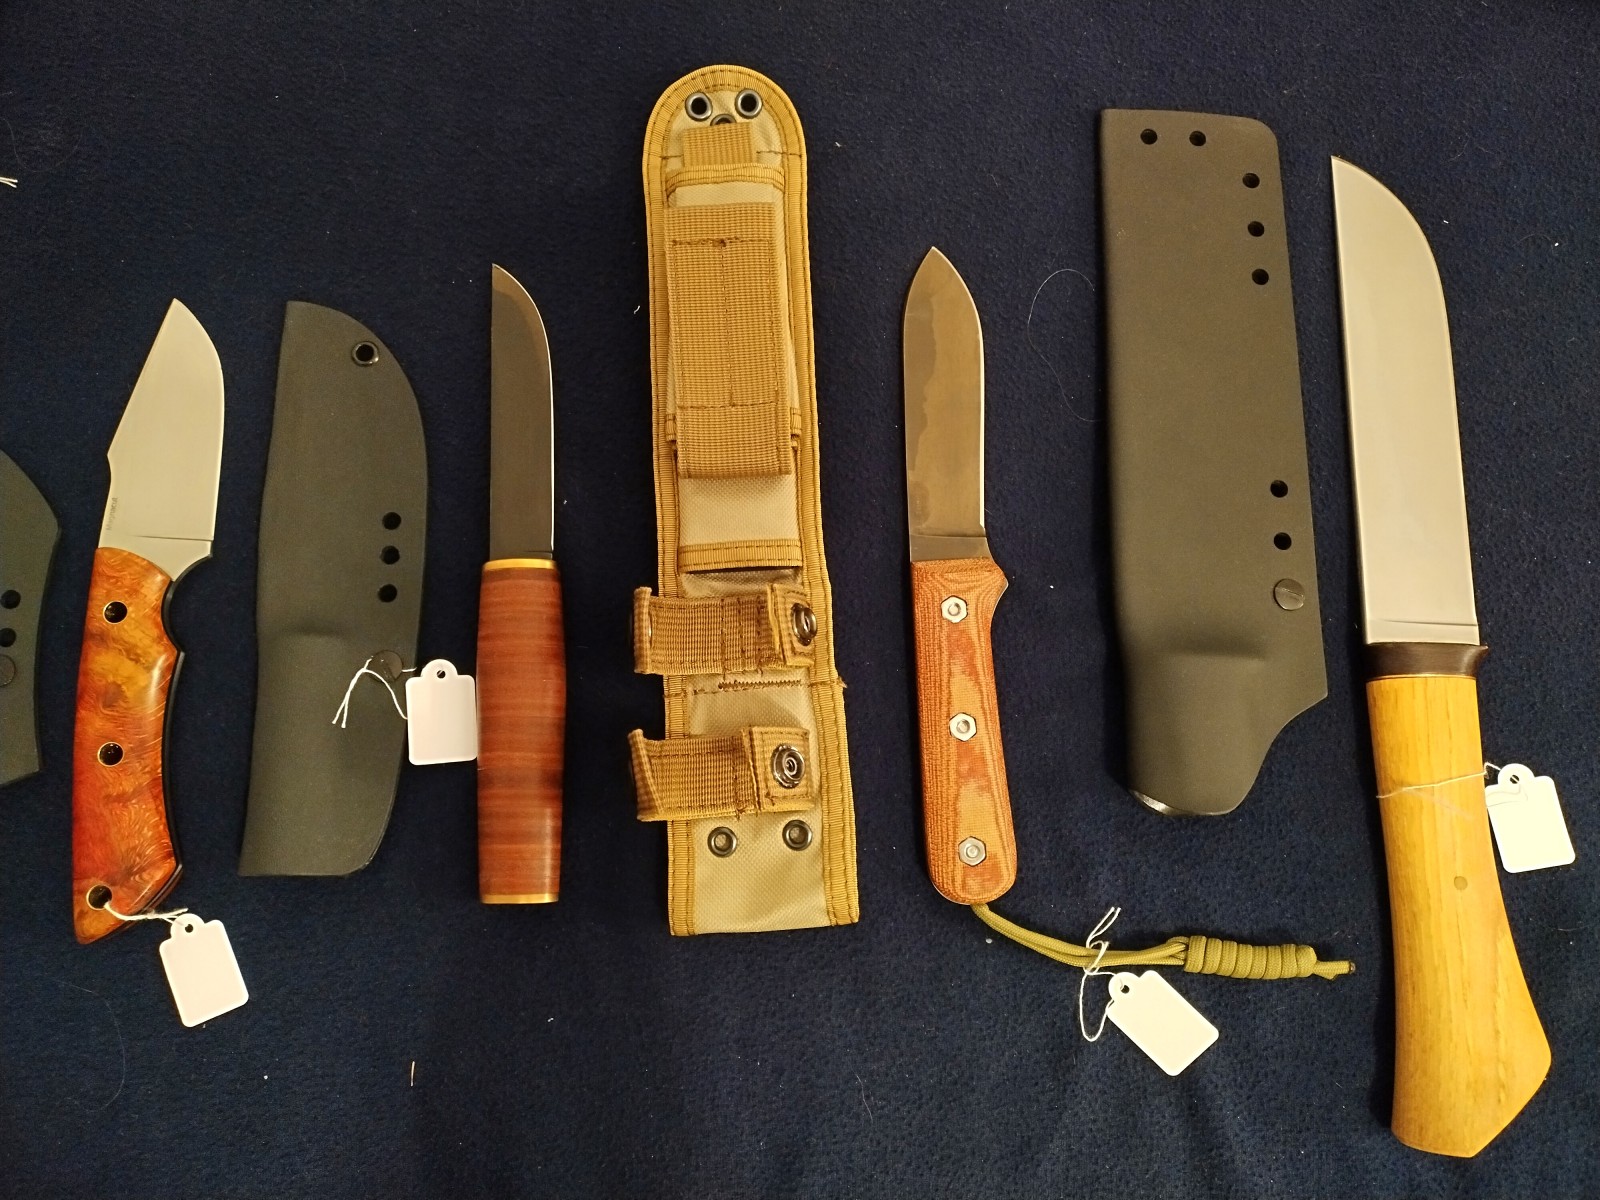
Lousy lighting in the "layout room", but here's a sample of what's going on the table this coming weekend:
Question on the BK-62 lanyard! How did you attach it?
Thanks!
- Joined
- Oct 18, 2018
- Messages
- 9,125
Been awhile since I played with any Actual Beckers.... This one always bugged me, idk what it's Supposed to be? So I gave it more identity.
Since I don't otherwise have anything 1/4" thick, and I've been jonesing for them to come out with a new design using the original scales ......
How about a modified sheepsfoot?
Yes, I'm keeping chisel.

Lately my personal EDC is a chisel grind, and I kinda like it. Might be Fun for a good Beater knife...... I'm calling it a "Hacking Knife". Like they use in the trades.....
Update: 3:00pm
Since I don't otherwise have anything 1/4" thick, and I've been jonesing for them to come out with a new design using the original scales ......
How about a modified sheepsfoot?
Yes, I'm keeping chisel.
Lately my personal EDC is a chisel grind, and I kinda like it. Might be Fun for a good Beater knife...... I'm calling it a "Hacking Knife". Like they use in the trades.....
Update: 3:00pm
Last edited:
daizee
Knifemaker / Craftsman / Service Provider
- Joined
- Dec 30, 2009
- Messages
- 11,194
P PlainsmanI’m pretty sure that not a BK62, that’s adaizee custom that uses official scales.
That's correct.
I drill a 1/4" (or is it 3/16?) hole through the tang between the butt and the rear-most bolt-hole. Then I drill a 1/4" hole directly into the butt-end of the scales, about 3/8"-1/2" deep, centered on the seam between the scales (bolted together in a drill vise - tricky operation!).
Then you can put in a lanyard with the scales off and bolt them on top of it, with each end coming out through the slot in each scale.
FWIW, you could do this with a production BK-62 by softening the butt with a torch so you can drill the hole. But dear FSM, please make sure you don't helicopter a sharp knife at your hands while doing that. (dull and/or tape the edge, use a stop on the table, clamp if you can, and drill with the LEFT side up so IF it breaks free it will spin spine-first)
- Joined
- Oct 18, 2018
- Messages
- 9,125
Not quite done yet.....
Still need to clean up my bevel (one bevel) and finish my edge, but it's just too Fun not to play with it early....
Ballance and weight feel so right.
This Should be a Thing.
Still need to clean up my bevel (one bevel) and finish my edge, but it's just too Fun not to play with it early....
Ballance and weight feel so right.
This Should be a Thing.
GeofS
“Nostra-bladus”
- Joined
- Mar 9, 2018
- Messages
- 4,046
Nicely done!Not quite done yet.....
Still need to clean up my bevel (one bevel) and finish my edge, but it's just too Fun not to play with it early....
Ballance and weight feel so right.
This Should be a Thing.
- Joined
- Oct 18, 2018
- Messages
- 9,125
Nicely done!
Thank You.
It's turning out better than expected.
Originally, I was going to do a seax or something
- Joined
- Nov 23, 2009
- Messages
- 1,106
Working on some large prototypes. Unfortunately I rubbed off some of the vinegar etch finish with my thumb as I was putting on the convex edge so I'm probably going to have to take off the rest of the finish. Otherwise they came out well and I just need to do some testing. Top 2 are .135" 8670 and bottom 3 are .12" 15N20. Roughly 18" blades on all.

daizee
Knifemaker / Craftsman / Service Provider
- Joined
- Dec 30, 2009
- Messages
- 11,194
oooOOOOOoooohhh!!Working on some large prototypes. Unfortunately I rubbed off some of the vinegar etch finish with my thumb as I was putting on the convex edge so I'm probably going to have to take off the rest of the finish. Otherwise they came out well and I just need to do some testing. Top 2 are .135" 8670 and bottom 3 are .12" 15N20. Roughly 18" blades on all.


daizee
Knifemaker / Craftsman / Service Provider
- Joined
- Dec 30, 2009
- Messages
- 11,194
Mangled a 1.25" ball bearing and added some birch bark to make it easier to hold onto
View attachment 2750392
that's not gonna roll at all anymore
(LOVE the BBark!)
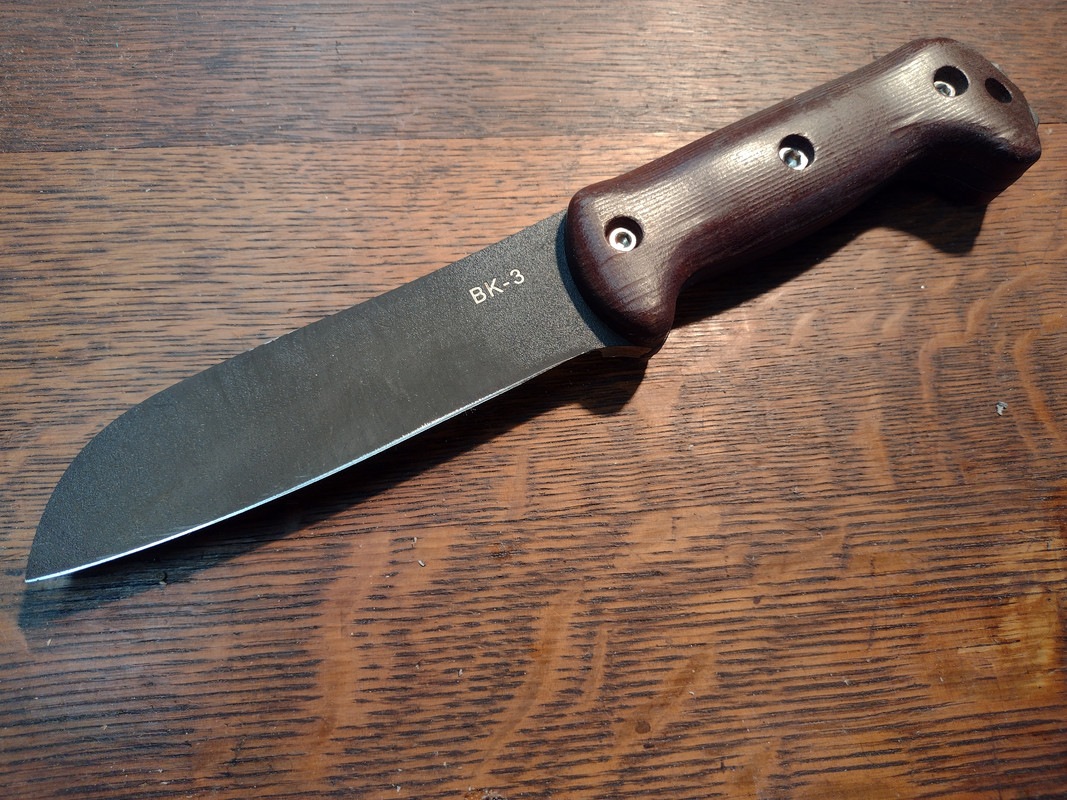
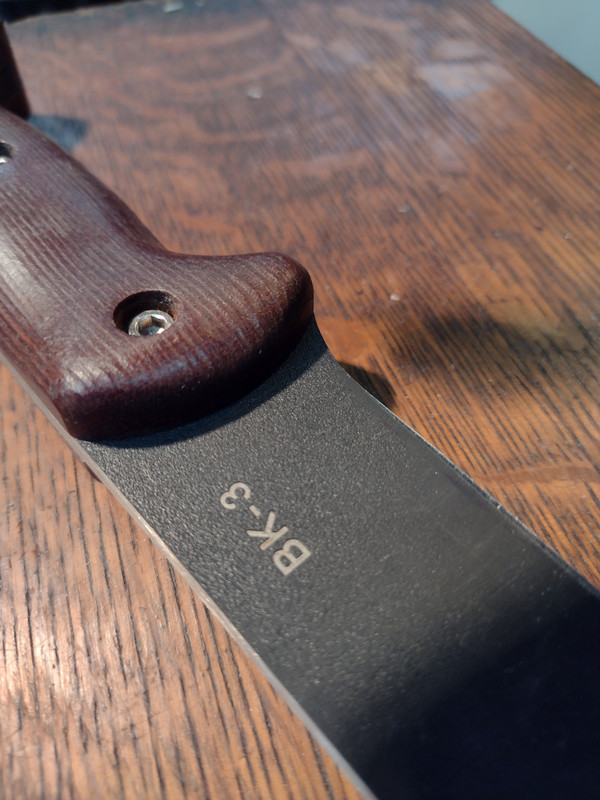
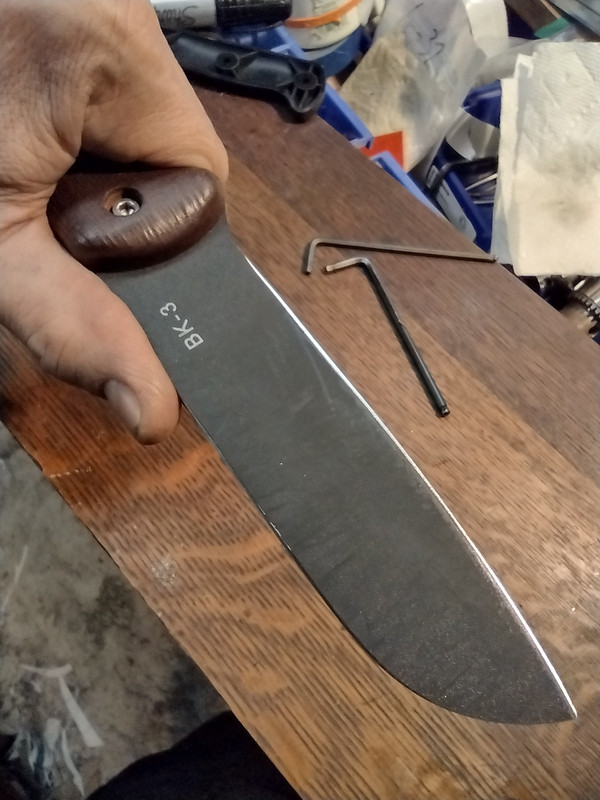
I am planning to customize my unstripped BK16 blade by having a professional laser etch a few small symbols for me. I have this question about the factory logo and model number laser etching. When these are etched, is the spot left completely vulnerable to water and rusting? Or does it have a protective light patina right from the factory? I’m wondering if I need to take extra steps to seal the new etchings or if they will be fine as is.
- Joined
- Nov 18, 2010
- Messages
- 6,118
Bro thats your blade shape, I just had an idea once, you made it happen. I appreciate the credit but its all you man, you made the thing work and happen. Love that knife though. You make it so so good.One that didn't make the website until after the show:
Ol'DerekH 's ever-popular blade shape:
https://www.bladeforums.com/threads/rigging-knife-in-magnacut-and-nautical-richlite.2010745/
daizee
Knifemaker / Craftsman / Service Provider
- Joined
- Dec 30, 2009
- Messages
- 11,194
Team effort deserves team credit.Bro thats your blade shape, I just had an idea once, you made it happen. I appreciate the credit but its all you man, you made the thing work and happen. Love that knife though. You make it so so good.
")
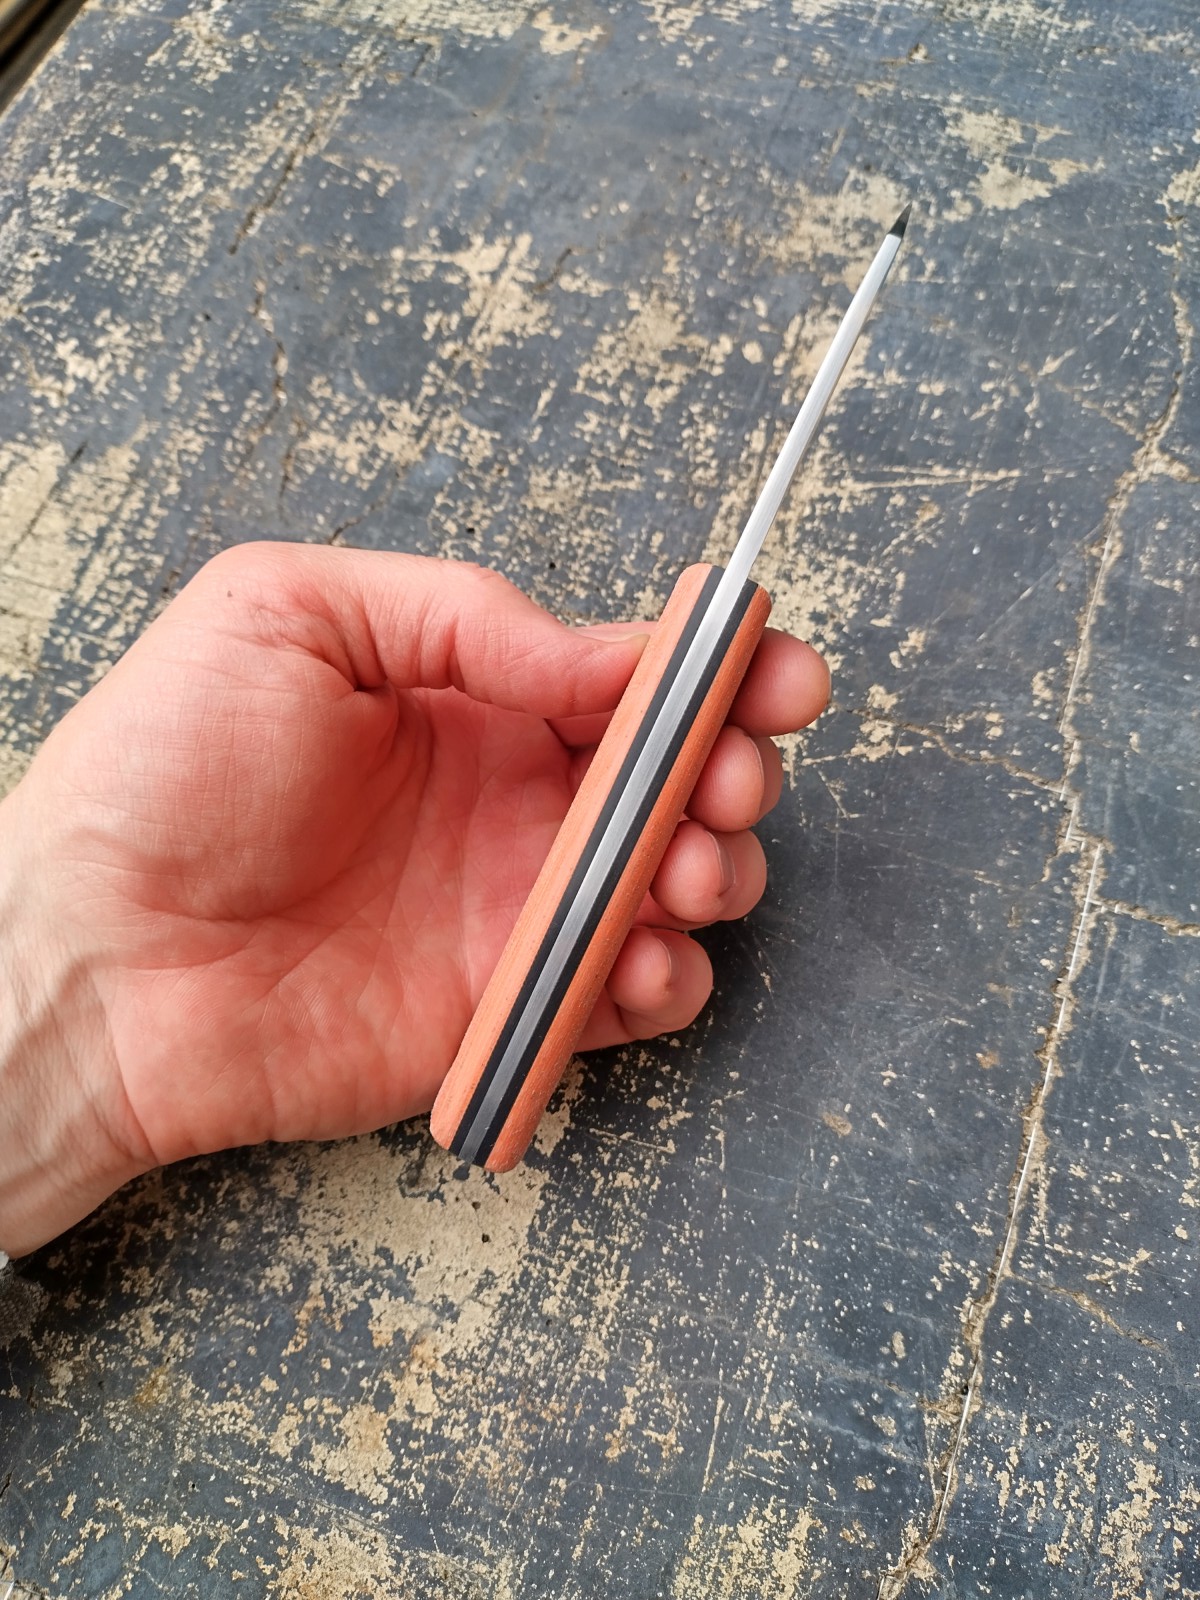
I still use a version of that original PDF you sent me, though in the near future I'm likely to adjust the handle shape on that and one more blade pattern "permanently", vs. a one-off. I'd like to get it a bit more here (tho this one's a bit overly thick, IMO):
1st piece off the bench in Magnacut is a 3" rigging knife.
Can't say I'm loving the dirty salmon TeroTuff, but the steel is blowing my mind:
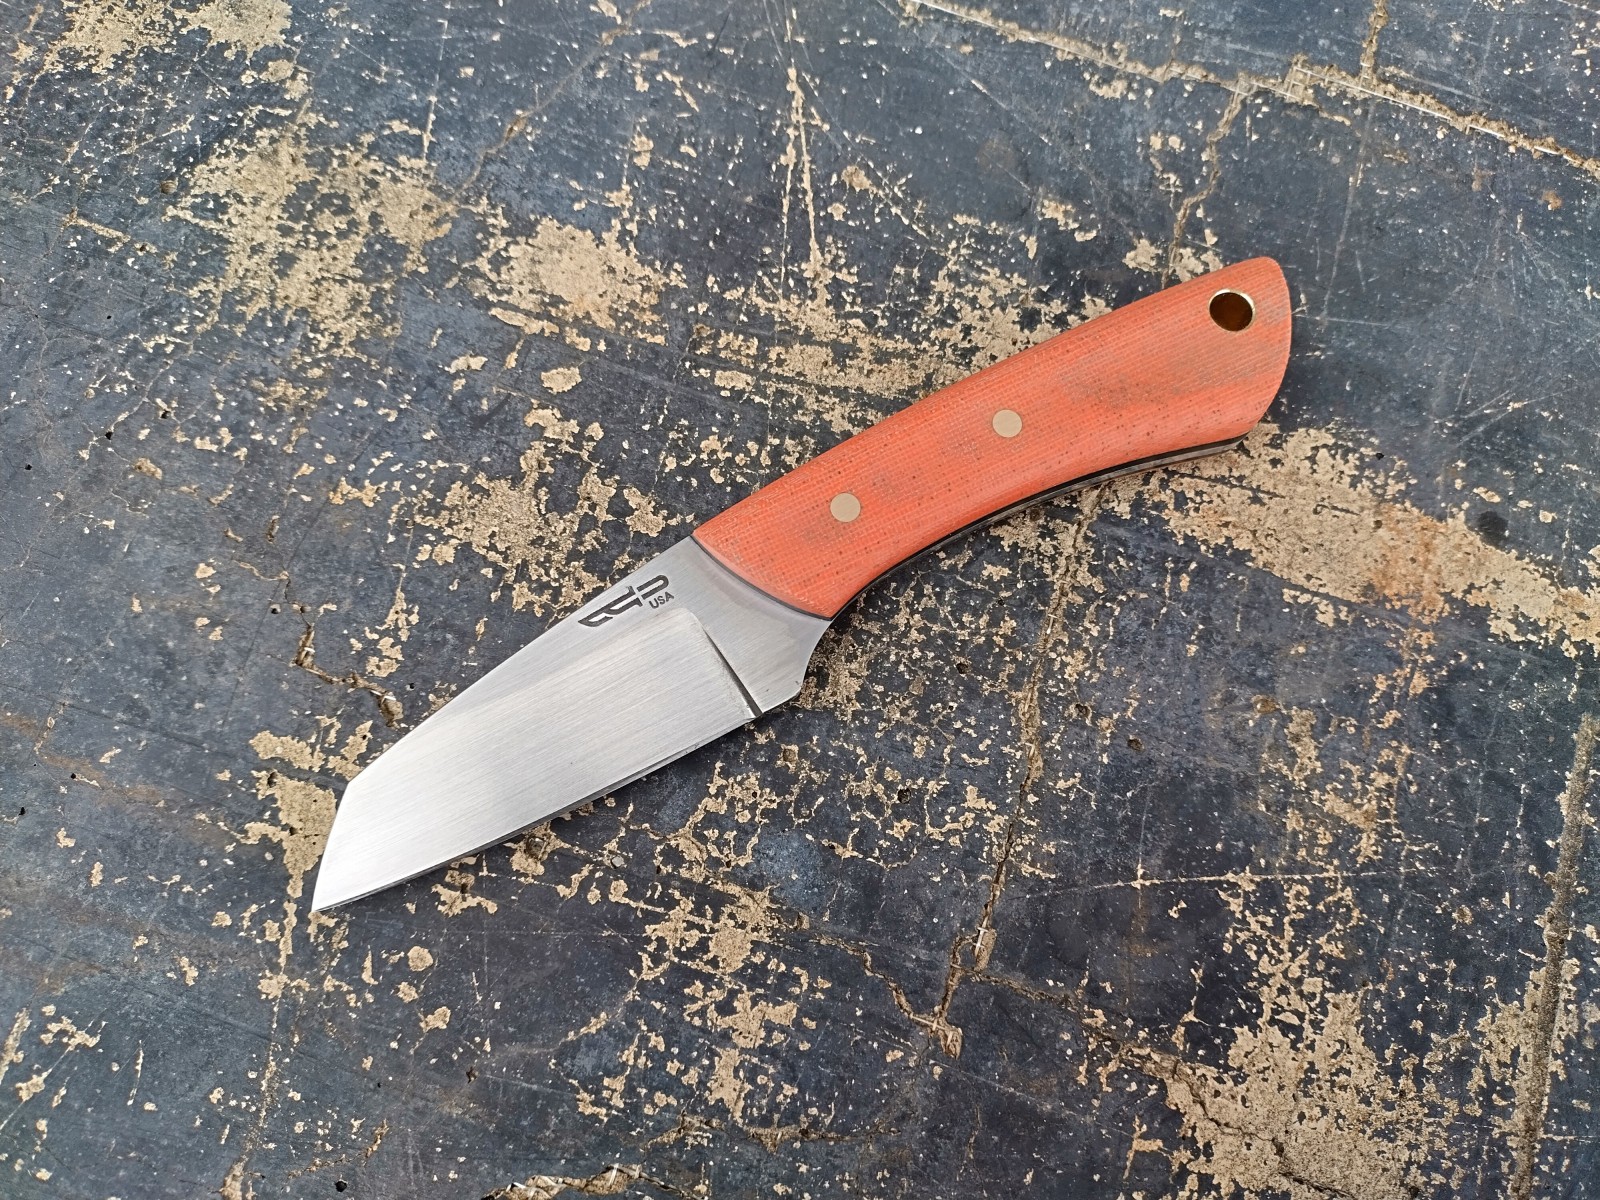
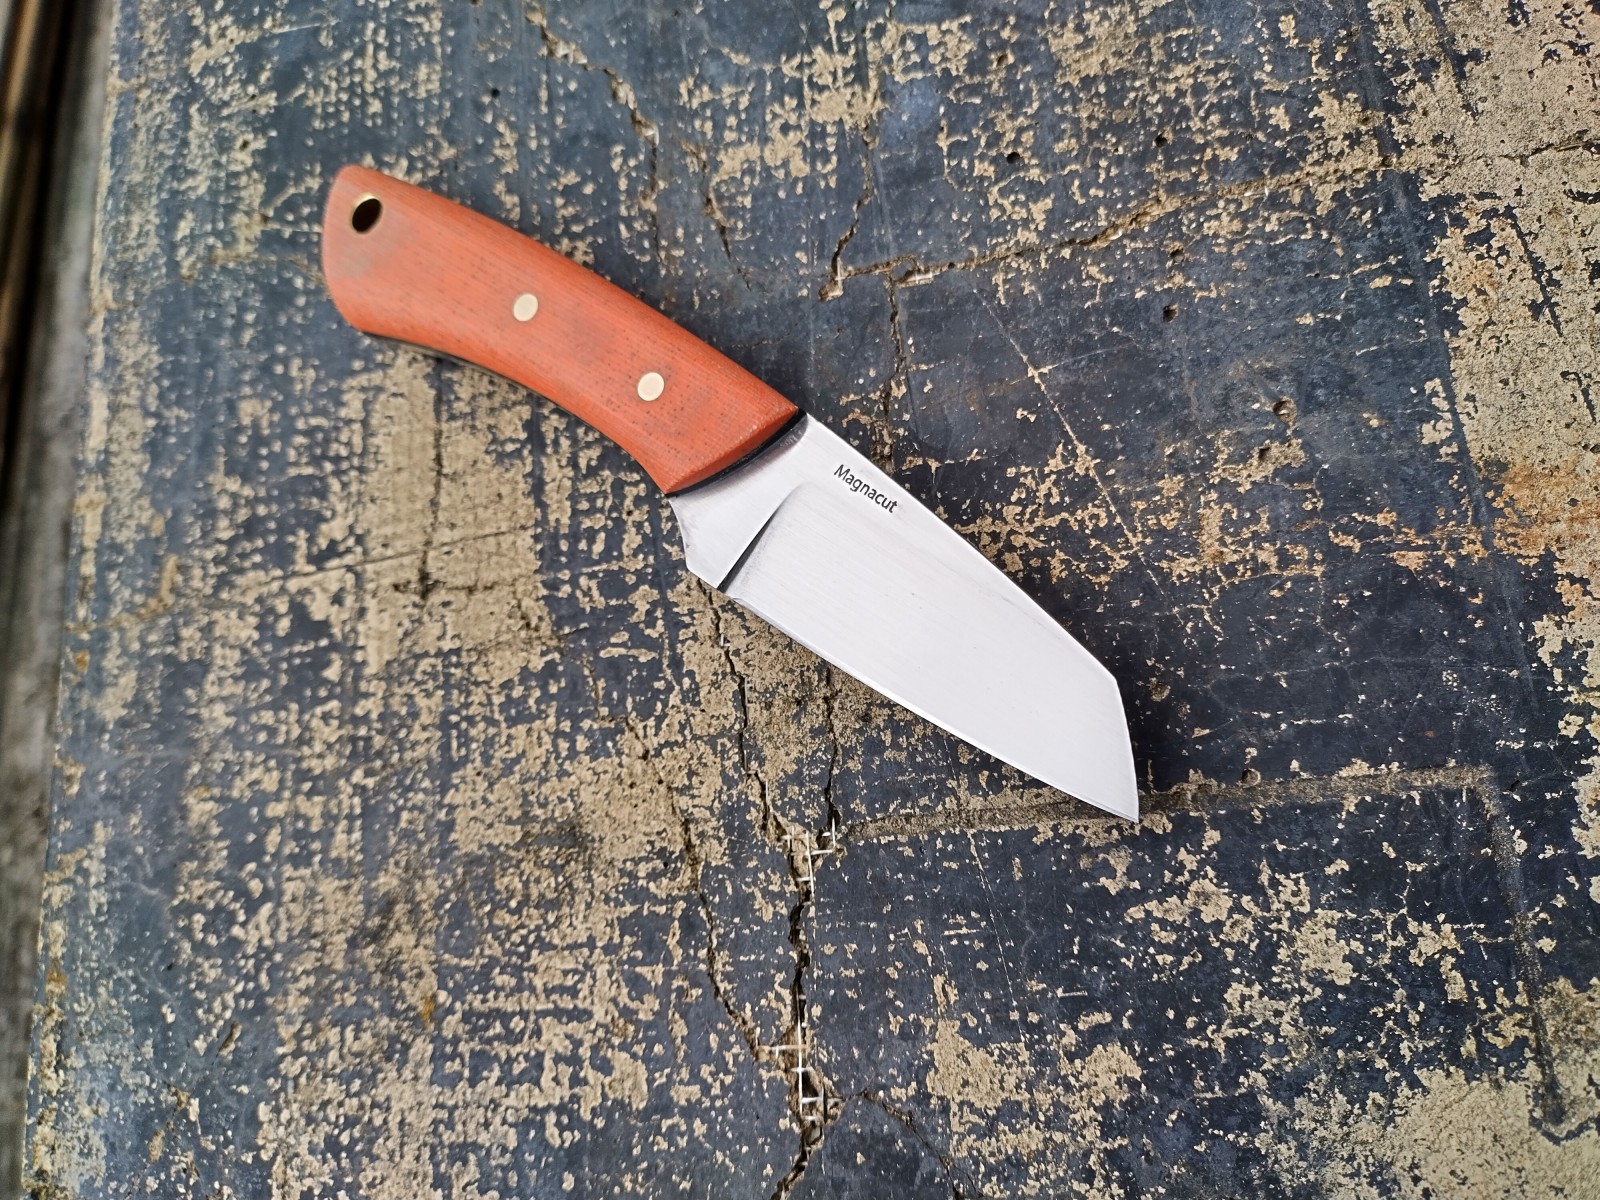
Can't say I'm loving the dirty salmon TeroTuff, but the steel is blowing my mind:
- daizee
- Replies: 2
- Forum: Knifemakers Gallery


