File guide issue? updated w/my solution

Deloid- I don't disagree at all. :) Actually reading my own words in your post made me cringe a little, as it sounds like I'm trying to remove the human element from my work... Which I'm not! I spend much more time at my handwork benches than anywhere else in the shop, and every once-in-a-great-while will build a small simple knife with only hand tools just for my own gratification...

But just as stevomiller mentioned, there's a certain amount of efficiency that I have to have to keep doing this stuff for a living... and I'd rather spend the "hand time" on sculpting the handle shape with files and sandpaper than spending that time filing the shoulders without a jig. ;) :)

So certainly no disagreement on my part. :)

Eric, I actually have pencil sketches of that same fixture, from my very first class with Mike! :) My only hangup with this style is getting the blade in there exactly how I want it. I think a fixture like that, with guide pins to make sure the clamping piece comes down square would be pretty foolproof.

Thanks guys :)
 
Here's what I use. Learned this from Mike Vagnino. Even with short ricasos it keeps very square. If needed slip in some shim stock at front of knife, it's a very quick process.

Why so big? Or is that a tiny knife? :) I can't imagine you'd need it to be much wider than 2"?
 
Why so big? Or is that a tiny knife? :) I can't imagine you'd need it to be much wider than 2"?

The bed of this fixture is 4" x 8". You need every bit of that 4" width when using with a large knife with a curved tang.

Nick, yes guide pins would most likely make this even more bomber but the two back rails don't let the clamping piece torque.
 
I make hidden tang knives only and have found this grinding and filing clamp can be used to grind shoulders. The clamp is only 1/2 inch wide, with the hex screw located at the center of the clamp, putting it at 1/4 inch from either side. I grind the tapered tang to its finished dimention except for the area right at the projected shoulder location. I then insert the blade in the clamp and with a new 120 grit belt installed, the shoulders can be ground in less than a minute. They turn out cleaner than the ones I used to do with a file.

After the sides are ground I clamp the blade in a vise leaving the clamp in place and finish the spine and edge sides with a safe bastard file letting the file ride along the clamping arms of the jig.

Fred

I would be happy to take pics of this in action if anyone is interested.

bubblejigmachine_jpg+020.jpg
 
Hi Fred

Sorry I missed this last part but I would love to see pics of what you are talking about if it's not too much trouble.
 
I have made a heavy set of file jigs that work quite well for me. My ricassos have just enough flat to allow the jig to sit flat against them. However I use a gage block shim under the far side to prevent the bowing that Nick was talking about. Though my jig will not bend in the short direction is will flex in the long axis. I will take some pictures later of the jigs and how I provide the stability needed.
 
My file guide is literally two pieces of full hard O-1 with holes and 1/4-20 bolts. I lay a straightedge across the flats, tighten the bolts and go, I use cheap 1/4-20 bolts so that when they bend to conform to the blade profile on some of my no-ricasso blades I just scrap them. Y'all are overthinking this one ;D

-page
 
Not overthinking it. Just have a lot different desired level of fit and finish than you are after. :)
 
Not overthinking it. Just have a lot different desired level of fit and finish than you are after. :)

Zing! You got me!:eek:

I have a high tech approach that I should have the prototype of done once my summer show season is over that should give me a level of fit and finish that even you would appreciate :p


-Page
 
Ha-ha! Nick makes better knives than Page!..... ha-ha!:p


Yes, I have been into the wine again... why do you ask?
 
No offense taken or intended, we're all in this together. For the sake of folks who don't realize how much we tease each other*, let's quantify this.
Not overthinking it. Just have a lot different desired level of fit and finish than you are after. :)

That's a bold statement. Prove it. I want to see sub-micron-level measurements of one your knives, and one of Page's. I'll submit one of mine for measurement and ask Rick to do the same. Not just guard-to-shoulder fit, but blade finish and consistency of edge thickness as well.

I'm entirely certain my work would come in dead last, but my point is that I suspect we're splitting frog's hairs here.

*y'all might be stunned at the number of non-makers and serious buyers who lurk here in ShopTalk, just to see who's up to what.
 
Last edited:
Geez James, now I'm gonna have to break out the good tools and the magnifying glasses. I suppose while I'm at it I should do a multibar composite Damascus blade too. Oh well, that'l give me something to show at Ashokan.

-Page
 
I'm a folder maker, not a fancy ass-distal tapered, fixed blade making guy, so here's what I came up with Nick.


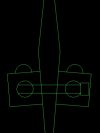
A different approach than I have seen here is to accept the taper, and build blocks with pivoting nuts.
They will match any taper within reason.
Carbide rounds instead of flats give you a plane.

Harder to make than the one earlier with the set screws though.

Nick.jpg
 
Steve Kelly offers one similar to this. He said it made his process much easier. The 2 points of contact reduce friction also so it cuts much faster. Hmmm I have never really looked very hard at this design. He has the rounds pressed into place and can be replaced as needed.
 
I was thinking along those lines too.

Just too lazy to spend that much time drawing...

Drill some long holes, then mill some of it away to make a captive slot for the carbide rounds.
Or mill a press fit slot.
Or glue them in a slot or vee with a glue you can remove later.
You could even use a screw plate on the outside to hold them in.

A million ways to skin that cat...
 
I just went and looked at Steve Kelley's guide.

That's just what I was talking about with the hole drilling!

Steve's should work even on knives with a distal taper, providing there is some flat ricasso and you have shims for the other side.
Gage pins come to mind.
A couple of gage pins in the side opposite the ricasso, of the same dimension as the ricasso, and you are in business.
Or some holes drilled and tapped like the Solidworks model posted earlier.
 
Thanks guys. :) Chuck, I remember seeing Steve's guide now that you jump started my memory... that is a great design! :)

Brian, thank you for the sketch and ideas. I THINK I get what you're thinking of here-- that's a totally different approach that I really want to explore. :cool:


As far as the fit and finish thoughts floating through this thread--- I gotta say I'm still pretty baffled by all of it. I mean, many of you guys seem to be very particular about the specifics of heat treating. So how would you take it if you came in here and posted a question about something quite specific like, "what effect will a 15 degree change in temperature of my Park 50 yield?" or "my salt bath seems to be overshooting temp by 10 degrees, how can I dial that back in?"

..........And you got responses like, "My heat treat set up is a propane torch and a bucket of lard. Y'all are overthinking this one. Keep it simple son!!!!" ???????????????????? :confused:
 
Back
Top