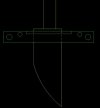
File guide issue? updated w/my solution

I'm going to keep doing everything I can to better my knives and further my knifemaking process until I'm the best knifemaker in the world! :eek:


I even bought a file guide, I just need to figure out what I'm going to use it on! :D
 
I use mine most often for cleaning and evening-up plunges. Of course, if I cheated and only ground one side of the blade, that wouldn't be necessary :D :p

I grind the tops too. :p

I'm always kidding around but I plan on using mine for the same thing, that and I want to use it as a guide to make shoulders for a guard. Wally Hayes has a Tactical Katana video where he makes great use of one, that is pretty much what I bought mine for.
 
I grind the tops too. :p
Wally Hayes has a Tactical Katana video where he makes great use of one, that is pretty much what I bought mine for.

Is there a picture of this one floating around? I saw Wally's shop video but he only displayed the big toys (nice shop!). Also...what guitar was he playing at the intro? It looks like a three pick up.
 
I actually think that the file guides have several fundamental flaws, alignment with the blade axis, indexing, repeatability, and parallelism are the beginnings of the issues. I am working on a system design that should deliver repeatably dimensioned tang shoulders but due to budget and time issues I am not anywhere near having it finished. File guides are a coarse attempt at a precision fit, they will get you in the ballpark, but the final fitting will still require magnification, focused light and Prussian Blue if you want to get it right, I want to reduce that work to cutting, broaching the guard, and having it fit with a few thousandths clearance right off

-Page

If you have the time can you discuss this a bit more or is this private? You got my attention with this.
Dean
 
The concept is simple, a collet that holds the blade rigidly aligned with physical indexing on all four sides that locks to an aligned bearing system that controls precisely its travel across a diamond cutter wheel. The devil is in the details. If I can get it to work I'll build one for myself and then sell plans, then someone will come up with a simpler version and . . . :)
Now I'm overthinking, but then again true precision is an interferance fit that has to be thermally assembled (chiled blade warmed guard)

-Page
 
Hello all, wow what a thread. I had to think a bit outside the clamp to follow this one. Apart from honing my skills with a good ol 0-1 clamp, I haven't thought about micron perfection. Learned much from all this input. I did not quote the member who mentioned the years of practice before your vision can start to become realized. So true- that's an encouragement. Keep on trucking. The best way I learn is through my failures. Thanks-Mark
 
Ha! I have the one Wally used in that video... "Sticky Fingers Ricky" That what he gets for turing his back on me in the shop.;)

:D too funny...

Is there a picture of this one floating around? I saw Wally's shop video but he only displayed the big toys (nice shop!). Also...what guitar was he playing at the intro? It looks like a three pick up.

Here is a link to a photo of the one I have http://www.usaknifemaker.com/file-guide-precision-p-1346.html

I need to watch the video again to see the guitar but I can't get my Paladin Press account to work. I need to fix that! I have a couple of katanas to make and he has some great tips.

I think it was a Stratocaster or maybe an Ibanez Strat style, not too sure.


Oh yeah, we were talking about file guides! Back to the regularly scheduled program. :D
 
Sorry for cluttering Nick's thread but I just got off the phone with Wally. The guitar in the video was a Strat American Classic as far as he can remember without looking at the video. And yes, my file guard is the one he used. It is very similar to the one from Tracy's site that Daniel posted.

file-guide-precision_MED.jpg
 
Brian- Always... my ricassos are short (usually about 1/4" - 5/16" or so), but always surface ground. It's the foundation of every knife I make. :)
 
The clamp I make is ugly; I have to admit. Its not shiny or square. But it does several things other clamps do not do. The Jaws align themselves as the clamp is tightened. It does this along both axis. I can clamp a 1/4" wide ricasso with parallel surfaces in its jaws and the jaws will stay aligned. Turning one hex screw to tighten the jaws will automatically grip the surface of the ricasso. Its because its sping loaded, so to speak. Its self aligning. The clamp does not bind as its tightened because of the looped end. The looped end keeps the jaws in alignment at all times. This clamp is only 1/2 inch wide which I believe is the reason it stays aligned on so narrow a ricasso.
I have not tried this with an extreme distal tapered blade, where the ricasso is included in the distal taper; the clamp surfaces do not go out of alignment. They stay parallel.

Sorry for posting and then getting of the thread, this interest me a great deal.

My clamp at first glance looks like it would be simple to make. But don't let its looks :barf: fool you. There is a great deal that goes into getting the jaws to align as the clamp is closed. One other thing, steel from 1/8 to 1/4 can be clamped in its jaws with the same alignment taking place.

So yes, my clamp wins the ugly award but it works like no other.

If any one wants to try making one I will gladly give you all the info I have.

Fred
 
Aw Hell Nick, that's a TON of space.

You just need to make a narrower version of what you posted in post #1 !

It does not even have to be smaller, it can be larger, BUT, your bolts need to be right at the edge.

I imagine you are getting your bind because your clamping pressure is over the taper, not over the parallel section.

Get that clamping pressure over your surface ground, parallel ricasso, and you should be golden.

You can then use however many guide pins you want, they don't have to be in line with your clamping pressure.
All they are really doing is keeping your carbide plates aligned as 1 plane.
 
I think the carbide plates may stick out to far to allow you to offset the bolts along the edge to solve the problem. If you are clamping a 1/4 wide ricasso the centerline of the bolts can't be more than a 1/4 inch from the surface of the carbide surfaces otherwise the same problem will exist.
Is there any play in the pin alignment set up?

Fred
 
So just inset the carbide a bit.
Easy, Peasy.

View attachment 273802

Should the carbide surfaces be flush, with the side of the clamp, minus a couple of thousands? If you inset the carbide, how can the hole for the bolt be drilled in the proper location, the carbide would be in the way? I've drilled about 600 of these clamps the center of the hole exactly 1/4 inch in from the edge of the clamp, installing a 1/4-20 hex bolt; the clamp is exactly 1/2 wide, that leaves 1/8 inch of material per side. The carbide surfaces would have to be flush with the side of the clamp for this to work. If its possible to get extremely thin carbide sheets it might be worth a shot. I don't think you can have less than 1/8 inch of steel at the side of the bolt. Won't work.
Fred
 
Perhaps I should clarify that drawing.
The 2 inner holes are 10-32 screws.
the 2 outer holes are 1/4" guide pins
The inset rectangle is the carbide.

Don't know if it'll work, because I am not 100% sure of how you use them.
I make folders, way less complicated...

Nick2.jpg
 
Last edited:
Never gave folders a try, looks way to complicated for me. I'm not joking I wouldn't know where to start. I just look at a Don Hanson folder and break out in a cold sweat.
Fred
 
Back
Top