First time making a knife WIP

Thanks for the tip Todd!! Thats smart thinking.

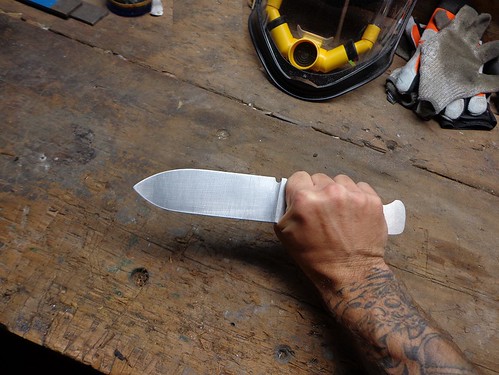
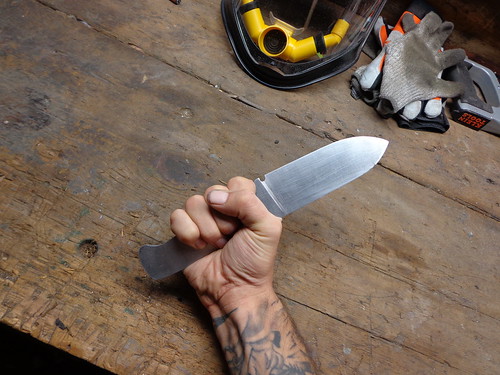
I thought about doing it that way when i was half way through the bevel on this side, not in case of spinning, but in case i screwed up lining the holes up or something, i wouldnt have spent HOURS filing a knife just to have a knife with a screwed up handle LMAO

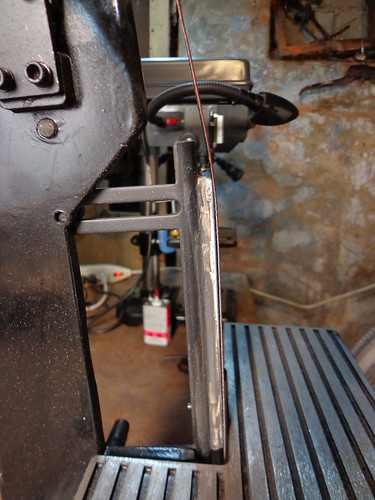
I did put a c-clamp on my drill press table, it doesnt hold anything down, its just there as a stop, in case something does start spinning it hits the clamp and doesnt keep spinning. This was a tip i got from Keffeler and has proved itself a couple times already LOL.
 
Another thing to think about is drilling the holes with the spine oriented towards you (handle left and blade right), so that if the knife should start spinning the sharp edge won't be coming at you. Just clamp it and rest the spine against the clamp body (so the bit is trying to push the spine into the clamp) and you should be good.

Looking forward to your progress, WW.
 
Been a bit busy here lately with fall cleaning, doctor appointments, and such but i have gotten the ceramic tile put on the platen...

15278463939_b1f6dd9ebc.jpg


And i got a couple bolts under the tile just in case...

15278644270_08caab832c.jpg


Im about 3/4ths of the way done filing the bevel on the 2nd side of knife #2 as well, just need to finish it off between a couple other things i have going on, but i hope to finish it in the next few days... Busy busy.

I been doing a little practicing acid etching (as a finish) with Ferric Chloride as well, Started with 1 part FC to 3 parts water, then tried 1 part FC to 1.5 parts water, I liked the second way better. I use a 0000 steel wool in between dips, dips for around 30 seconds then run under water and clean it up with the steel wool. Did 3 sets of dips and then neutralized with baking soda.

Also got in my new stencils from Tustech. 3 different sizes ranging from 3/8" up to 1/2", i got varying sizes so close together to figure out the smallest i could get it and still maintain the detail.

15279001208_9c30bc13fd.jpg


Havent taken a lot of pictures lately but i will for sure post more pictures as i finish the 2nd knife.
 
Finished filing the bevel. A little disappointed in myself for making a couple of bonehead mistakes. I used the clamp for something else and when i put it back on the knife wasnt in the same exact spot as before so i went past the plunge line a little and then tried evening it up on the other side.... I also attempted to try a more aggressive file and put some gouges in it that didnt want to come out... And well yea....

Anyways, i made some mistakes, learned some stuff and enjoyed doing it so i guess thats what counts! Its not a beautiful work of art or anything but im guessing when its done it "may" still cut stuff LMAO

15288726308_f00c5396dd.jpg


15288478639_28a6d7c0a5.jpg


Still need to drill the holes in the handle. Then send both knives off to be heat treated.

I got more steel in now so ill be doing a lot of practicing grinding bevels while these are gone to HT, once they are back ill attempt to make some handles for them and put on the final edges.

Thanks everyone for stopping by, giving tips, and showing interest in my journey!
 
Looks really good man, keep going!!!. I just started making knives myself. Started with a few fixed blade kits and have now jumped into the deep end and working on my 2nd flipper knife with bearings. So far so good but like you I have limited equipment to work with which makes it twice as difficult as it should be....I think....It's nice to see what others are working on and what they are using.. Looking for a benchtop mill and 2x72 grinder now.
 
Thank you!!

Sounds like your doing great! I have a couple of straight razor blanks i been thinking of turning into basic friction type folders, but that wont be anytime soon!
 
Just went down and drilled the holes for the handle pins and lanyard tube. Then smoothed out the ridges by hand with sandpaper and made sure the handle pins will fit snugly.

All ready to go the HT now.
 
Just went down and drilled the holes for the handle pins and lanyard tube. Then smoothed out the ridges by hand with sandpaper and made sure the handle pins will fit snugly.

All ready to go the HT now.

don't know if you already said it, but where are you sending for HT?

And make sure you lightly de-burr the holes you just drilled :).
 
don't know if you already said it, but where are you sending for HT?

And make sure you lightly de-burr the holes you just drilled :).

T.M.Hunt offered to do the HT on my first attempt knives. He does a lot of work with O1 and i have had the pleasure of using a couple items he has made and they work excellently.

Ill be using 52100 for a while after these 2 in O1 though and will be sending them to Peter's Heat treat. I had the awesome opportunity to meet Brad in August while getting certified for BladeSports, while there i got to check out the HT facility up in Meadville and they really seem to have the HT stuff down to a science.

I smoothed the holes out by hand with sandpaper... I also have a countersink bit but im a bit worried if i use it, it will make the pin loose in the hole, at the very least give the pins less to attach too. How do you de-burr the holes when pins will be in them?
 
Straight razor folders? I like the way you think!
 
Straight razor folders? I like the way you think!

Yessir! I got these blanks a while back, they are 52100 steel. I think with a little work they could make some half decent friction folders... At least that was the plan when i bought them LOL

14590852698_a2658f8e86.jpg
 
I smoothed the holes out by hand with sandpaper... I also have a countersink bit but im a bit worried if i use it, it will make the pin loose in the hole, at the very least give the pins less to attach too. How do you de-burr the holes when pins will be in them?

You don't want to countersink the hole but just remove the little ridge the drill bit makes. You can use something like this. http://www.amazon.com/General-Tools-Instruments-482-Deburring/dp/B00004T828
 
You don't want to countersink the hole but just remove the little ridge the drill bit makes. You can use something like this. http://www.amazon.com/General-Tools-Instruments-482-Deburring/dp/B00004T828

Interesting little tool.

@worldwood, I was just about to recommend peters heat treat. He did my entire batch of cpm154 blades (25 of them) for $134....now that was a good deal.

I usually just hit the holes with a countersink till the burr comes off, (about 0.010 only needs to come off in my experience), except for my folders, since reaming the holes usually produces no burr if done right.
 
This is awesome to see friend!

Thanks man! Havent seen you around in a while!

Hope all is well! If i remember correctly the misses was pregnant last we spoke?? did you have a boy or a girl? Im sure im late on it but congrats brother.
 
Back
Top