Modified Production Knives (traditional only)

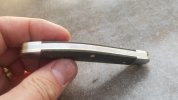
Hello, new to this thread, just had my love of slipjoints rekindled a while back. Was gifted a Rough Ryder Swayback from a forum member which is what got the ball rolling.
There is some fantastic work in this thread!
I’m no where near complete disassembly and re-assembly like you folks here.
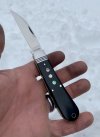
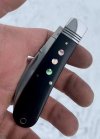
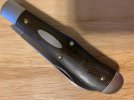
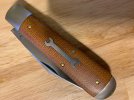
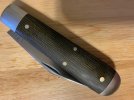
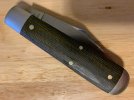
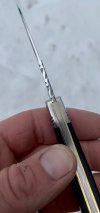
I did however decide to filework the spine, and crown it. Then decided to contour the covers, knock of the sharp edges, polish the bolsters, and try my hand at a MOP inlay.
Hope I am welcome around here (however sporadic it may be.)
22B34AE9-759D-426A-A70D-3B9468A34269.jpeg
A1D24D2F-758F-4F5E-B05B-A90A4B2CB128.jpeg
78C833C4-2145-4A8B-A42F-540CACC95232.jpeg
DD83A959-928F-4366-990E-E59F9EEDC35F.jpeg
(For those of you who are OCD and a perfectionist like myself, yes, unfortunately the middle MOP inlay is off by a hair. Really bugs me. Lol. Wont make me stop carrying tho. First time doing inlays, so overall I learned something and I’m pretty happy with the result.)

*I have also posted these pictures in the RR and related thread. Apologies to those who have to see them twice.
 
Last edited:
Hello, new to this thread, just had my love of slipjoints rekindled a while back. Was gifted a Rough Ryder Swayback from a forum member which is what got the ball rolling.
There is some fantastic work in this thread!
I’m no where near complete disassembly and re-assembly like you folks here.
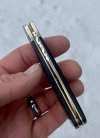
I did however decide to filework the spine, and crown it. Then decided to contour the covers, knock of the sharp edges, polish the bolsters, and try my hand at a MOP inlay.
Hope I am welcome around here (however sporadic it may be.)
View attachment 1261200
View attachment 1261201
View attachment 1261198
View attachment 1261199
(For those of you who are OCD and a perfectionist like myself, yes, unfortunately the middle MOP inlay is off by a hair. Really bugs me. Lol. Wont make me stop carrying tho. First time doing inlays, so overall I learned something and I’m pretty happy with the result.)

*I have also posted these pictures in the RR and related thread. Apologies to those who have to see them twice.
Welcome. It looks to me like the inlays follow the curve of the handle, and wouldn’t have noticed if you hadn’t mentioned it. Looks great
 
Welcome. It looks to me like the inlays follow the curve of the handle, and wouldn’t have noticed if you hadn’t mentioned it. Looks great

Thank you. This modification stuff is fun! And rewarding!
Thank you all for your kind words and acceptance. Hope to contribute to this thread more often. :)
 
Ok folks...btw, excellent job J jsdistin , I’m thinking I may try my hand at full disassembly and blade delete on a GEC. If any of you “in the know”, and willing to send me a PM on how to go about doing this, I would be in your debt. I would really like this one to come out well.
If you know of a link that explains how to do this...I will take that also/instead.
Thank you in advance...I have many questions.
Sharp & Fiery

Thank you, and I think you should ask in here and not over PM, there are as many ways of doing this as there are people that are posting in here, I think we use different but similar tools and methods and all of us can learn something.
 
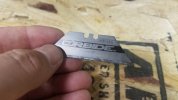
Sharp & Fiery Sharp & Fiery Invest in carbide razor blades. Slide it between the liner and blade and use a hammer to shear your pivot, back spring and rear frame pin. If the edge deforms do not reuse the blade. It'll scratch up your liner and spring. They are cheap enough on Amazon so get a bunch of them. @Jfowl31 tought me this trick. ;)
20200108_143229.jpg
 
That's how I used to do it, only with my spring loaded center punch on a soft wood board with a hole in it. The carbide blades were a revelation!!! :thumbsup::D
I’ve done it that way a few times but still preferred tapping out the pins. Solid pin punch though and yes soft wood for sure. If it’s a blade delete you can re-use the original pins so the pull a fit remains the same.
 
I’ve done it that way a few times but still preferred tapping out the pins. Solid pin punch though and yes soft wood for sure. If it’s a blade delete you can re-use the original pins so the pull a fit remains the same.

I would prefer to go this way as well...punch out the pins...is there a correct side to punch from? Would i need shims between the blade and liners?
 
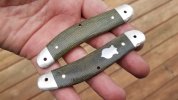
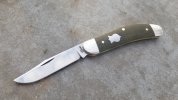
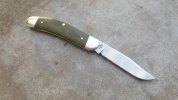
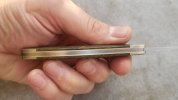
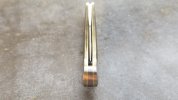
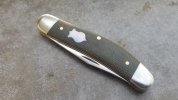
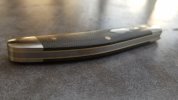
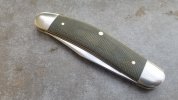
Just finished up. Case CV Sowbelly dressed in green canvas micarta. Pinned shield. Contoured the stock flat bolsters. Backspring is flushed in the open and closed position. She came out hot and perfect if I do say so myself! :cool: Video also posted to my IG page.
20200108_155828.jpg

20200108_155844.jpg

20200108_155859.jpg

20200108_155927.jpg

20200108_155942.jpg

20200108_155955.jpg

20200108_160008.jpg

20200108_160017.jpg
 
Just finished up. Case CV Sowbelly dressed in green canvas micarta. Pinned shield. Contoured the stock flat bolsters. Backspring is flushed in the open and closed position. She came out hot and perfect if I do say so myself! :cool: Video also posted to my IG page.
View attachment 1261728
View attachment 1261719

View attachment 1261720

View attachment 1261722

View attachment 1261723

View attachment 1261724

View attachment 1261725

View attachment 1261726
Nice
Do you have to grind off the peened portion of the pin before tapping them out?
It invariably works out better if you do, I’ve generally used a drill press or a dremel bit. I’ll post pics of the dremel bit later, that’s my current preferred way. If you don’t have a good way too and it’s a flat sanded pin it’s not absolutely necessary but the risk of breaking the scale is increased substantially.

I would prefer to go this way as well...punch out the pins...is there a correct side to punch from? Would i need shims between the blade and liners?
I’ll post a detailed description with pics later. There’s also times when the way that Signalprick Signalprick does it is the best way. That’s what’s fun about it there’s different ways to do things depending on the tools you have and the unique problems of the current project.
 
Just finished up. Case CV Sowbelly dressed in green canvas micarta. Pinned shield. Contoured the stock flat bolsters. Backspring is flushed in the open and closed position. She came out hot and perfect if I do say so myself! :cool: Video also posted to my IG page.
View attachment 1261728

View attachment 1261719

View attachment 1261720

View attachment 1261722

View attachment 1261723

View attachment 1261724

View attachment 1261725

View attachment 1261726
I really like this one! Well done.
 
Just finished up. Case CV Sowbelly dressed in green canvas micarta. Pinned shield. Contoured the stock flat bolsters. Backspring is flushed in the open and closed position. She came out hot and perfect if I do say so myself! :cool: Video also posted to my IG page.
View attachment 1261728

View attachment 1261719

View attachment 1261720

View attachment 1261722

View attachment 1261723

View attachment 1261724

View attachment 1261725

View attachment 1261726

- skilful, very nicely done indeed :thumbsup:
 
Back
Top