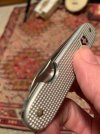
Modified Production Knives (traditional only)

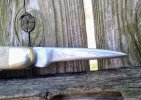
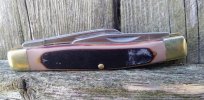
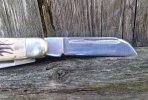
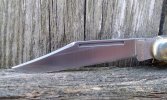
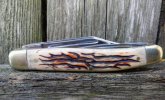
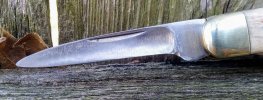
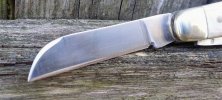
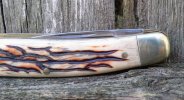
My latest mod, another pen to coping blade, this time on a stag #44.

Before and after shots, with some obvious difference in lighting! :eek:
xWoji0p.jpg

SLImmA9.jpg
 
So I already fixed the clip point blade but didn't do before and after. Now I'll show the skinner blade
pl0vPwp.jpg

As you can see it's not where it needs to be in the open position. This shows it a little better with the clip point as a reference.
o6szIum.jpg

So out comes the masking tape and the file.
02tTyW7.jpg


Checking the cant
oTdsFMO.jpg


Getting close
dVd0euw.jpg


And finally.
5f0zwbT.jpg


I'm sure Case could have adjusted this for me but it didn't take that long to file down the spring. It's definitely my knife now.

Sorry for digging up an old post, but I wondered if you could elaborate a little; You are filling the end/tip of the spring?

I've wondered if this fix was possible, to my mind any fitting would have to be done to both spring and tang, and on more than one mating surface to avoid loosening the fit/losing tension. And couldn't be done assembled.

Would love to know for sure where to file, save me a lot of trouble/work!
 
Had this congress out for a look yesterday, and remebered yet afain that i need to fix it. Little time to kill later and I took it to the shop, finally got it done! Only been 2.5 years since I bought it and that it's been bugging me.... ha!

Before;

2018-11-18-01-05-14.jpg


After;

2018-11-18-01-05-38.jpg


2018-11-18-01-06-05.jpg


Dropped the kicks on the coping and large sheep's foot blade. Then cropped the coping blade tip down even with the spine of the sheep's foot. Had a angular coping, then a semi lambsfoot, but liked the look of a sheep's foot the most so I went with that.

MUCH more comfortable to hold now, and looks better ta'boot! They now sit at about the same level as the two spear/pen blades.

It also needs two more access notches in the liners/bone for the two long blades cut in, like were provided for the smaller ones. But as is, I can open them OK for now.

I love the look and concept of this knife and it's blades, but never carry it much... It just never really "clicked" for me. Hopefully now that I've made it more comfortable to hold/use, that will change, and I will carry it more.
 
Sorry for digging up an old post, but I wondered if you could elaborate a little; You are filling the end/tip of the spring?

I've wondered if this fix was possible, to my mind any fitting would have to be done to both spring and tang, and on more than one mating surface to avoid loosening the fit/losing tension. And couldn't be done assembled.

Would love to know for sure where to file, save me a lot of trouble/work!
I just filed the top of the springs. Now when the blade is open the spring is sunken. It's not a perfect fix but it's functional and it still has all the security a slip joint can have. It's still got the same tension it had before.
8DtS9SR.jpg

Pf9toIY.jpg
 
1122181330.jpg 1122181334.jpg 1122181333a.jpg 1122181332a.jpg 1122181331b.jpg 1122181331.jpg 1122181330a.jpg 1122181333.jpg 1122181331a.jpg 1122181332.jpg
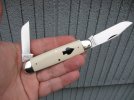
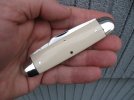
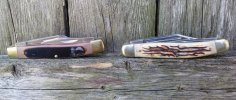
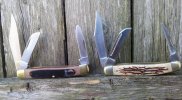
Taylor Schrade 885, the 8OT is for comparison as their the same pattern just different covers. I bought this one then the covers was to unrealistic and cheap looking for me to leave alone. So I started by doing a rounding off of the covers, then decided to make the bolsters more round to. The covers I left some scratches in for now, they've been sanded to 1500 grit. I think they make the fake stag a bit more realistic and well used looking. Then I got the idea to add a swedge to the main. I already had to do some blade work because of rounding the bolsters left the tang shoulders proud when open. Well I liked the swedge on the main, decided to swedge the sheepsfoot. Then not satisfied to leave it at that, lets go ahead and make it a long pull. I got carried away and made the long pull a tad longer than I had intended. Now that's done lets drop the kicks I think, so I did that just a tad. Then came the biggest idea, lets turn that big 'ol spey blade into a punch! After regrinding that into shape, I ground the kick so it'd drop way down into the frame. Its not perfect, but it was all done free hand with a dremel and sand paper and a file.
 
As I touched on in the Congress thread, I've modified my Case again. Couldn't stand the funky spear/drop point large blade, so I clipped it.

Had it perfect and decided to touch it up a tad... Yeah, then had to fix the over touch and lost 3/8" of blade... lol.

So I have a medium to short clip blade. Still infinitely more useful to me than the funky spear.

Actually turned out better, since completely re-grinding the tip meant I could raise the tip a bit.


2019-01-29-04.14.48.jpg


2019-01-29-04.14.23.jpg


But anyway, I end with 3 different blade styles, plus 1 duplicate. Largesheepsfoot, small sheepsfoot, pen, andclip.

2019-01-29-04.13.43.jpg


And then, after I had dropped the kicks and lowered blades a few months ago, the pulls were covered on the two big blades at the tips, and hard to access toward their bases. Added 2 more of the easy open/nail access notches like the ones it had for the pen/coping blades.

2019-01-29-04.15.13.jpg


2019-01-29-04.15.51.jpg


Now all blades sit sunk low for comfortable grip, all open easy, and all are a profile I can use. Will see how she works out to carry now.
 
@flatblackcapo did this mod a while back to a 4 blade Rough Rider stockman, then a Rough Rider sowbelly. Made me think at the time, I never use the spey on my '47 stockman, I could do it too.

Then I got this fancy '18 recently, and had the same idea... Wasn't sure if the thin blade would end up too weak, and flexy. Then I noticed it's blades and the '47s are the same stock thickness.. either way it'd be thin.

Thought I could try it on my older '18, but if I'm going to be carrying one it'll probably be the newer one for a while... So I decided to heck with it, what the hell, why not. :D

What the heck am I talking about?
Making an awl/punch out of the spey blade!

Before, after, and both knives for side by side comparison.

2019-01-3121.52.43.jpg


It was easy, and worked great! Not my smoothest bevel grind ever, but it's hard for me to free hand a chisel grind-- not used to the deeper angle. But it'll work! (and does, I tried it!)

Turned out to be very stiff too, it's thin stock, but short and narrow, it has no flex like I was worried about. Should be fine.
 
Two more...

Yes, I'm on a roll lately. Lots of free time to kill in the shop in between other projects, and little things like this happen.

Took the top hump/bump off the spey on my '47 stockman. No real useful gain here, just asthetics. Im not likely to ever need the hump there for its intended use, so now its simply a wide somewhat blunt spear point.

Before and after;

2019-01-3119.19.49.jpg


2019-01-3119.17.33.jpg


And then I did a mod I'd intended to do when I bought the knife recently.

Some of you will know of my search for the "perfect" pocket knife.( A 3.375" to 3.625" stockman frame, 2 blades at opposite ends, a clip point, and sheepsfoot. That's affordable...)

This is my most recent acquisition on that concept, a Rough Rider half stockman. 3.25", clip and spey.

2019-01-24-09.58.05.jpg


Turned out to be a very slim, trim knife, both blades on one spring, and extremely thin bkade stock. Call it a gentlemans version of what I'm after. -- A touch too thin and light for my tastes, but not a problem, just not what I'm after.

Anyway, needed to bob the spey into a sheepsfoot.

Before and after;

2019-01-3119.19.30.jpg


2019-01-3119.17.09.jpg


Gives me my perfect arrangement, in a light slim Sunday go to meeting knife. :)
 
GEC 72 spear - February 2017 showing patina
oPJgonj.jpg


February 2018 made into a clip blade
Eq1rLa0.jpg


February 2019 wanted a Buck 112 without a nail nic, couldn't find one at a reasonable price, decided to make my own
RXOo1zR.jpg


4b8y04Z.jpg


q9wCND3.jpg

helps to keep cabin fever at bay, February in MI. can be rough ;):)
 
Back
Top