Whacha Been Up To......

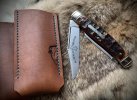
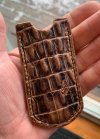
A few slip projects. Already started on my biggest sheath project to date!

This is for the Waynorth City Stock 81
A4390DA8-4CFC-4315-A029-701251D97E18.jpeg

These are for the Rexford RUT (2 styles. One for carry with fob on RUT and one for carry without fob on RUT.
755B298B-DA9D-4122-A378-E10A269DB251.jpeg

This is for the Buck 501 (Larrin) with about 3/4” of the knife sticking above.
AE4A39A6-E12E-44C0-8FFD-83B376CB6679.jpeg
 
You did a very nice job on that sheath. Stitching and tooling all done very well!
I am curious what you used on your edges. The picture that shows one is a bit blurred.
Randy
So far I've only used beeswax on the edges, and it seems to work fine for me. What do you use?
 
So far I've only used beeswax on the edges, and it seems to work fine for me. What do you use?

I'm having a struggle on this very matter. I like natural leather and neatsfoot oil. I'm finding if I tokonole the edges it prevents oil from absorbing. Considering how many leather balm darken the leather... the idea of the edges not saturating in the same way bothers me, so I'm now using something wax based (snoseal) but it doesn't get as shiny.
 
So far I've only used beeswax on the edges, and it seems to work fine for me. What do you use?
It varies with the leather but mostly, I just use water and glycerin saddle soap. Edge the leather, get it damp, not soaked, rub with the glycerin and rub with my various tools for smoothing it out. When dry, I generally coat with Resolene, wait for it to dry, rub with my bees wax, oil blend and burnish. It only works with veg tan leather. Here is an example of what it it looks like when finished.
Randy
 

Attachments

  • Folder Sheath Edge.JPG
    Folder Sheath Edge.JPG
    91.2 KB · Views: 10
It varies with the leather but mostly, I just use water and glycerin saddle soap. Edge the leather, get it damp, not soaked, rub with the glycerin and rub with my various tools for smoothing it out. When dry, I generally coat with Resolene, wait for it to dry, rub with my bees wax, oil blend and burnish. It only works with veg tan leather. Here is an example of what it it looks like when finished.
Randy
Thanks for sharing! I'll have to try that
 
Simple but tricky to make it work correctly. I’m known for making adapters for existing sheaths and this one needed something to make it carry better, for me at least. As the clip it came with had the handle of the knife too high to carry comfortably.
So I start by using a shop paper towel to make an approximate shape so I could use it to cut out the leather and then I will trim, and shape as needed for the final piece. Then get one hole in and then wrap the leather around tightly so as to mark the back side through the first hole so it will line up. And same with the second hole.

The knife is a Kizer Deckhand

Untitled by GaryWGraley, on Flickr

It does have a large sharpening choil that I wish it didn't, eats up too much edge and also things catch on that sharp pointed corner, so I made it more of a ramp and angled the access upward so things don't catch quite as hard as before, it's better but marginally so.


The bobtail fob aids in drawing the knife, it has what's called a Wide Diamond knot which is also a tricky thing to tie.

Untitled by GaryWGraley, on Flickr

The belt loop folds down and I skived the leather to blend it in and glued in place, there isn't any pressure or tension at this joining so it really doesn't need any stitching, it ain't going anywhere.

Untitled by GaryWGraley, on Flickr

Felt odd marking the new year, but, I couldn't make 2024 last any longer ;)

Untitled by GaryWGraley, on Flickr

So, like I said, simple but tricky, kinda like leather origami. This now carries a lot easier over my right back pocket, easy to access and being kydex guiding the tip of the knife into the sheath is also fairly intuitive.

Welcome to 2025 folks
G2

edited to add one other bit that I modified on the sheath, there wasn't a good way to thumb break the knife out of the sheath as the kydex was made with a sloping section that your thumb would just slide up and over.

Untitled by GaryWGraley, on Flickr

so I cut it down straight so at least you have a small wall to brace your thumb against in order to get the knife to be drawn easier.

Untitled by GaryWGraley, on Flickr
 
Last edited:
RYZPzNu.png

Tried a little texturing with some stamps I made, I think it turned out well
 
A few slip projects. Already started on my biggest sheath project to date!

This is for the Waynorth City Stock 81
View attachment 2756058

These are for the Rexford RUT (2 styles. One for carry with fob on RUT and one for carry without fob on RUT.
View attachment 2756059

This is for the Buck 501 (Larrin) with about 3/4” of the knife sticking above.
View attachment 2756060
Just clean! Very clean!

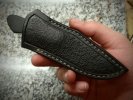
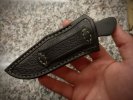
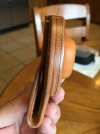
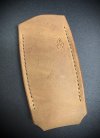
This one is probably the best sheath I've made yet. I made it for a small EDC I finished a few days ago. Any comments to improve my work are appreciated.View attachment 2756455View attachment 2756456View attachment 2756457
Very nice, really nice in fact. Just a couple lil things. Did ya bevel your border cut? On the upper right corner(of the throat of the sheath). first pic. You've got just a hair of an over cut on the border. When cutting to a corner I like to stop about a 1/16" to an 1/8" from the corner and then put the corner of your swivel knife in the the corner of your pattern and cut back that lil distance to the cut. That really helps with cutting over accidentally. Hope I explained it well. Nice work.
It varies with the leather but mostly, I just use water and glycerin saddle soap. Edge the leather, get it damp, not soaked, rub with the glycerin and rub with my various tools for smoothing it out. When dry, I generally coat with Resolene, wait for it to dry, rub with my bees wax, oil blend and burnish. It only works with veg tan leather. Here is an example of what it it looks like when finished.
Randy
My process is similar but I've moved away from the glycerin and use paraffin. It just works better for me. Mrs Horsewright uses the saddle soap though and that is the recommendation of the Leather Machine Co, as we use their power finisher. I think the finish over the edge after burnishing is really an important step that many folks skip. If I've rubbers an edge it gets two coats of Bag Kote after rubbing.
Simple but tricky to make it work correctly. I’m known for making adapters for existing sheaths and this one needed something to make it carry better, for me at least. As the clip it came with had the handle of the knife too high to carry comfortably.
So I start by using a shop paper towel to make an approximate shape so I could use it to cut out the leather and then I will trim, and shape as needed for the final piece. Then get one hole in and then wrap the leather around tightly so as to mark the back side through the first hole so it will line up. And same with the second hole.

The knife is a Kizer Deckhand

Untitled by GaryWGraley, on Flickr

It does have a large sharpening choil that I wish it didn't, eats up too much edge and also things catch on that sharp pointed corner, so I made it more of a ramp and angled the access upward so things don't catch quite as hard as before, it's better but marginally so.


The bobtail fob aids in drawing the knife, it has what's called a Wide Diamond knot which is also a tricky thing to tie.

Untitled by GaryWGraley, on Flickr

The belt loop folds down and I skived the leather to blend it in and glued in place, there isn't any pressure or tension at this joining so it really doesn't need any stitching, it ain't going anywhere.

Untitled by GaryWGraley, on Flickr

Felt odd marking the new year, but, I couldn't make 2024 last any longer ;)

Untitled by GaryWGraley, on Flickr

So, like I said, simple but tricky, kinda like leather origami. This now carries a lot easier over my right back pocket, easy to access and being kydex guiding the tip of the knife into the sheath is also fairly intuitive.

Welcome to 2025 folks
G2

edited to add one other bit that I modified on the sheath, there wasn't a good way to thumb break the knife out of the sheath as the kydex was made with a sloping section that your thumb would just slide up and over.

Untitled by GaryWGraley, on Flickr

so I cut it down straight so at least you have a small wall to brace your thumb against in order to get the knife to be drawn easier.

Untitled by GaryWGraley, on Flickr
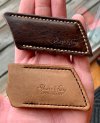
Very cool as always my friend! Good to see you around G2.
RYZPzNu.png

Tried a little texturing with some stamps I made, I think it turned out well
Yes it did!!
 
Been a while since I've posted any recents from this outfit. We finally got some weather, this was this morning going out to feed:

eVHzwfe.jpg


Nichole came up with a cool idea and it took fruit here and there. Her idea was making a purse with some of the design elements of a type of chaps, called AZ Bells or step ins. Came out pretty cool and lasted overnight on the website. Went to Alberta.

JQlFKDG.jpg


JkUSmBZ.jpg


Lined in a light canvas in a western print with four inside pockets:

KPnhqHa.jpg


One front exterior pocket:

HuzVxpJ.jpg


Course busy making knives and sheaths:

TEo465W.jpg


0ryj2Kf.jpg


Auh4qvK.jpg


zVuvMqw.jpg


Built myself a new roundknife. The old one, on the left has retired:

pVXtLQq.jpg


AYk56Mu.jpg


And big news on our outfit, we went down to the Leather Machine Co and picked up one of their strap cutters. I call it The Beast. Took four BIG guys to get it out of the truck:

SEciuf5.jpg


It's adjustable and can cut straps from 1/4" to 20" wide. Just running a scrap piece through. a 1/4" and a 3/4".

fgX3u55.jpg


One of the great things is that you do your part, and it's not hard, each strap is perfect. Need some belts? How about 11 at once?

sgzkje6.jpg


eLMDe5i.jpg


All exactly even the whole length:

ltPPQ6Q.jpg


Whaha been up to?
 
Very nice, really nice in fact. Just a couple lil things. Did ya bevel your border cut? On the upper right corner(of the throat of the sheath). first pic. You've got just a hair of an over cut on the border. When cutting to a corner I like to stop about a 1/16" to an 1/8" from the corner and then put the corner of your swivel knife in the the corner of your pattern and cut back that lil distance to the cut. That really helps with cutting over accidentally. Hope I explained it well. Nice work.
Yeah, I did bevel the border cut on the inside edge.
I see what you mean about over cutting. Thanks for the tip! I really appreciate it
 
Yeah, I did bevel the border cut on the inside edge.
I see what you mean about over cutting. Thanks for the tip! I really appreciate it
Here's a lil visual on what I was trying to say. On this piece of scrap, I've used my dividers and laid out a border line to cut. I've cut to the corner but stopped just shy of it.

y0TDMzG.jpg


Then using the corner of my swivel knife blade I cut from the corner to the existing cut. Because I'm not going very far it's pretty seamless to match up to the cut. If you were to do the same thing but meet in the middle that's pretty tough to pull off well.

FzoNkCP.jpg


But just going that short distance its pretty easy to match up well. Try to always cut away from a corner when ya can.
 
Back
Top