- Joined
- Oct 15, 2014
- Messages
- 67
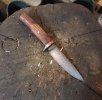
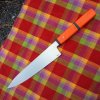
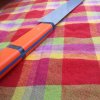
So I've been working on both some kit blade knives & my first hand made blades & here are some WIP photos.
Here I learned that superglue fuses acrylic together, so I can't tack glue them for drilling & getting the symmetric initial profiling done. When I went to separate them, they broke off with chunks of one scale fused to the other. That was a waste of $8, although I think I will use parts of them as bolsters or in a multi-material scale, stay tuned to see how I try to salvage some of the material for another knife.

Here are my 1st 3 hand made blade rough cuts: Nessmuck, a short Kepart, and a Wharncliffe. That later two I plan on trying out a 1/2 full tang, if that is the correct term (please educate me if I'm wrong) where I plan on putting 1/8" G10 or micarta to fill in the bottom space below the handle steel & then put another color scale on the outside, so on the spine you will see steel all the way back, and on the belly of the handle you will see an 1/8" phenolic between the scales. Since these will be my first grinds, I wanted to get the most from my bar stock as possible so doing the tangs like this I was able to get 2 blades from an 11-12" bar. It will also allow me to practice on a straight blade & curved blade.
As a solution to holding the acrylic scales together for shaping, I plan on modifying some stainless corbys by grinding down the heads so they are shorter, then grinding a flat head slot back into them with a dremel cut off wheel so I can have them hold the scales together but be short enough to be below the surface of the scales. I think I'll need to be careful around the holes because it will make a 'hot spot' for material removal when shaping with files or abrasives.
Here's a Russell Green River Riper blade that I'm putting Bois d' Arc (Osage orange) with red g10 liners. The scales aren't opoxied on yet, I just put corby pins on to see how the front was looking after I polished them up. And the last one is a Russell Green River Hunter blade with the 2nd attempt on the acrylic handle material that's similar to Kirinite. I picked up a bar of it at a popular woodworking supply place locally, it was about 1.5x1.5x6" IIRC.


Here I learned that superglue fuses acrylic together, so I can't tack glue them for drilling & getting the symmetric initial profiling done. When I went to separate them, they broke off with chunks of one scale fused to the other. That was a waste of $8, although I think I will use parts of them as bolsters or in a multi-material scale, stay tuned to see how I try to salvage some of the material for another knife.

Here are my 1st 3 hand made blade rough cuts: Nessmuck, a short Kepart, and a Wharncliffe. That later two I plan on trying out a 1/2 full tang, if that is the correct term (please educate me if I'm wrong) where I plan on putting 1/8" G10 or micarta to fill in the bottom space below the handle steel & then put another color scale on the outside, so on the spine you will see steel all the way back, and on the belly of the handle you will see an 1/8" phenolic between the scales. Since these will be my first grinds, I wanted to get the most from my bar stock as possible so doing the tangs like this I was able to get 2 blades from an 11-12" bar. It will also allow me to practice on a straight blade & curved blade.
As a solution to holding the acrylic scales together for shaping, I plan on modifying some stainless corbys by grinding down the heads so they are shorter, then grinding a flat head slot back into them with a dremel cut off wheel so I can have them hold the scales together but be short enough to be below the surface of the scales. I think I'll need to be careful around the holes because it will make a 'hot spot' for material removal when shaping with files or abrasives.
Here's a Russell Green River Riper blade that I'm putting Bois d' Arc (Osage orange) with red g10 liners. The scales aren't opoxied on yet, I just put corby pins on to see how the front was looking after I polished them up. And the last one is a Russell Green River Hunter blade with the 2nd attempt on the acrylic handle material that's similar to Kirinite. I picked up a bar of it at a popular woodworking supply place locally, it was about 1.5x1.5x6" IIRC.


Last edited:


