- Joined
- Jan 12, 2016
- Messages
- 101
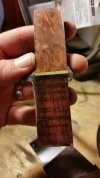
Not much shop time lately but managed to get a little work done.


Nakiri?
The BladeForums.com 2024 Traditional Knife is available! Price is $250 ea (shipped within CONUS).
Order here: https://www.bladeforums.com/help/2024-traditional/
Not much shop time lately but managed to get a little work done.
No its going to be a chopper, more the looks of a competition cutter. 1/4" steelNakiri?


This big stag handled knife is forged 5160 @ 61 HRC. 8 inches long. The handle is Sambar Stag, curly Koa, with wrought iron fittings and G=10 spacers. OAL is 13 inches.
The bottom photo, even though not knife related is of my shop dog, Tipper, a wonderful companion.


Worked on the scales and back spacer of my first liner lock yesterday. I hope it turns out to be a usable knife. If not, I will try to not repeat my mistakes on the next one.


I agree it is much like balance beam performed by a complete novice.
This is an idea I've been working on for a while and recently had the gusto to push it through.
Some time back I saw a knife posted by one of the regulars here(I want to say Scott Roush...???) with a stunning, brush-textured Wenge treatment. I thought that was just smart as hell, and produced a unique look that I've tried to recreate here. I brushed hard into the grain of handle and sheath for at least two hours with a fine stainless steel wire brush found at a welder's supply shop, then blew out all the dust and gave it a 3-coat oil finish sanded to 600. Even with the heavy texture, its still quite smooth with no sharp catchy spots.
After this first chance to work with Caribou, I'm a bit surprised at how relatively soft it is compared to Moose or White Tail. It's also "dirty" well through the whole piece, especially near the crown, with deep black and green and brown streaks and "stains" everywhere. I actually like the look, but unexpected. The antler pieces on front and back of the handle, as well as the two spacers, are all hand carved ferrules. This is a completely straight bladed seax. No curve at the tip. Pointy! Why? Because.
Please let me know what you think.
-Peter
Broken Back Seax
Blade: 10 1/2" x approx 5/32" of hand forged 1095 with a brute de forge finish, clay quenched, flat ground bevels hand sanded to 600 grit then etched and polished to reveal a smokey hamon.
Handle: 5 1/8" of wire brushed Wenge' mortised to fit the blade's hidden tang. Caribou antler ferrules on either end accompanied by antler and Rosewood spacer ferrules . The wire brushed wood has a Tung oil finish. The hand turned, domed, and polished antler pin is left slightly proud.
Sheath/Scabbard: Routed, two-piece, wire brushed Wenge' with hand turned Caribou antler stud and leather strap.

Is that a unicorn AND a mermaid? That IS awesome.
So how do you like the radius platen? I have one and haven't put it to metal yet. Is it pronounced enough to deliver a nice urasuki?
Ive only tried it with 1/8" and .100 thick steel but it works out. Would probably come out much more pronounced in something that is Deba thickness.
") Here is a pic of our attack dog, Scruffy.
Here is a pic of our attack dog, Scruffy.
The newest addition to our family:
Tobi
10 weeks, Terrier(Jack Russell, English??) and Huskey mix, my daughter's choice of harness.
-Peter