-
The BladeForums.com 2024 Traditional Knife is available! Price is $250 ea (shipped within CONUS).
Order here: https://www.bladeforums.com/help/2024-traditional/
You are using an out of date browser. It may not display this or other websites correctly.
You should upgrade or use an alternative browser.
You should upgrade or use an alternative browser.
What's going on in your shop? Show us whats going on, and talk a bit about your work!
- Thread starter WillSwift
- Start date
- Joined
- Jun 4, 2023
- Messages
- 773
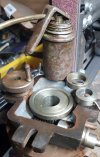
Half strip down and service of the gear mechanism on my rotary vice, I don't want no excuses when I make the liner relief jig tomorrow. I have got my magnetic vice, my sine vice, the rotary vice and tomorrow the jig, last but not least the rise and fall jig, I think that is the easiest to make. I think I will I have everything to start making a pen knife in earnest by the weekend.

SwissHeritageCo
Knifemaker / Craftsman / Service Provider
- Joined
- Jan 8, 2021
- Messages
- 3,587
New outdoor pattern. Blade is 128 mm convex Cruwear 62 Hrc. Tapered tang, micarta and nickel silver rivets.

Beautiful lines as always but that handle in particular looks very comfy
- Joined
- Jul 20, 2022
- Messages
- 18
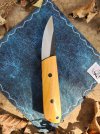
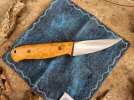
You got some blood thereFinished this small Puukko up yesterday. Blade is around 3" on this guy. 8670 with Osage wood.
- Joined
- Jun 4, 2023
- Messages
- 773
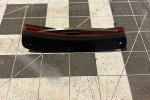
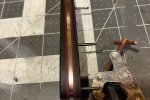
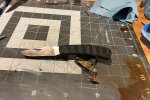
First fit up at the bench in this slippy.
View attachment 2358958View attachment 2358959View attachment 2358960
Now to take it back down and continue on.
Loving that sodbuster style handle Dan, fantastic pattern that!
Thank you! I like that handle too, it's from another pattern that I got very good feedback on from the customer. So I decided to use it on this one, and also on a new hunter am making.Beautiful lines as always but that handle in particular looks very comfy
J Lensmire
Knifemaker / Craftsman / Service Provider
- Joined
- Oct 30, 2021
- Messages
- 229
- Joined
- Jun 4, 2023
- Messages
- 773
As usual I got ahead of myself, my intention tonight was to make the jig to relieve the liners. as soon as I started to think about centralizing it on the face of the rotary vice all the old memories about clocking up came flooding back. I determined two things, I needed to centralize the rotary vice on the milling bed around the axis and then to centralize the jig on the rotary vice. In an attempt to kill two birds with one stone I cut a bit of brass to make an alignment tool. The tool is the length of the depth of the center hole in the rotary vice, one end of the tool is drilled out to 5/8" to take the shaft from the milling collet, the other end of the tool is drilled out to the size of the pivot pin so the hole in the relief jig aligns with pin in the alignment tool. This will save hours clocking up over the first few folders. hopefully this will help someone in the same boat as me, figuring it out. Or someone who is sick of clocking up and also possible free up their rotary vice instead of having the relief jig permenantly fastened to it.
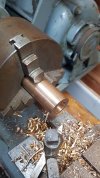
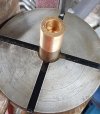
Vice centralizing end done. Then Theakston Old Peculiar called.


Vice centralizing end done. Then Theakston Old Peculiar called.
- Joined
- Jul 20, 2022
- Messages
- 18
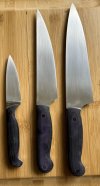
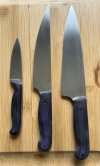
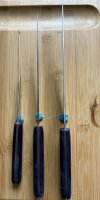
I finished some after almost a year pause and having a workshop finally. The mini Bunkas are completely selfmade, in the second picture I finished up my already finished bought blades with some handles
All Bunkas are made with 1095 / 1.1274
From top to bottom:
Ebony ferrule and walnut
Stabilized maple
Walnut ferrule and stabilized maple
The premade blades are from top to bottom:
Cocinero 165 with Red heart, G10 liner, AliExpress spacer and sycamore maple
Bread knife from ebay with padouk
Cocinero chef 225 with stabilized maple ferrule and birch (I think)
Blade by Helle and ebony from AliExpress
Last edited:
- Joined
- Dec 5, 2005
- Messages
- 28,377
I cleaned my air filtering system today and added another fan and some new filter material. Even washed the shopvac filter bag. Just not pleasant work, but it feels good to be set up again to deal with another onslaught of toxic dust
- Joined
- Jan 11, 2019
- Messages
- 1,484
I am in the middle of moving house, so no knife pics, but I managed to grab 2 San Mai billets with 1.4034 and Apex Ultra directly from T. Hangler. He was even kind enough to taper it for me. Feel lucky to have him in the neighborhood and looking forward to have the chance to take one of his courses. Will post a thread on the build once I get around to it.
HSC, what Rockwell are you running the CruWear at? I've done it at 60 (like Bark River for extra toughness) for some field knives, but I wanted to see how it plays at higher rockwell for a kitchen knife. I was thinking 63-64 like I run Magnacut?
- Joined
- Jun 4, 2023
- Messages
- 773
Good afternoon all, a day off work today, got a bad cold. It happens every year when we put on the heating.
I had an afternoon in the shed messing about with the folder relief jig.
Alignment tool worked really well. simple set up and then bolt down vice.
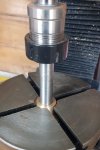
Turned over the alignment tool to align plate.
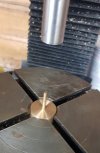
I dropped lucky on the plate, I found a plate in a drawer and only had to drill and ream the pivot hole.
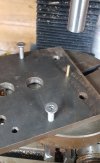
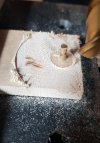
It looked to be going really well at this point so tested on a bit of wood.
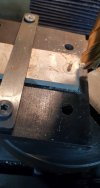
Pic of clamp set up
I had an afternoon in the shed messing about with the folder relief jig.
Alignment tool worked really well. simple set up and then bolt down vice.

Turned over the alignment tool to align plate.

I dropped lucky on the plate, I found a plate in a drawer and only had to drill and ream the pivot hole.

It looked to be going really well at this point so tested on a bit of wood.

Pic of clamp set up

What is your HT for that?
I had Bos Heat Treating do my last batch at 60 (first time with CPM CruWear), but I want to go higher for the next batch, especially the kitchen knives. CruWear has a nice, toothy edge to it, and I really want to play with it for kitchen knives!

