What's going on in your shop? Show us whats going on, and talk a bit about your work!

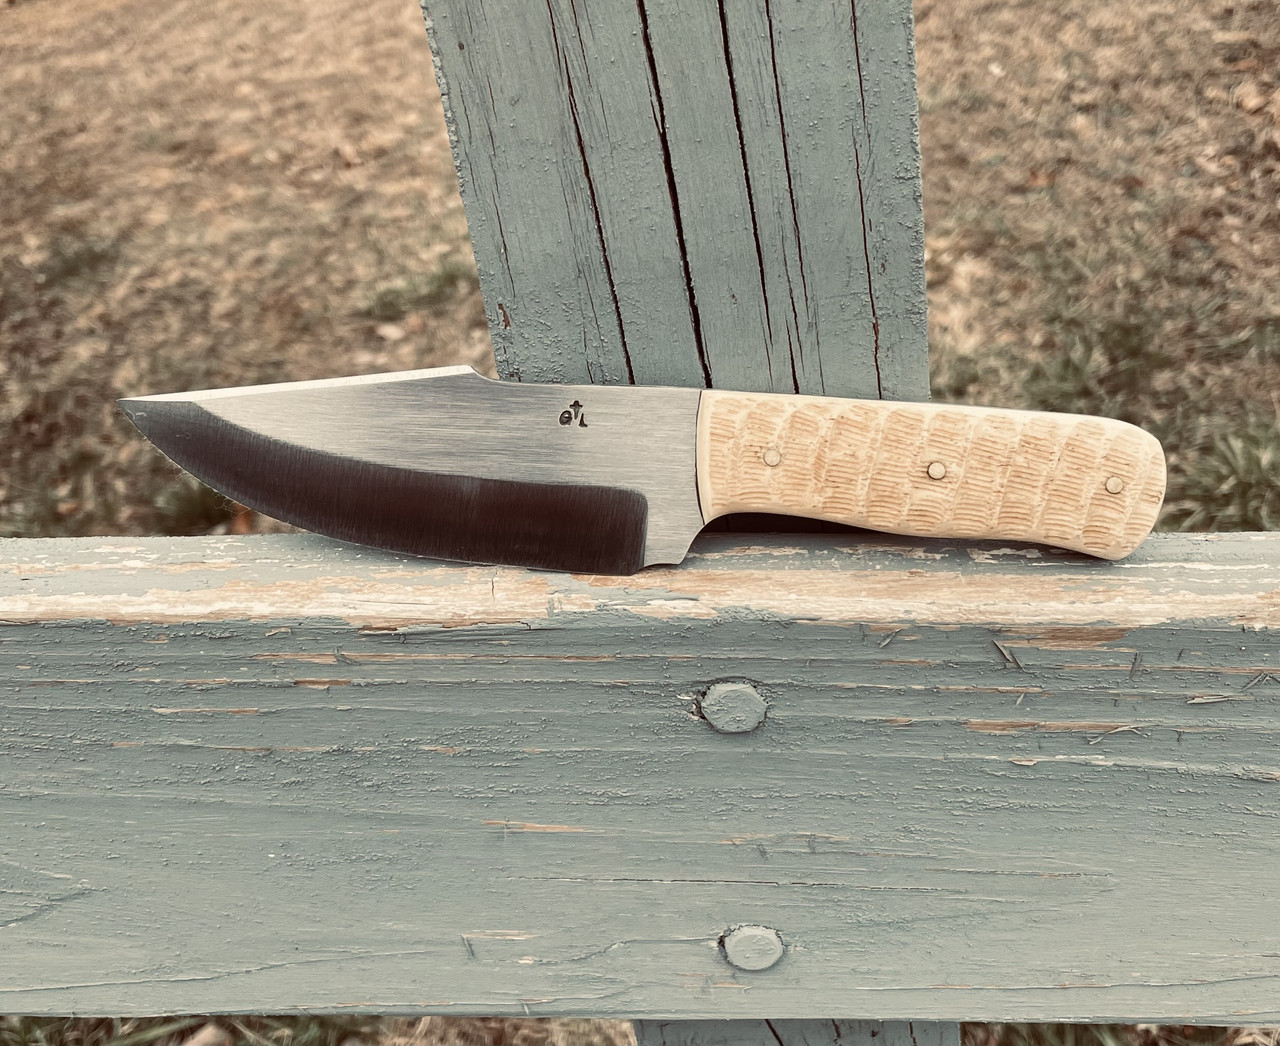
Here’s a hunter I’m finishing up. It has camel bone scales with G10 pins, and a 1095 carbon steel blade.
IMG-9180.jpg
 
Very nice.... Love that hammer!!!!! Very.cool ..what's it made out of...🤔
The hammer is wrought iron with a hardened steel face forge welded on and then I believe just etched the hell out of it in ferric chloride. The maker of the hammer is Michael Hoops. It’s not just cool looking, but one of the best dog head hammers I’ve ever used.
 
Last edited by a moderator:
The hammer is wrought iron with a hardened steel face forge welded on and then I believe just etched the hell out of it in ferric chloride. The maker of the hammer is Michael Hoops. It’s not just cool looking, but none of the best dog head hammers I’ve ever used.
Thats great!!! Thanx for the info.......Needs a.COOL TOOL thread....😉
 
Been a few busy days, but I got 13 blades just about done! I just need to wipe the Tung Oil on the handles and let dry. All of these are 14C28N, between 62-63 HRC. I could only get inside pics because it was dark by the time I finished them last night.

639993350_18083116427582960_1842818463052874693_n.jpg

MBBO, based off the Mini Bugout from Benchmade. Around 2.5" cutting edge, 6.75" OAL. 2nd one down is spoken for already, may try to replace it before the show. I have a few more of these blanks available.

PXL_20260222_002101058~2.jpg

And sheaths set up for pocket carry with the DCC #1 Universal clip:
PXL_20260222_002254935~2.jpg

How they ride in the pocket:
639574051_18083116454582960_1029744065976275315_n.jpg


And the FBBO, based off the Bugout. Handles really need some oil; they look a bit dry and faded since they were wiped down with Denatured Alcohol to get all of the dust off!

PXL_20260222_001723215~2.jpg

And the horizontal belt sheaths that can also go IWB.
PXL_20260222_001544580~2.jpg

Started on 2 FBBO in Magnacut and I may get to work on some MBBO in S90V, but I am not sure how much time I will have left with the snow storm coming up tonight! I also want to try cutting out some display steps for the upcoming Mystic show!
 
Just finished these two sets. Need to put an edge on, but they’re ready to go. First up is a three piece, small kitchen set.
14C28N ~ 63 Rc w/ black linen micarta, G10 pins and stainless Loveless style bolt. Secured with GFlex
IMG_1665.jpeg
IMG_1664.jpegNext is four piece, “traditional” kitchen set,
Chef, Carver, Large Parer/Small Utility and Parer.
14C28N ~ 63 Rc w/ Dymalux Cocobolo and blue fiber liners. Brass pins/ Loveless style bolts. Secured with GFlex epoxy.
IMG_1667.jpeg
IMG_1666.jpeg
 
Gt a few in the glue-up stage. I made a glue jig a while back that holds knives vertical while the epoxy sets The tubes are filled with lead shot.

Had to move into the pantry due to the bad weather.
Four that I will finish today.
A batch of custom brass and bronze gravers or cleaning up the glue at the ricasso/handle. ( they'll be in The Exchange soon)
Several Japanese kitchen blades.
A few small miscellaneous knives.


20260222_150156.jpg20260222_150122.jpg20260222_144904.jpg20260222_144848.jpg20260222_144841.jpg20260222_144832.jpg20260222_144807.jpg20260222_144747.jpg20260222_144800.jpg
 
Thanks. The tubes were filled with lead shot from a 10# bag I recovered from Ron Frazier's shop, ... so a little over a pound per tube. It is just right for holding things firmly. It accommodates most any length of knife.

The wine rack was initially two 36 bottle Temu kits. Each kit slotted together in six racks of six regular wine bottles. I re-notched ten of those racks to hold shorter half-bottles. I glued it all up and screwed it to the end of the pantry shelves at the bottom of the steps. I get the half-bottles at Christmas time from Costco in cases of 24. Each case is half red and half white from around the world. I haven't found a bad wine in one yet. At $4 a bottle it is hard to beat. They are only available for a few weeks each year (starts around Nov), so I buy a years supply of cases. The bottom two racks hold regular bottles and champagne. (Photo during construction of the pantry. I'll find a better shot and replace it)

20251204_190653.jpg20251204_190653.jpg20251205_154629.jpg
 
Last edited:
IMG_8344.jpeg
So far on a hunter I’m making. I added a false edge to it just to spice it up and practice. Blade will be etched and cold blued as well as the brass guard. Handle will be antler. So far I have the blade to almost 1mm. Once I make sure the tang will fit like what I want in the horn and thread the end for a pommel nut, I’ll quench it and move forward.
IMG_7985.jpeg
 
Last edited:
I got the other fuller, swedge and rough grind on this one. I need to even up the fullers a little and it will be ready to heat treat. This is the first time I’ve ever done fullers and the first time I feel like I have potential for a decent hollow grind. Hand filing fullers is certainly an exercise in patience.

IMG_1354.jpeg
 
ScarFoot ScarFoot it's an unfortunate turn of events but it happens. You know the drill by now, the next one will be better.

I'm not that active in the forum nowadays and whatever time I spend in the shop, I'm mostly experimenting/learning new things, so much to learn yet so little time.
My main focus has been curved transitions/fit ups. While it's a proper pain in the butt to execute them correcly, I think they add a lot of subtle beauty.
1.jpg1000015457.jpg

On this one I tried a new technique (new for me). The guard is inset in the handle, that ensures a 100% gap free transition. Takes some detailed work with a rotary tool and burrs but once mastered, there is no better way in my opinion.
1000015458.jpg

Some may have seen this subhilt from some time ago, I never finished it and had it laying around. Yesterday I decided to keep working on it a bit and had it put on an extreme diet. Looks much better now, probably it will sit inside a drawer for the foreseeable future as is.
1000015481.jpg

I also had a mishap, droped the handle and of course it had to land on concrete the worst way possible. Luckily it was a clean one-piece break and was able to fix it with lots of ca glue. Done right, this makes for an invisible fix (one of my JS set knives had a fix like this 🤫)
1000015460.jpg1000015461.jpg1000015462.jpg

Finally, I've been doing some knife educational videos lately in greek due to lack of information in Greece about knife making. Since I need to point things out all the time, instead of using a pen, I decided to forge a little pointer.
1000015483.jpg1000015484.jpg
 
ScarFoot ScarFoot it's an unfortunate turn of events but it happens. You know the drill by now, the next one will be better.

I'm not that active in the forum nowadays and whatever time I spend in the shop, I'm mostly experimenting/learning new things, so much to learn yet so little time.
My main focus has been curved transitions/fit ups. While it's a proper pain in the butt to execute them correcly, I think they add a lot of subtle beauty.
View attachment 3117002View attachment 3117004

On this one I tried a new technique (new for me). The guard is inset in the handle, that ensures a 100% gap free transition. Takes some detailed work with a rotary tool and burrs but once mastered, there is no better way in my opinion.
View attachment 3117005

Some may have seen this subhilt from some time ago, I never finished it and had it laying around. Yesterday I decided to keep working on it a bit and had it put on an extreme diet. Looks much better now, probably it will sit inside a drawer for the foreseeable future as is.
View attachment 3117009

I also had a mishap, droped the handle and of course it had to land on concrete the worst way possible. Luckily it was a clean one-piece break and was able to fix it with lots of ca glue. Done right, this makes for an invisible fix (one of my JS set knives had a fix like this 🤫)
View attachment 3117006View attachment 3117007View attachment 3117008

Finally, I've been doing some knife educational videos lately in greek due to lack of information in Greece about knife making. Since I need to point things out all the time, instead of using a pen, I decided to forge a little pointer.
View attachment 3117010View attachment 3117011
Love it! Wish ya were on this side of the pond. Would love to learn from ya in person. You put out great work.
 
Back
Top