Making a pouch sheath - Apprentice Thread.

Here is Part D:

Little did I know you could only put three Youtube video's in a thread. :huh:

Part D:

[video=youtube_share;UfdAuqaO1SU]http://youtu.be/UfdAuqaO1SU[/video]


[video=youtube_share;rGQznVR0-9M]http://youtu.be/rGQznVR0-9M[/video]


Part F: Final Part

[video=youtube_share;SoZycvzc9hg]http://youtu.be/SoZycvzc9hg[/video]
 
Last edited:
Tal,
I've been avidly following every minute of your videos and have to tell you that they are fantastic. I've finished my 1st sheath (drumroll, yeah!) before they were all posted, and have made plenty of mistakes --some of which I could have avoided if I had watched the videos first. I'll post up a pic tomorrow, but for now just had to let you know how helpful I've found your narrative and step by step instruction in the videos.

At this point I seem to be missing Part E, which would cover the actual stitching of the sheath; so I hope you can get it posted tomorrow. In the meantime, TWO THUMBS UP!
Rich
 
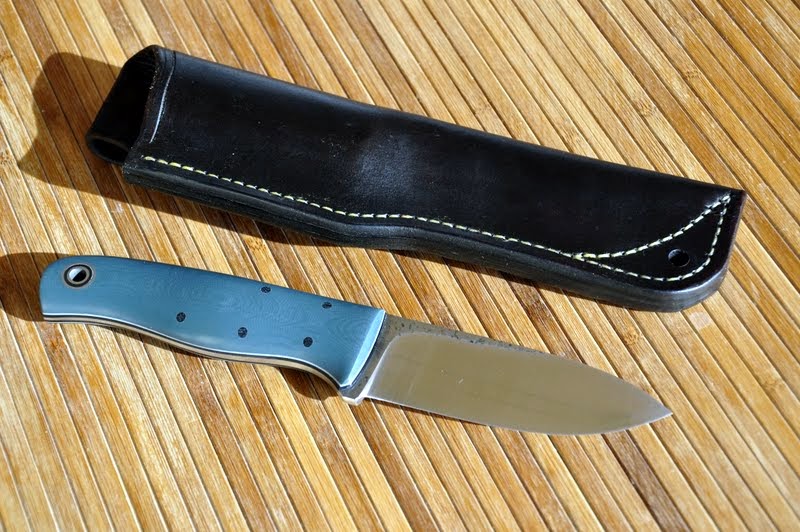
Thanks to Tal, and others, my FIRST sheath is done! Is it perfect? --not even close; there were times when I almost threw it away and started over, but I wanted to finish it as a learning exercise so that the next ones will be better.

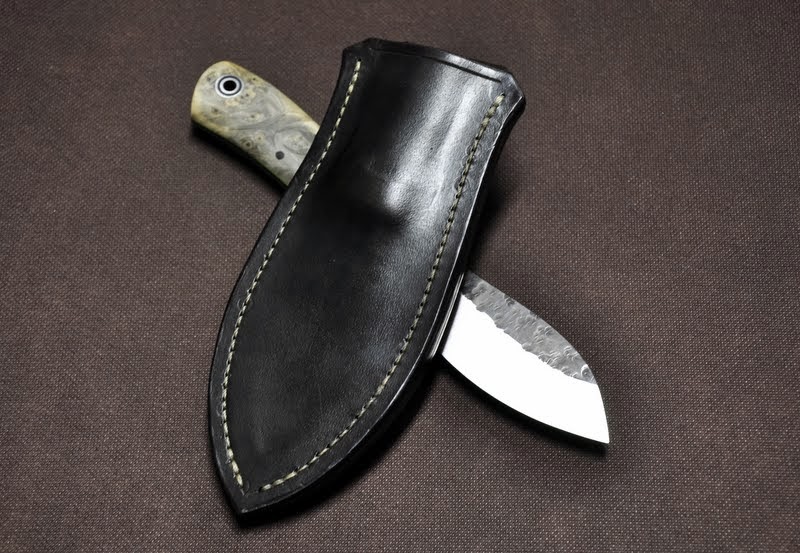
I opted for a folded "butterfly" type sheath for this shape of knife, an EDC II, and am glad I did because it looks good with the leaf-shape blade.

I opted to use a so-called "Loveless Cam Lock" to keep the knife in, and wish I had not --it added a layer of complexity that I didn't need. Does it work? -oh Yeah! it works. Would the wet-molding have worked just as good without it? -probably yes. I'm not giving up and will try it again with more experimentation.

I pushed one hole when using the drill press, in the wrong place due to working at night in a poorly lit garage --lesson learned there, work in better light.

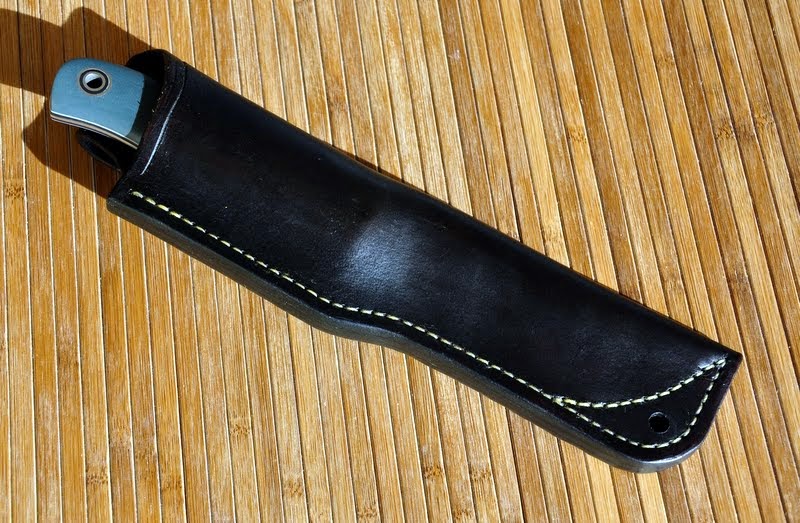
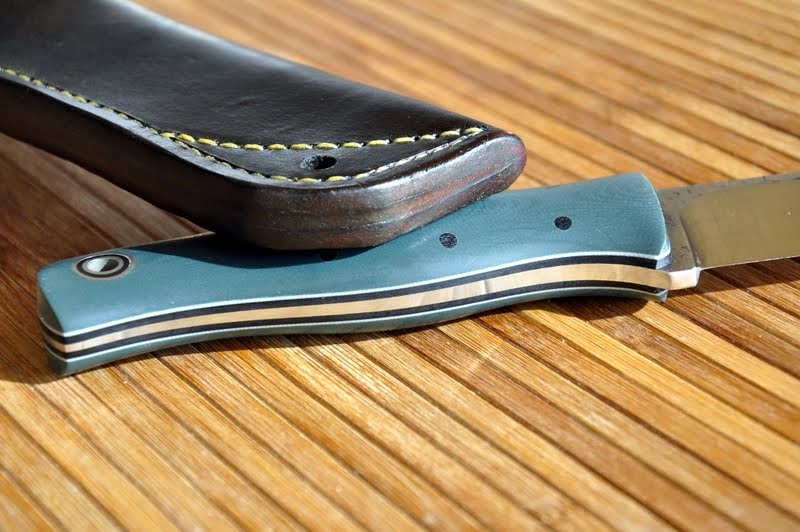
The dangler shown will not fit this sheath. It's a 1" dangler and the belt loop on the sheath is 1 1/8" because I cut it oversize and forgot to trim it to 1" at a later stage. I also ran the taper too high, resulting in almost an inch and a quarter where the dangler would go. I just did the dangler for the experience, but still.... another oops.
And... I bought 1/4" Chicago screw posts, way too short, need at least 3/8" screw posts for 3 thicknesses of leather, and this one could have used 1/2 inch screw posts due to thick leather; you can see the mark where I put it in the vise to squeeze it down so I could attach the screw post. I swear I read 1/4" somewhere, but 3/8" is needed, trust me.

My leather is too thick in my opinion at nearly 12/64ths. 8/64ths, or 1/8" would be better. A problem with mail-ordering a shoulder from Tandy. I'll try to get some better leather, but for now will skive the next one down to closer to 1/8" or 8 oz.

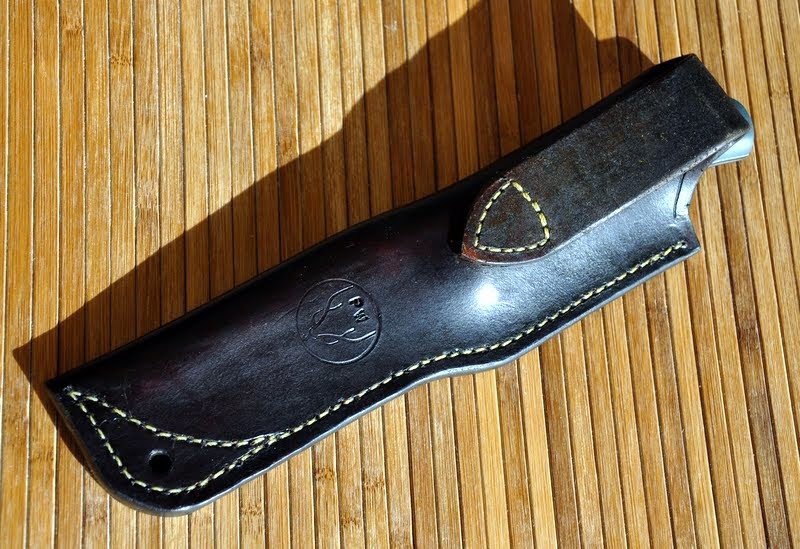
You will notice the belt loop stitching is brown thread and the rest is natural thread; just because the evening I was sewing I couldn't find the natural thread that I thought I had purchased, and didn't find until later.
I didn't notice until looking at the pictures that the stitch line is imperfect; but I think I can fix that with the overstitcher.
All in all, a fantastic experience that I would not have tackled without the video guidance of Tal, and others. I already have two more cut out, and I can't wait to get started. The next one will be twice as good. In the meantime, I have a bullet-proof sheath that will last a lifetime (I'm 68, so how long is that?).
Thanks, Tal.


Last edited:
ricsha - Nicely Done Bro! Thanks for sharing the details and the lessons learned. Very ambitious with the cam lock. I think it looks pretty awesome. Nice job burnishing.
 
It looks like Rick and My sheath had a baby! ;)

1) I don't see the stitch line problems you are talking about. This is common. You see a mistake and others don't.

2) There are no mistakes - there are only 'design modifications'. ;) I like the belt loop. I think as a belt sheath it will wear perfectly without the dangler.

3) In terms of quality. I am stunned at how well this turned out. Simply amazing. Everyone in this thread has made such great work the first time out.


A few things I see - and they are picks of nits.

1) Leave another 1/16th on the outside of the sheath to sand off. You have a little uneveness between the layers. Sanding those flush would take care of that.
2) Watch out for things that will leave marks on your sheath. I see what I think is a fingernail mark on the middle. It matters little - it is just one of those things.
3) I would skive your welt further down to have an easier time of bending the leather at the point of connection.
4) What did you seal it with? It seems a little glossy. I think it looks great - and it may just be the flash - but if you used Tan Kote - did you put on quite a few layers?


Again - total nit picks. You managed to turn out something in your first try that looked like my work after two years. I am really proud of you and happy for your experience making this sheath. You are indeed correct - you have an heirloom quality sheath that honors the animal whose hide it was made from . Well done!

Now - get your own designs and customers. Don't snipe mine!

You too Thurin! ;)

This thread has been a blast and is only getting better.

TF
 
Thanks, Tal. High praise indeed. I don't know where that mark came from; I intentionally used a piece from the worst part of the shoulder for my "practice" sheath. Shine is too much; I'm not happy with it either --one coat of Tan-Kote followed by one thin coat of Montana Pitch Blend. How would I de-shine it a bit?

No worries about me stealing your customers! I'll stick to a few for myself --too much time and work to do it for others. I can never again be happy with a machine made sheath from BHK or Bark River or KSF! I really have enjoyed making this one, and will make more; but, it's really made me appreciate even more the work of the custom makers here, and realize the prices for custom sheaths are pretty darn reasonable considering the materials and the work involved. Like everything else in life, you get what you pay for. Thanks again.
Rich
 
1) It is the pitch blend! No worries - you buffed the hell out of it didn't you? It is the bees wax. Just wear it - it will mellow.

I would use one or the other from here on out - but you didn't do any harm.

2) Buy a back or a half a back from a place like Wickett and Craig. You now have the tools to do mostly anything simply - like a possibles bag or journal over - or that sort of thing.

It will be about 100 bucks for a whole back (7-8 ounce veg tanned in Oak - then you can dye it anything you want) - but you will have something like 20 square feet. Enough for a FEW sheaths. ;)

Also a back has no belly leather and thus little waste.

I am happy you heard my reply like I intended it - as high praise.

TF
 
A baby:eek: 
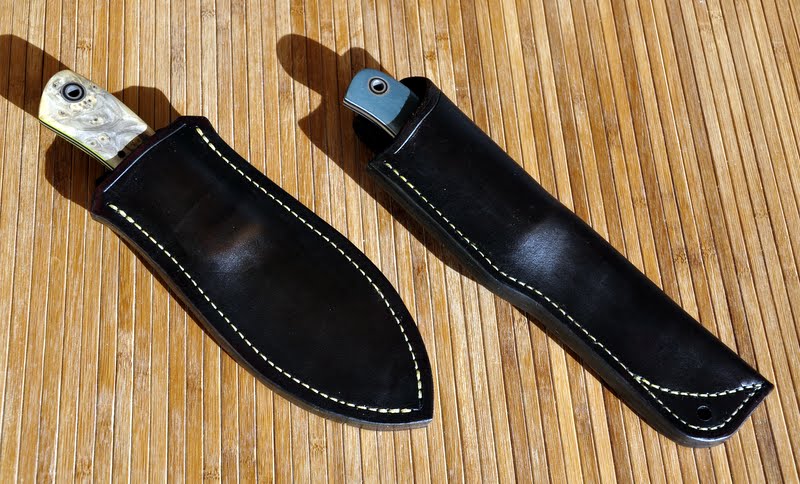
Well, it really is a very well done combo of both styles and I like it!

Like Tal said, if you'll really thin that welt at the bend point, the leather will fold much neater. I'm curious how wide your welt is? A more narrow welt on the butterfly style will reduce the slight bulge look on the spine.

Over all, a nice job!
 
After reading this thread for a while, I had to make a go at this. I went a different direction from the pouch sheath. I took one of Tal's designs for a nessmuk I liked and and tried to copy it. I had only seen the first video by the time I made the sheath, so I will have to watch the rest of the videos and see what I missed out on. I think I can agree with many of the posts here - it was very much a learning process and I would not do some of the same things again. I made a bunch of mistakes that are very obvious to me, but for a first learning attempt I think it came out OK. I pressed too hard when wet forming. I need a depth stop on the drill press when the needle punched through, because it touched the leather several times. It took me a while to figure out to drill a hole in piece of wood just larger than the needle and use it as backing to give the sheath enough support so that the needle would make a clean straight punch. There has got to be an easier way to connect the dots on the back than the adjustable v-gouge. I over ran the groove in a couple of places doing this. The list goes on and on. I certainly have a huge appreciation for the sheathmaker's work I see here. This was definitely a fun project and I will try to make some of my own sheaths in future. I figure I need about 3 more before I break even on all the stuff I bought to make them... ;) and sorry for the crappy pics, but here it is:

_DSC1189.JPG


_DSC1172.JPG


_DSC1188.JPG


_DSC1187.JPG
 
Last edited:
Nice job M4Super90! I have a Nessmuk that needs leather, and that looks like a good design for that blade shape. I think your sheath came out great, especially for a first attempt. As for punching the holes on the drill press, I used a very soft piece of pine and let the needle punch it's own hole; by then I had stitched the belt loop so it wouldn't lay flat, and that way I could move the sheath around on the edge of the wood to keep it flat.

You're the only one that will see most of your tiny boo-boo's, and compared to most factory-made sheaths it's so much better. Like you, it's going to take me several more sheaths to begin to pay for all the tools, supplies, books, etc. that I used to make the first one. Nice job; I'm looking forward to seeing number 2.
Rich
 
nice job guys!
everyone here did a great job

but ricsha....i do believe this aint your first rodeo & a credit to tal's superb tutorial & everyone that took advantage of its input

:)

nice job! indeed
 
Looking at that video, do you tie each stitch like he does? I'm guessing no, since you say someplace else you can wait and snug of several stiches at a time.
 
Last edited:
If you watch my video's above M4 - you can see just how I do it.

He is not tying off - he is sort of locking the stitches into place because he uses a stitching prong and has sort of a front and a back to his stitches. He does SUPER clean work.

TF
 
I'm looking forward to seeing number 2.
Rich

Attempt Number 2. I decided to try the pouch sheath this time and I made one for my Bushcrafter. Different process, but some things went a little smoother this time just because I already done it once. Still not perfect, and I think some of that will be easier with better leather. I just bought the Tandy on sale stuff and it pretty rough. It will be fun to make a few more for my family members. My wife has actually started one for her Arete. Here is #2:

With #1
_DSC1190.JPG


_DSC1191.JPG


_DSC1192.JPG


_DSC1200.JPG


_DSC1202.JPG


Also, while I was shopping online for the things I needed to make sheaths, I came across a place that makes custom stamps for $40. I had the emblem we use on our family ranch gates made into a stamp and it has a nice spot for initials so I can personalize each one I make. Getting the little 1/8" letters straight is damn near impossible, but I don't think those getting free sheaths will care much.

_DSC1193.JPG
 
Last edited:
M4Super9,
I'm really liking what you did with that one, too. I've been too busy to start #2 yet, but you give me inspiration to get going. I thought you were dying them black, but now I'm seeing more of a dark burgandy; what is it? Nice job!
Rich
 
Back
Top