ChazzyP
Platinum Member
- Joined
- Dec 27, 2014
- Messages
- 8,974
OK, as requested, here's a pictorial on the Crown and Diamond knot. As with the Snake knot post, the pics here should show up in horizontal pairs on a computer screen, following the text above left to right, and be paired vertically on a phone.
I usually hold the two strands of cord vertically, side-by-side pinched between my thumb and forefinger adding the crossings at the base to that grip to keep them in place. Here, to keep my thick fingers out of the way, I've tied this clipped in a hemostat lying on my workbench--it actually works pretty well. For descriptive purposes, front is toward the camera and back is behind the work.
Start by making the crown of the knot, left over right then under and out the other side to reverse the working ends. Take the end that's now on the right and lay it across the front of the two center cords at the base and point it toward the left.


Now do the opposite with the working end on the upper left, running it behind the two center cords, again toward their base and toward the right. It should look like the first pic below with the crown on top and a sorta ear on each side. Take the working end on the left, pass it behind the three cords starting left to right and up through the middle of the right side ear, as in the second pic below.


Next, take the working end on the lower right, pass it over the front of the three cords right to left and down through the left side ear. The second pic below shows the route for the last two steps with the awl in between the two lobes of the crown. This is really just one space and the two working ends will pass through it.


Take the end on the right up through that space from the front and the end on the left up through from behind. That's it for the bends.
When cinching up, initially pull the two top strands with one hand and the two bottoms with the other. Pull slowly, intermittently running any overly large loops through to even things out. Once the knot gets close and is even, start pulling one upper cord on the top against the opposite side cord on the bottom. Going back and forth between opposite pairs you'll see the knot gradually closing while shifting side-to-side as the "almost done" pic shows it leaning a bit to one side.


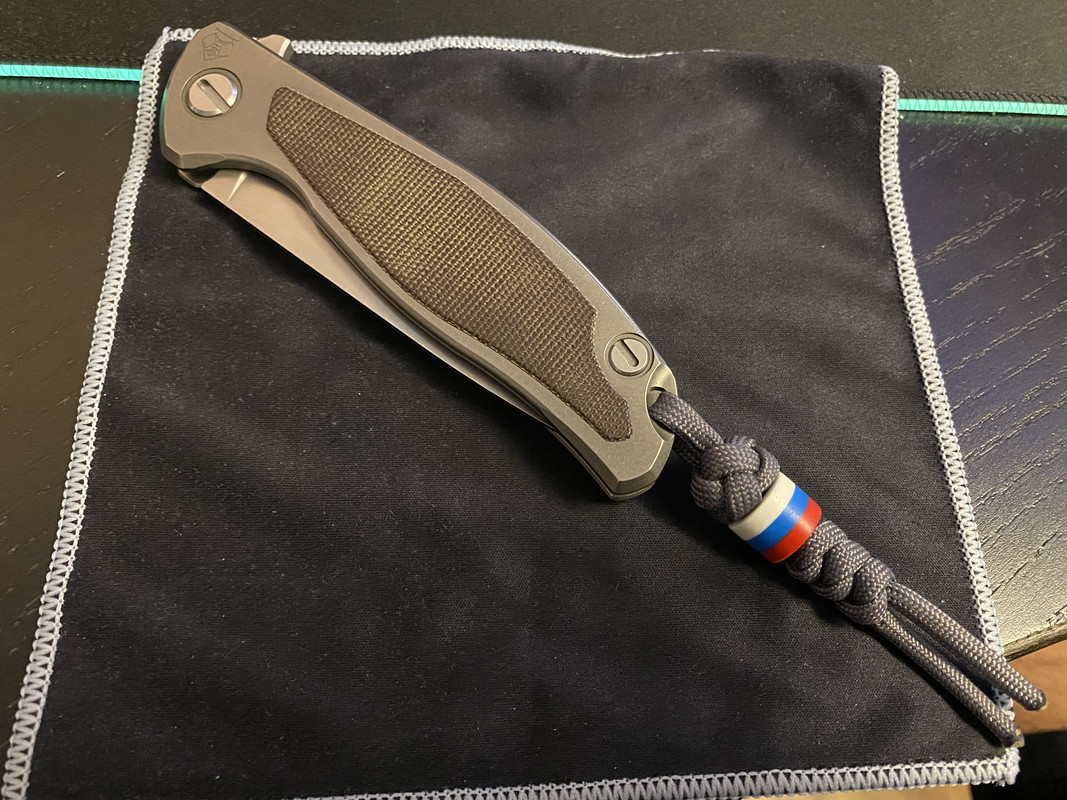
About as tight as the second pic above is a good state to move the knot closer to the standing end, pulling one side then the other a bit at a time up and through to move toward the knife or a bead. Here's this one on a free cord all done. I think Crown and Diamonds look best as loose as possible but with no open spaces showing through, though I'm sometimes guilty of getting them too tight.

I usually hold the two strands of cord vertically, side-by-side pinched between my thumb and forefinger adding the crossings at the base to that grip to keep them in place. Here, to keep my thick fingers out of the way, I've tied this clipped in a hemostat lying on my workbench--it actually works pretty well. For descriptive purposes, front is toward the camera and back is behind the work.
Start by making the crown of the knot, left over right then under and out the other side to reverse the working ends. Take the end that's now on the right and lay it across the front of the two center cords at the base and point it toward the left.
Now do the opposite with the working end on the upper left, running it behind the two center cords, again toward their base and toward the right. It should look like the first pic below with the crown on top and a sorta ear on each side. Take the working end on the left, pass it behind the three cords starting left to right and up through the middle of the right side ear, as in the second pic below.
Next, take the working end on the lower right, pass it over the front of the three cords right to left and down through the left side ear. The second pic below shows the route for the last two steps with the awl in between the two lobes of the crown. This is really just one space and the two working ends will pass through it.
Take the end on the right up through that space from the front and the end on the left up through from behind. That's it for the bends.
When cinching up, initially pull the two top strands with one hand and the two bottoms with the other. Pull slowly, intermittently running any overly large loops through to even things out. Once the knot gets close and is even, start pulling one upper cord on the top against the opposite side cord on the bottom. Going back and forth between opposite pairs you'll see the knot gradually closing while shifting side-to-side as the "almost done" pic shows it leaning a bit to one side.
About as tight as the second pic above is a good state to move the knot closer to the standing end, pulling one side then the other a bit at a time up and through to move toward the knife or a bead. Here's this one on a free cord all done. I think Crown and Diamonds look best as loose as possible but with no open spaces showing through, though I'm sometimes guilty of getting them too tight.

 Untitled
 Untitled