-
The BladeForums.com 2024 Traditional Knife is available! Price is $250 ea (shipped within CONUS).
Order here: https://www.bladeforums.com/help/2024-traditional/
You are using an out of date browser. It may not display this or other websites correctly.
You should upgrade or use an alternative browser.
You should upgrade or use an alternative browser.
Time for a new BBQ Challenge - The Camp Sword
- Thread starter Stacy E. Apelt - Bladesmith
- Start date

- Joined
- Oct 29, 2006
- Messages
- 2,912
A little different approach. My wife and I just finished watching the series "Rome" so I had the gladius on my mind. Maybe not the best "bush sword" design but I wanted to try it.
I started with a piece of W2 similar to this.

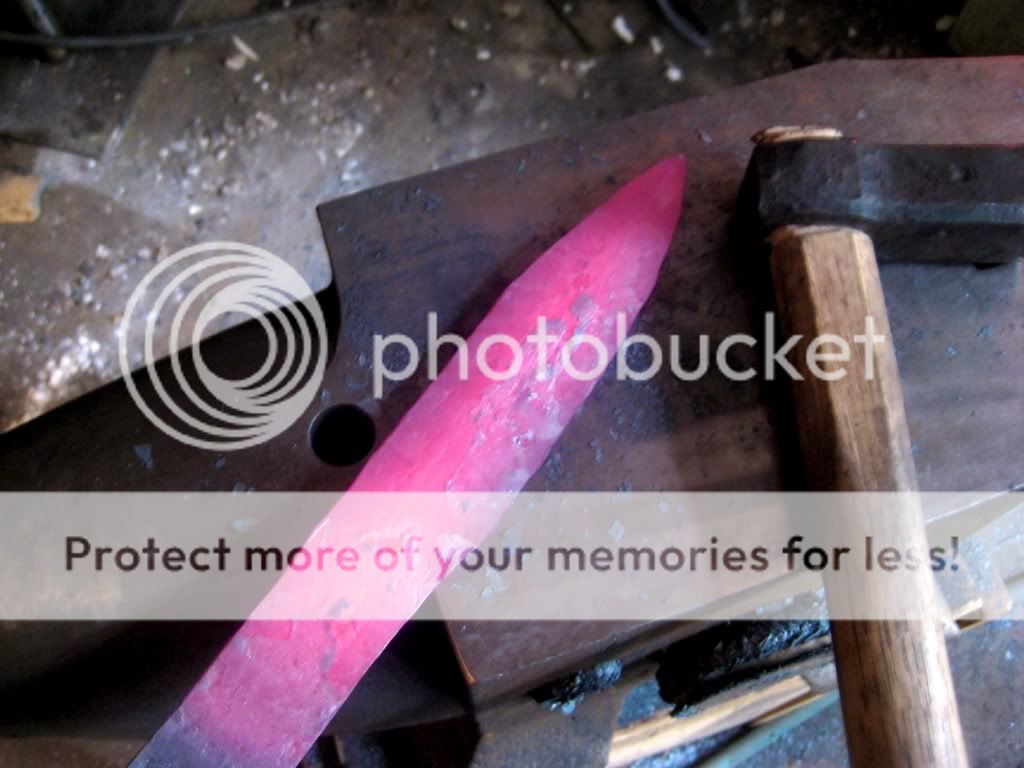
And here's some of the forging stages and finally the sword in hand. I expect this to wander a fair bit during the quench.
This one isn't the piece for the order, more of a trial run. I'll be leaving it brut de forge style. The blade will be about 19" and I haven't sorted out the handle yet so I made the tang a good 10" for a pein block.
There's nothing like forging a sword. It really imparts a primal feeling of power while weilding it.

I started with a piece of W2 similar to this.
And here's some of the forging stages and finally the sword in hand. I expect this to wander a fair bit during the quench.
This one isn't the piece for the order, more of a trial run. I'll be leaving it brut de forge style. The blade will be about 19" and I haven't sorted out the handle yet so I made the tang a good 10" for a pein block.
There's nothing like forging a sword. It really imparts a primal feeling of power while weilding it.
Last edited:
- Joined
- Jan 9, 2011
- Messages
- 16,487
Awesome photos everyone!
I got in more work on my sword yesterday and hope to have some pics later.
I got in more work on my sword yesterday and hope to have some pics later.
- Joined
- Feb 7, 2011
- Messages
- 427
Got a question for ya'll. I have 1084, and 5160 on hand, both in usable sizes. Which would ya'll suggest for this project? (I was thinking 5160, but have seen a handful of steels mentioned that are closer to 1084).
Eagle-Eye, if I can be blunt--I've watched your progress for a long time, essentially from when you threw your first thread on Instructables to the recent flurry of activity the past three months and how you've increased your array of talents.
Most of us mentioning Carbon steels are focusing on certain aesthetics, particularly sori or hamon, and looking at fast quenching steels that will produce those desired results.
One thing I can certainly praise you for is your patience and slow rate with which you are focusing on improving your skills, unlike so many in your age group who try to pump out as many knives as possible with little consideration on improving.
Based on watching your growth, technique, style, and tools (congrats on your new anvil btw) I'd suggest going with the 5160 spring steel--it will be more forgiving, and will offer better chances of performance quality with your means. As this would be the largest blade you've forged to date, I think the former (rather than latter) will be a good test for yourself. This isn't going to be like your rasp knife, and 5160 would give you better odds for a good chopper--especially if you go with a larger version of your Pepper choppers.
Use this to your advantage--work the 5160 to experience forging a large blade, and then when you've got a technique for even heating something large in your forge, move on to carbon steels.
Good luck lil brother--looking forward to seeing what you turn out. :thumbup:
Brian.Evans
Registered Member
- Joined
- Aug 20, 2011
- Messages
- 3,267
BTW if anyone needs I'm gonna be heat treating my knife/sword made out of 1095 within the next week hopefully. I have a 27" deep oven so if anyone would like I can do theirs too at the same time if need. I'm willing to hold off on HTing mine if someone else needs theirs done too.
Cbr, can you shoot me an email,
medicevans at gmail dot com. I was actually trying to figure out today how I was going to HT mine. I'd be interested in talking to you about it. I have an interesting idea for my blade, wonder if you be interested in trying it.
Tai Goo
BANNED
- Joined
- Apr 7, 2006
- Messages
- 3,806
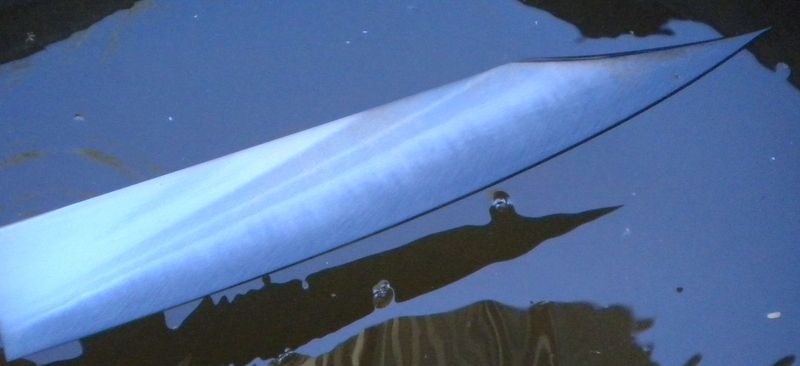
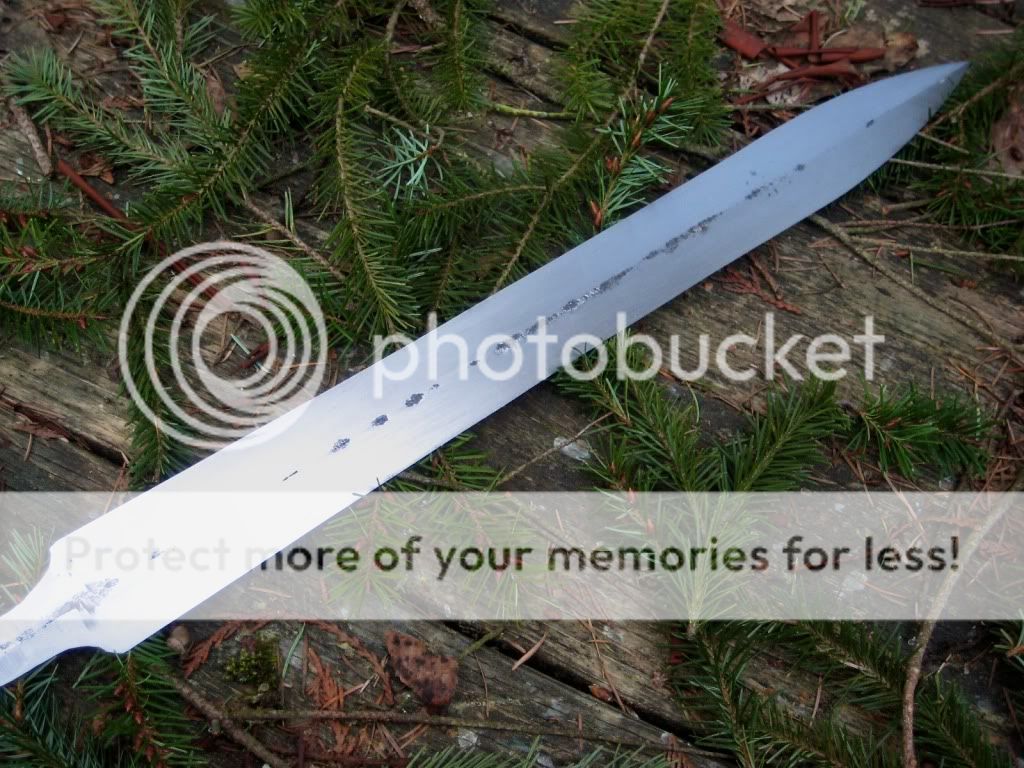
Tai, I love that shot. That tip profile is so graceful but so vicious at the same time.
Thanks.
This is the first time I’ve intentionally made the point straight in line and dead on the center line of the handle with a single edged blade… a little more of a thrusting weapon, but still good for chopping, slicing and some camp chores.
- Joined
- Jan 9, 2011
- Messages
- 16,487
Tai that came out incredibly well! I see some rays of sunlight running through the rainbow.
I have the sword rough ground and etched, I didn't see any activity to speak of so I plan on a satin finish. I'm also making a kwaiken from the original sword!

I have the sword rough ground and etched, I didn't see any activity to speak of so I plan on a satin finish. I'm also making a kwaiken from the original sword!
- Joined
- Dec 6, 2010
- Messages
- 1,154
Blade is profiled, looks like I better get grinding. You guys are making me look like a slacker.
")
- Joined
- Oct 29, 2006
- Messages
- 2,912
Good stuff guys. I like the profiles I'm seeing. Nice chopper Carl. Daniel, I'm not sure you can call that a kwaiken. It looks like you could lop a head off with it. 
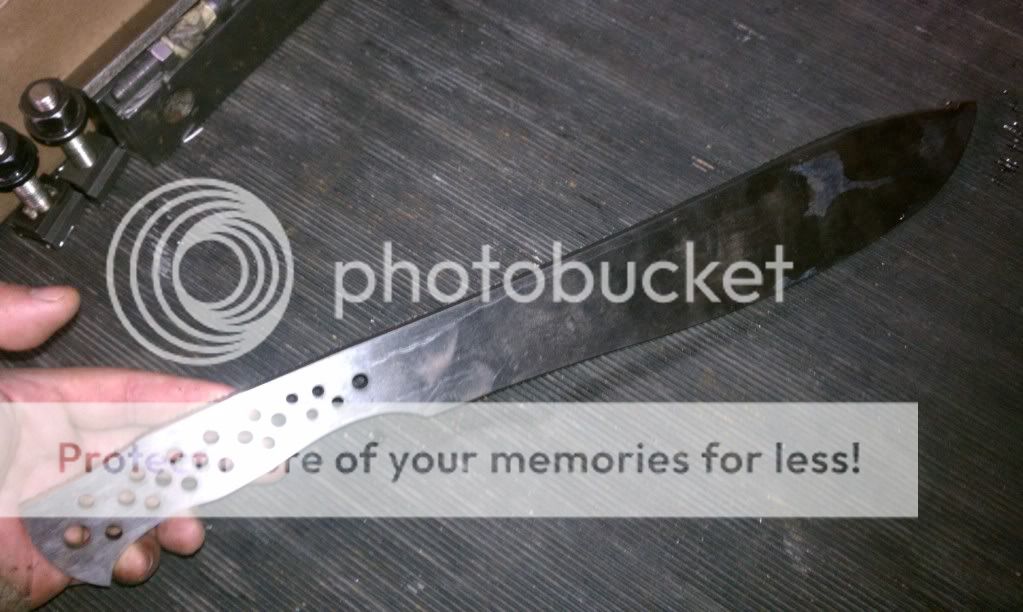
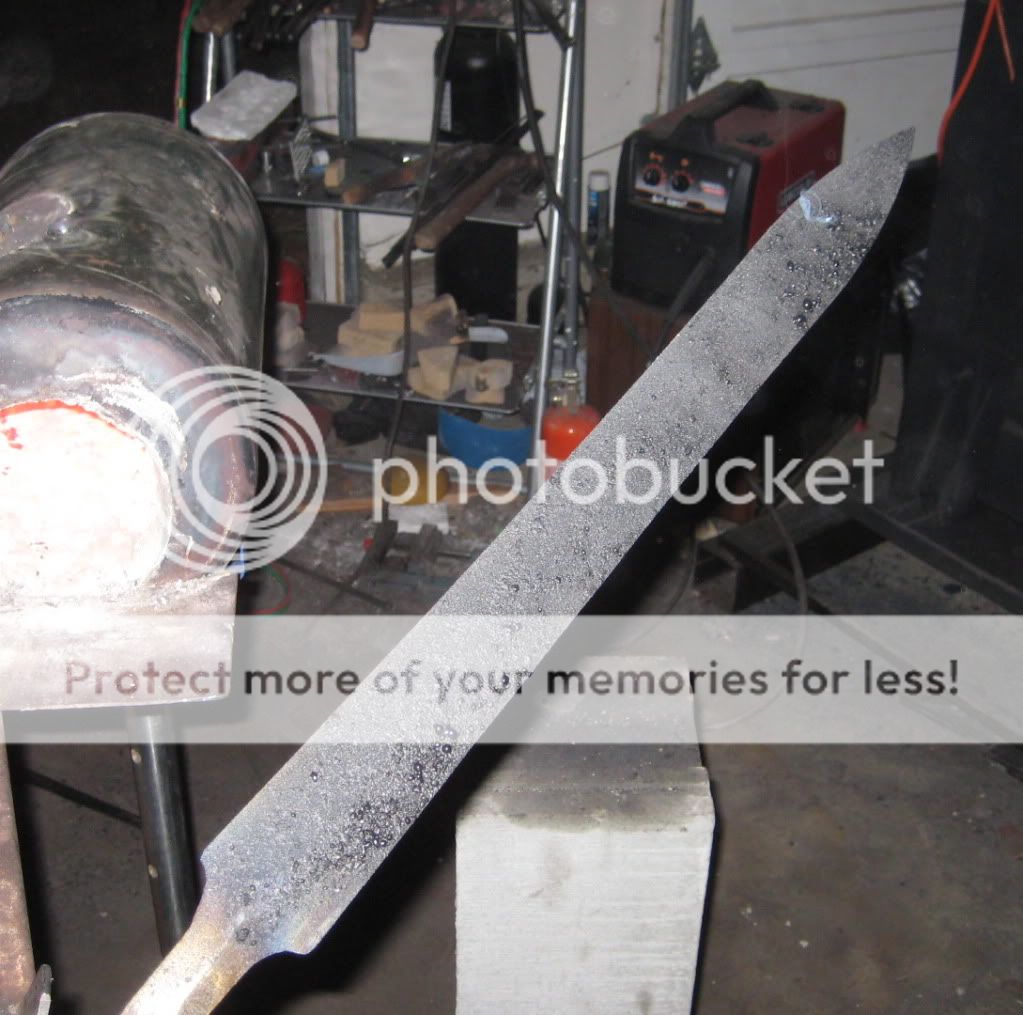
Last night I did the thermocycling/grain reduction heats in my Paragon. I did more work today but kept forgetting photos. Knocked the scale off, refined the profile, ground the bevels then draw filed the whole thing to flatten and true up the bevels then a quick hand sand with 150x. It's ready for heat treating but I have to figure out the guard/handle/pommel in case I need to drift the hole in parts of the guard or what have you. I left some forge marks on the ridge so I may go a little "tribal" with the handle/guard. Maybe something like a Roman sword salvaged by Gauls and "fixed" with leather and copper. Still thinkin'...
The profile is a little between a Hispaniensis and a Mainz style. It's waisted but a bit short for the former but a little narrow for the latter. One of those things where one forging "mistake" determined the whole profile.
Can't really see the profile here but it's waisted.
Last edited:
- Joined
- Feb 6, 2007
- Messages
- 1,298
One of those things where one forging "mistake" determined the whole profile.
Those are also known as "design modifications"....
Nice looking sword Stuart.
- Joined
- Oct 29, 2006
- Messages
- 2,912
Good one Bruce. What happened was that when working "zones" of the blade, where two zones met, I didn't draw out the width evenly and had one spot that needed to be ground to but was a little too close to the tip to get the Mainz style swell to start in the right place. It made for a narrower upper 1/3rd of the blade than I intended but only about 1/8" overall. Amazing what 1/8" will do though.
What happened was that when working "zones" of the blade, where two zones met, I didn't draw out the width evenly and had one spot that needed to be ground to but was a little too close to the tip to get the Mainz style swell to start in the right place. It made for a narrower upper 1/3rd of the blade than I intended but only about 1/8" overall. Amazing what 1/8" will do though.Stacy E. Apelt - Bladesmith
ilmarinen - MODERATOR
Moderator
Knifemaker / Craftsman / Service Provider
- Joined
- Aug 20, 2004
- Messages
- 38,572
Nice.
I have had 2" wide broadswords turn into 1.5" wide shortswords due to those "design modifications".
I have had 2" wide broadswords turn into 1.5" wide shortswords due to those "design modifications".
- Joined
- Oct 29, 2006
- Messages
- 2,912
Hope no one minds me blasting this thread with so many photos.
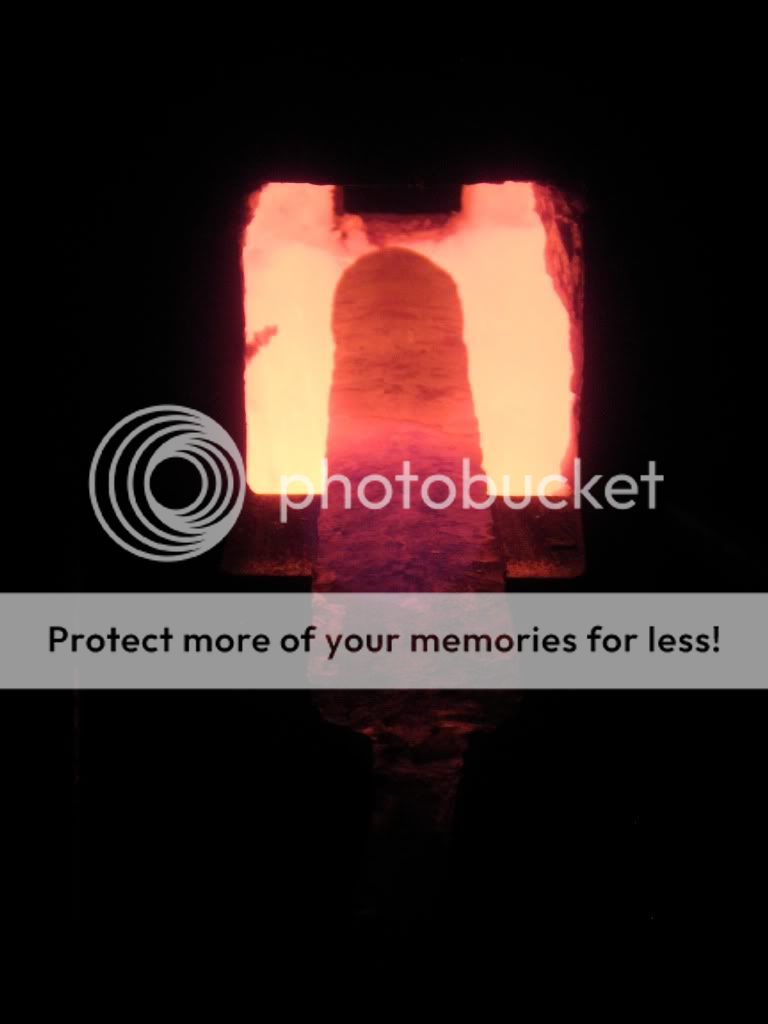
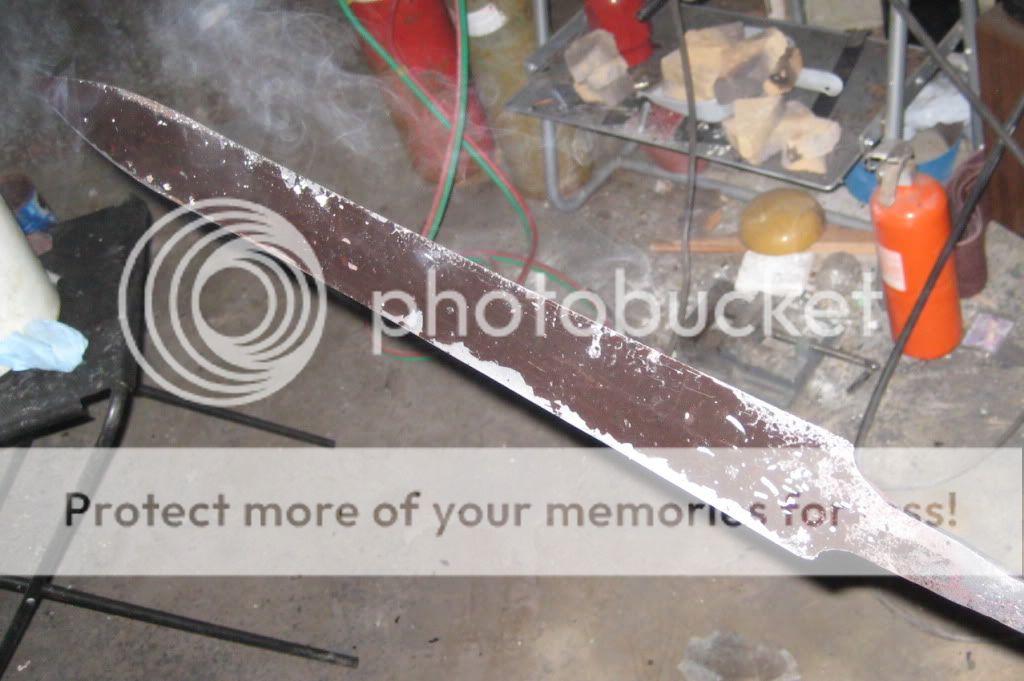
Had an exciting HT session last night. I went ahead and did it because I didn't want to waste a nice dark night. I do my HT'ing in a forge. I don't fully trust my Paragon and how can you see the colours through the door? And when you have a sword at that temperature, it tends to get a little droopy if you don't watch it.
So, I heated it up, sprinkled it with anti-scale compound.
No pictures in process as I had to turn out the lights and concentrate but here it is out of the Parks50. Has anyone else quenched using anti-scale compound? I should have taken a video, the blade screams as it's cooling. It's a crazy sound, even more violent sounding than a sword into water. A quick test with a file and it skated nicely along the whole edge.
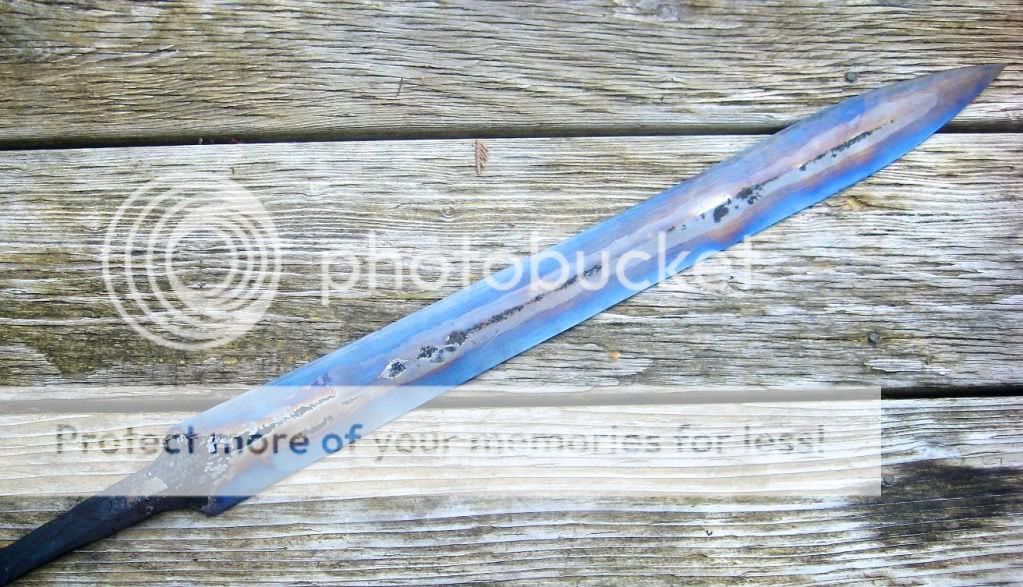
So, I thought this was going to come out like a pretzel. It's not a thick blade and quite wide and with the draw filing I took the edges down to about 0.018" but it came out STRAIGHT! I don't have to adjust anything! I was very happily amazed! Either luck or I did something right.. probably luck.
Pretty colours. Again, the Paragon isn't the greatest at holding temperature but that could be because I have the 36" model with one thermocouple. I set it first for 460℉ and checked in and it was up at 480℉ but then settled back down. I let it go for 1 1/2 hours and it was still straight so I put it back in at 460℉again for 2 hours but set the ramp speed at 200. That seems to keep it in a tighter band of temperature.
[youtube]ub1F-LwXZDw[/youtube]
Had an exciting HT session last night. I went ahead and did it because I didn't want to waste a nice dark night. I do my HT'ing in a forge. I don't fully trust my Paragon and how can you see the colours through the door?
And when you have a sword at that temperature, it tends to get a little droopy if you don't watch it.So, I heated it up, sprinkled it with anti-scale compound.
No pictures in process as I had to turn out the lights and concentrate but here it is out of the Parks50. Has anyone else quenched using anti-scale compound? I should have taken a video, the blade screams as it's cooling. It's a crazy sound, even more violent sounding than a sword into water. A quick test with a file and it skated nicely along the whole edge.
So, I thought this was going to come out like a pretzel. It's not a thick blade and quite wide and with the draw filing I took the edges down to about 0.018" but it came out STRAIGHT! I don't have to adjust anything! I was very happily amazed! Either luck or I did something right.. probably luck.
Pretty colours. Again, the Paragon isn't the greatest at holding temperature but that could be because I have the 36" model with one thermocouple. I set it first for 460℉ and checked in and it was up at 480℉ but then settled back down. I let it go for 1 1/2 hours and it was still straight so I put it back in at 460℉again for 2 hours but set the ramp speed at 200. That seems to keep it in a tighter band of temperature.
[youtube]ub1F-LwXZDw[/youtube]
Last edited: