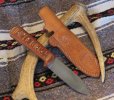
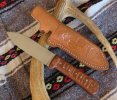
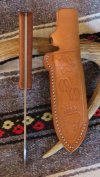
This is a WIP - but thought I would share if the technique is new/of interest to anyone. I once struggled with several knives that had bolsters, in terms of getting everything to line up (scale to bolster tight, all pins lined up and inserted cleanly without hang-ups. I asked Horsewright how he does his (begged him for help more like

), and this is a slight adaptation of his approach. Blade is a skinner for a friend (it looks and IS big in the handle - this guy has big hands.....). Bolsters were pre-cut, pin holes pre-drilled using the tang holes as a template, then removed and trued up (fronts and backs aligned and given final finish - temporary pins used to keep them aligned. They were then attached to the tang using JBWeld and same temporary pins, then the pins removed:
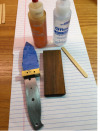
the scales (cocobolo) are attached (no pin holes yet) one side at a time just using Gflex and appropriate clamping - the front to back clamp giving a good tight fit with the bolster, without needing to fight any restrictions already placed pins/corbys might give:
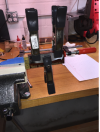
Excess handle material around the tang removed (bandsaw) and holes drilled through that first scale using the holes in the tang as guide. second scale attached with Gflex using the same basic clamping technique:
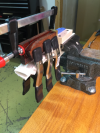
after this cures, same thing: remove excess handle material, drill pin/corby holes through the second side drilling from the first side, then proceed with final pin (in this case corby) placement, and shape handle. So far this has gone much much easier than trying to get everything to line up and glue it all up at one time. I am pretty sure others on the forum use this same basic approach - but thought I would share as a "first time trying" and relate that the approach seems to go smoothly and makes a lot of sense.....


 fullsizeoutput_72 by john april, on Flickr
fullsizeoutput_72 by john april, on Flickr


