-
The BladeForums.com 2024 Traditional Knife is available! Price is $250 ea (shipped within CONUS).
Order here: https://www.bladeforums.com/help/2024-traditional/
You are using an out of date browser. It may not display this or other websites correctly.
You should upgrade or use an alternative browser.
You should upgrade or use an alternative browser.
What's going on in your shop? Show us whats going on, and talk a bit about your work!
- Thread starter WillSwift
- Start date
- Joined
- Jul 23, 2015
- Messages
- 18,237
Don't leave out beautiful!
- Joined
- Jun 4, 2023
- Messages
- 773
To celebrate the end of a project at work that I actually enjoyed I made everyone on the team this bottle opener - utterly impractical, unergonomic, but heavy and shiny.

A striking photograph Pafka, Those are beautiful. they bring to mind early American Indian and Aztec depictions of the mighty Eagle, standing proud, waiting to take flight in search of prey. That, combined with the power of the images, we can all instantly call to mind, of the world renowned craftsmanship of the Rapa Nui people matches that bold style fantastically. I hope that your friends realize what they have in their hands. They are sure to be a treasure!
I am so jealous.
- Joined
- Jul 23, 2015
- Messages
- 18,237
Starting cleanup on these tomorrow.
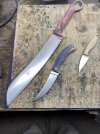
From top to bottom, Bonkerzillasaurus Rex, in 8670, the contest give away knife.
A Persian fixed blade in 8670 based on a one off custom folder by Nathawut.
Another Zoomerang wharncliffe in MagnaCut. All three for the same gentleman who won the “Design the Next David Mary knife” contest when his design (the top one) received the most votes from the Bladeforums community.
He provided the handle materials and Mosaic pins.

Joseph Bandeko
Knifemaker / Craftsman / Service Provider
- Joined
- Dec 9, 2021
- Messages
- 1,372
- Joined
- Oct 18, 2018
- Messages
- 8,506
Two new toys for the shop.....

I wanted to get a glass platen for awhile, finally I set it up. I milled a little ledge and tig welded it to my original platen. The glass I bought was longer than expected.... I scored it and broke it to fit. It was not quite right. I was able to grind it perfectly on my 2x72 with ceramic belts. I was surprised how easy it was to grind the glass...? :0
Also, I splurged on a bevel guide.
It was more than I wanted to spend, but WOW, am I impressed.... Very high quality. It glides tight and smooth on the pins. All the work that goes into it, I couldn't of made it better.
Hope these 2 help my knives look a little better!
Joseph Bandeko
Knifemaker / Craftsman / Service Provider
- Joined
- Dec 9, 2021
- Messages
- 1,372
I have that same guide, expensive bit of kit, but well built! (mine did come where the surfaces are a few thou off, but there's just enough movement in the pins that I can tap the lower side up and it comes into alignment perfectly (if that makes sense)Two new toys for the shop.....
I wanted to get a glass platen for awhile, finally I set it up. I milled a little ledge and tig welded it to my original platen. The glass I bought was longer than expected.... I scored it and broke it to fit. It was not quite right. I was able to grind it perfectly on my 2x72 with ceramic belts. I was surprised how easy it was to grind the glass...? :0
Also, I splurged on a bevel guide.
It was more than I wanted to spend, but WOW, am I impressed.... Very high quality. It glides tight and smooth on the pins. All the work that goes into it, I couldn't of made it better.
Hope these 2 help my knives look a little better!
- Joined
- Oct 18, 2018
- Messages
- 8,506
I'm not at work where my gauges are, and I didn't indicate them? But didn't notice any difference.... But I'll look a little closerI have that same guide, expensive bit of kit, but well built! (mine did come where the surfaces are a few thou off, but there's just enough movement in the pins that I can tap the lower side up and it comes into alignment perfectly (if that makes sense)
- Joined
- Apr 13, 2017
- Messages
- 2,143
- Joined
- Jul 2, 2009
- Messages
- 1,176
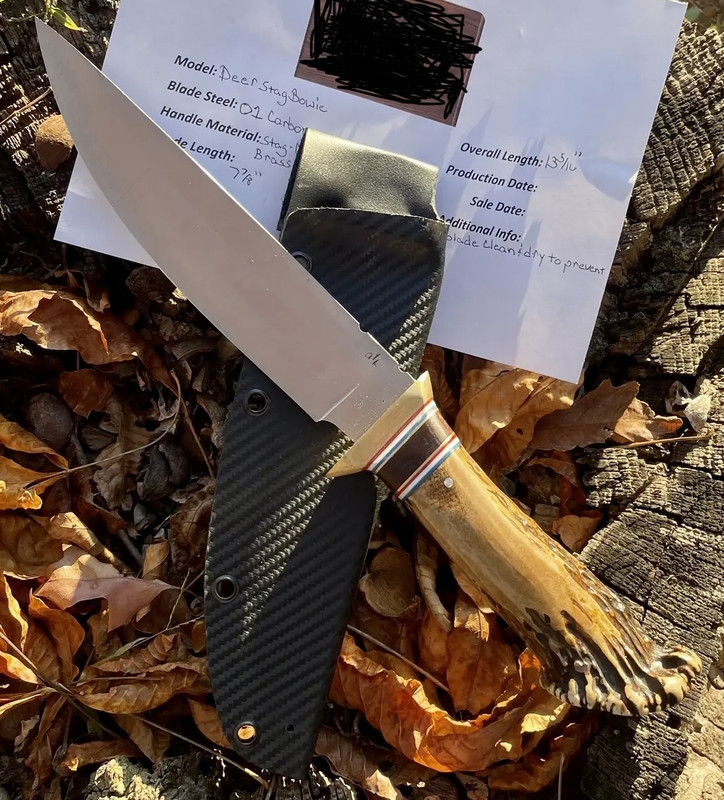
Made a camp knife with a gentle recurve. 10 3/8" OAL and 5.5 blade with hamon. This is way bigger than I typically make but this was a fun change of pace. I think I am going to re-make this pattern in 1/8 stock and shrink the handle thickness down for myself. This knife needs to find a new home/owner with bigger hands.
- Joined
- Nov 9, 2006
- Messages
- 540
Sheffield inspired Real Lambfoot Knife
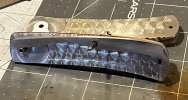
8670 carbon steel, SS threaded bolsters, liners, shield, pins, bronze washers, stabilized burl over black G10 liners. Manual scratch engraving+electro etch with Gravograph pantograph. paste wax finish on scales.


8670 carbon steel, SS threaded bolsters, liners, shield, pins, bronze washers, stabilized burl over black G10 liners. Manual scratch engraving+electro etch with Gravograph pantograph. paste wax finish on scales.


Hengelo_77
Basic Member
- Joined
- Mar 2, 2006
- Messages
- 6,279
Can you show what bit you use to scratch your name and text. Do you fo that prevor post HT?Sheffield inspired Real Lambfoot Knife
8670 carbon steel, SS threaded bolsters, liners, shield, pins, bronze washers, stabilized burl over black G10 liners. Manual scratch engraving+electro etch with Gravograph pantograph. paste wax finish on scales.


- Joined
- Nov 9, 2006
- Messages
- 540
Hi, I am using a Gravograph (like Hermes) pantograph engraver. I use it in manual mode (no motor running) with a Diamond Drag Bit, similar to this (https://www.gravostoreusa.com/eng/product/33954).Can you show what bit you use to scratch your name and text. Do you fo that prevor post HT?
I do all this post heat treat. Though don't see why I couldn't do the part on the tang pre heat treat. The scratches aren't super deep so my concern was diminishing them during final cleanups of the tang. I will try it sometime to see how it goes. Maybe the heat treat scale will get in there and darken it more.
First I mask with some oil paint. This is not the most ideal. From discussion here, asphaltium is the desired masking for scratch engraving/etching. I then engrave with the diamond drag bit.
Then I use my electro etch machine to etch where I just scratched. Leroi Price has an old video on you tube showing how to do this.
Last edited:
Hengelo_77
Basic Member
- Joined
- Mar 2, 2006
- Messages
- 6,279
Thnx. So you only scratch trough the paint with the bit and etch to get dept in to the steel?
I have a Deckel pantograph and I tried all saturday to get engraving like yours.
I tried with and without power and broke the tips of all my bits. I think I used the worng bits, I'll see if I can get yours with the shank diameter I need.
I used sharp engraving bits like these.

I have a Deckel pantograph and I tried all saturday to get engraving like yours.
I tried with and without power and broke the tips of all my bits. I think I used the worng bits, I'll see if I can get yours with the shank diameter I need.
I used sharp engraving bits like these.

Stacy E. Apelt - Bladesmith
ilmarinen - MODERATOR
Moderator
Knifemaker / Craftsman / Service Provider
- Joined
- Aug 20, 2004
- Messages
- 38,263
I use a Hermes pantograph with a diamond drag point engraving tip. Usually I use a 90° diamond point. I just cut the engraving and am done ... no masking or etch.
I have done artwork engraving, like a humpback whale or monogram, on wider blades by coating with wax or asphaltum and engraving/cutting the design using a stylus like Bart shows by hand, or the pantograph for monograms. When using the pantograph on asphaltum I use a 110° point. After cutting through the masking, I etch in an aqua Regia mix.
While I haven't tried it, I don't see any reason an electro-etch would not be suitable for smaller etching.
I have tested etching pre-HT, and it gets reduced too much in clean-up and polishing. I always do it on hardened steel. Perhaps a very deep electro-etch would survive, but I can't see a reason to do it.


